
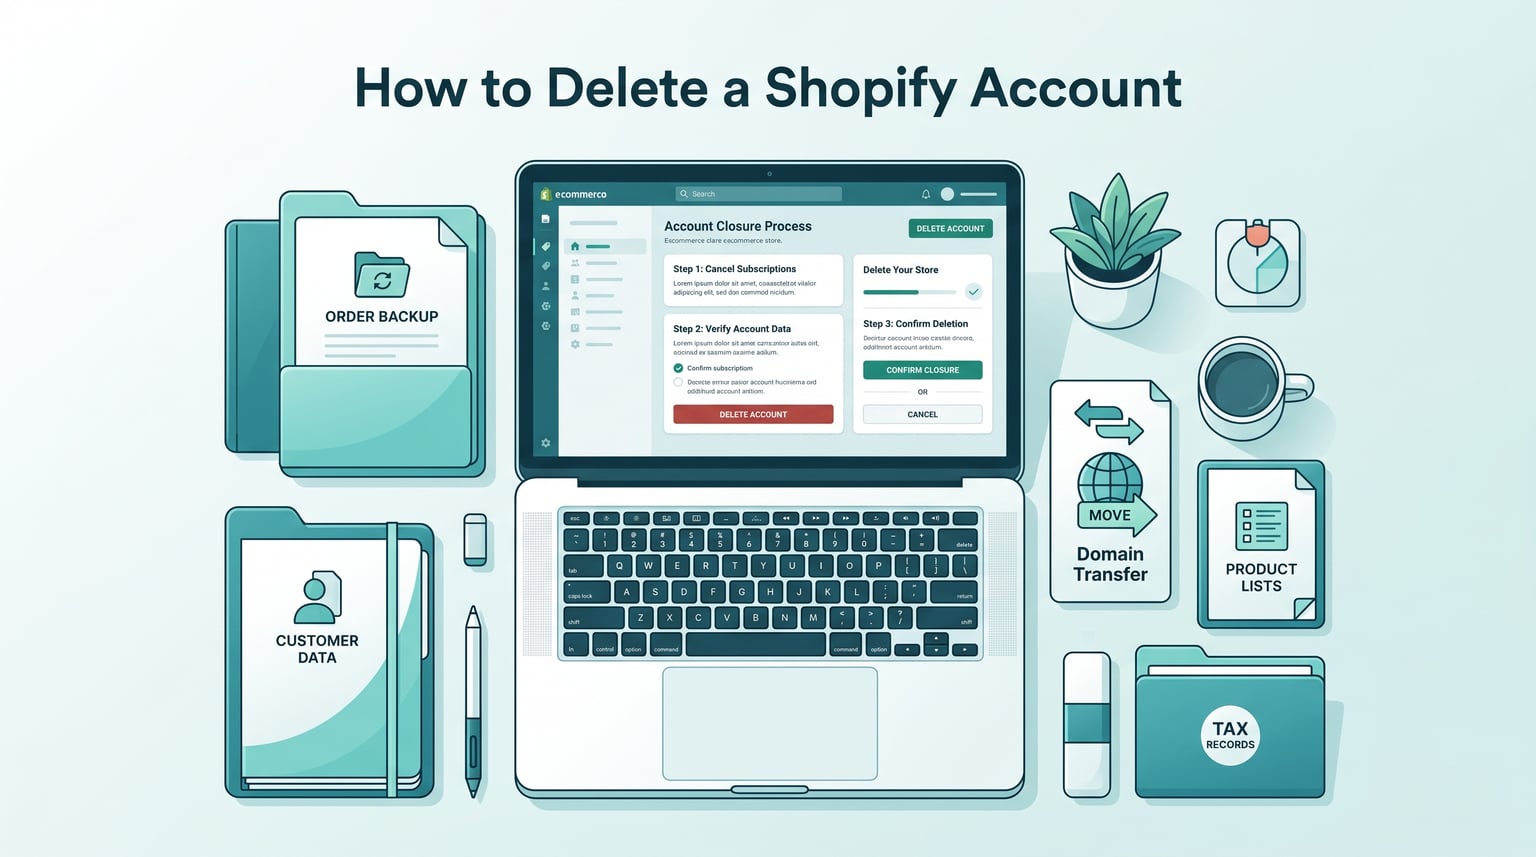
Closing an online store is never a small decision. Whether you are pivoting to a different business model, moving to another platform, or simply stepping away from ecommerce for a while, you want the shutdown process to be clean and final. This guide walks you through exactly how to delete a Shopify account, cancel your subscription, and avoid the common pitfalls that catch store owners off guard.
Quick answer: To delete a Shopify account and cancel your subscription, log in to your Shopify admin dashboard, go to Settings > Plan, click Deactivate store, select a reason for leaving, enter your password to confirm, and click Deactivate now. Your storefront goes inactive immediately, billing stops at the end of your current cycle, and you receive an email confirmation. Only the store owner account can perform this action.
Below, you will find a pre-deletion checklist, step-by-step deactivation instructions for desktop and mobile, how to cancel during a free trial, how to pause instead of delete, what happens to your data after closure, a troubleshooting section for common problems, and a comparison of your options so you can make the right call for your situation.
Table of Contents
- Pre-Deletion Checklist: What to Do Before Closing Your Shopify Store
- How to Back Up and Export Your Shopify Data
- How to Transfer Your Custom Domain from Shopify
- How to Cancel Third-Party App Subscriptions
- How to Deactivate Your Shopify Store on Desktop (Step by Step)
- How to Delete a Shopify Account on iPhone or Mobile
- How to Cancel Shopify During the Free Trial
- How to Pause a Shopify Store (Instead of Deleting)
- What Happens After You Delete Your Shopify Account
- Delete vs Pause vs Transfer vs Sell: Which Option Is Right for You?
- Common Problems When Deleting a Shopify Account (Troubleshooting)
- Alternatives to Deleting Your Shopify Store
- How to Permanently Erase Your Personal Data from Shopify (GDPR)
- Frequently Asked Questions
- Conclusion
Pre-Deletion Checklist: What to Do Before Closing Your Shopify Store
Before you deactivate anything, you need to handle four tasks that protect your data, your domain, and your wallet. Skipping any of these steps is the number one reason store owners show up in Reddit threads months later, frustrated about unexpected charges or lost assets. Taking fifteen minutes now saves hours of headaches later.
The four pre-deletion tasks are: exporting your store data to CSV files, transferring or disconnecting any custom domain, canceling third-party app subscriptions, and settling all outstanding charges on your account. Each one is covered in detail in the sections below, but here is the short version of why each matters.
Data export ensures you retain copies of your products, customers, orders, and analytics reports. Once your store is deactivated, you lose access to the admin dashboard and everything in it. Domain transfer prevents you from losing a web address you may have paid for and built brand equity around. App cancellation stops recurring charges from third-party developers that can persist even after your store closes. Outstanding charge resolution is required because Shopify will not let you deactivate a store with unpaid invoices on the account.
If you are on an annual plan, pay special attention here. Annual subscribers are still responsible for the remainder of their billing period, and Shopify does not prorate or refund unused months when you close mid-cycle. You can confirm your plan type and any pending invoices in Settings > Plan before you begin the deactivation process.
How to Back Up and Export Your Shopify Data
Exporting your data is the single most important pre-deletion step. After deactivation, you cannot log back in to retrieve product lists, customer records, or order history. Shopify retains your store data internally for a period, but you would need to reactivate the store (and pay for a new plan) to access it again. CSV exports give you a permanent offline copy that works with any spreadsheet application or future ecommerce platform.
Here is how to export each major data type from your Shopify admin dashboard:
- Step 1: Log in to your Shopify admin and navigate to Products > All products. Click the Export button at the top of the product list. Select “All products” and choose “CSV for Excel, Numbers, or other spreadsheet programs” as the format. Click Export products and wait for the file to generate. Shopify emails you a download link within a few minutes.
- Step 2: Go to Customers in the left sidebar. Click Export at the top of the customer list. Select “All customers” and the CSV format. Click Export customers to generate and download the file.
- Step 3: Navigate to Orders. Click Export at the top of the orders list. Choose a date range (select “All orders” for a complete backup) and the CSV format. Click Export orders. If you have a large order history, Shopify may split the export into multiple files.
- Step 4: For analytics and reports, go to Analytics > Reports. Export any reports you need individually. Shopify does not offer a bulk analytics export, so download each report type you want to keep.
- Step 5: If you use Shopify’s blog feature, go to Online Store > Blog Posts and copy your content to a separate document. There is no native CSV export for blog posts.
- Step 6: Download all theme files from Online Store > Themes. Click the three-dot menu next to your theme and select Download theme file. This gives you a ZIP archive of your store design.
Store all exported files in a secure location, such as a cloud storage service or an external drive. These CSV files are your only copy of this data once deactivation is complete.
How to Transfer Your Custom Domain from Shopify
If you purchased a custom domain through Shopify or connected one to your store, you need to handle it before deactivating. Shopify does not automatically release domains when a store closes, and leaving it unmanaged can result in downtime, broken email, or even permanent loss of the domain in edge cases. You have two options: transfer the domain to another registrar, or simply update the DNS settings to point elsewhere.
- Step 1: In your Shopify admin, go to Settings > Domains. Identify which domains are managed by Shopify and which are third-party connections.
- Step 2: For Shopify-purchased domains, click the domain name, then click Transfer domain. Shopify will provide an authorization code (also called an EPP code). Take this code to your new registrar (such as Google Domains, Cloudflare, Namecheap, or GoDaddy) to initiate the transfer.
- Step 3: Be aware of the 60-day transfer rule. Domains purchased or transferred within the last 60 days are not eligible for transfer to another registrar. If your domain falls in this window, you must wait until the 60-day period expires.
- Step 4: For third-party domains (purchased elsewhere and pointed at Shopify), simply update the DNS records at your original registrar to point to your new host or platform. Disconnect the domain from Shopify by going to Settings > Domains, clicking the domain, and selecting Disconnect.
- Step 5: Download your DNS zone file if available. This record contains all your subdomain configurations, email forwarding rules, and verification entries. Having a copy makes it easy to replicate the setup on your new platform.
One important note: you cannot reuse the same custom domain name for a different Shopify store. If you close your store and later open a new one, you will need to re-verify domain ownership and reconnect it from scratch.
How to Cancel Third-Party App Subscriptions
This is the step that trips up the most store owners. Deactivating your Shopify store does not automatically cancel subscriptions for third-party apps. Some apps bill through Shopify and will stop when the store closes, but others bill independently through their own payment systems and can continue charging your credit card for months after you think everything is shut down.
- Step 1: In your Shopify admin, go to Apps to see all installed applications.
- Step 2: For each app, click the app name or the Remove button to uninstall it from your store.
- Step 3: Log in to each app developer’s website separately and cancel the subscription there. This step is critical. Removing an app from Shopify only disconnects it from your store; it does not cancel any billing arrangement you set up directly with the app provider.
- Step 4: Check your credit card statements for the following two billing cycles after deactivation. If any charges appear, contact the app developer directly for a refund and cancellation confirmation.
Reddit users frequently report being charged months after closing their Shopify store because of app subscriptions that slipped through the cracks. One user wrote that they “closed my account in June and kept getting charged” from an email marketing app they forgot to cancel separately. Take the time to verify each one.
How to Deactivate Your Shopify Store on Desktop (Step by Step)
Once you have completed the pre-deletion checklist, the actual deactivation process takes about two minutes. You must be logged in as the store owner. Staff accounts and other permission levels do not have the ability to deactivate a store. If you do not see the deactivation option, that is the most likely reason.
- Step 1: Log in to your Shopify admin dashboard at
your-store-name.myshopify.com/adminusing the store owner account credentials. - Step 2: Click Settings in the bottom-left corner of the admin sidebar.
- Step 3: In the Settings menu, click Plan. This section shows your current subscription, billing cycle, and plan details.
- Step 4: Scroll down to the bottom of the Plan page. You will see options for pausing or deactivating your store. Click Deactivate store. (If you do not see this option, see the troubleshooting section below.)
- Step 5: Shopify presents you with alternatives to closing, such as pausing or switching plans. Review these if you are unsure, then click Deactivate store again to proceed.
- Step 6: A dialog box appears asking for a reason. Select the option that best matches your situation (changing platforms, business closing, taking a break, etc.). This feedback is used by Shopify internally and does not affect your closure.
- Step 7: Enter your account password when prompted. This security step confirms you are the authorized account owner making the change.
- Step 8: Click Deactivate now to finalize. Your store is immediately taken offline.
Within a few minutes, you will receive a confirmation email at the address associated with your store owner account. This email serves as your proof of closure. Keep it for your records, especially if you need to dispute any future charges or provide evidence of cancellation to third parties.
How to Delete a Shopify Account on iPhone or Mobile
Many store owners manage their shops entirely from the Shopify mobile app on an iPhone or Android device. You can also deactivate your store from the mobile app, though the menu navigation is slightly different from the desktop experience. The steps below work on both iOS and Android.
- Step 1: Open the Shopify app on your iPhone or Android device. Make sure you are logged in with the store owner account.
- Step 2: Tap the Store icon at the bottom of the screen to access your store dashboard.
- Step 3: Tap Settings (the gear icon, usually in the upper right or accessible through the menu).
- Step 4: Tap Plan in the Settings menu.
- Step 5: Scroll to the bottom and tap Deactivate store.
- Step 6: Select a reason, enter your password to confirm, and tap Deactivate now.
If the mobile app does not display the deactivation option (this can happen on certain app versions), open your phone’s browser and navigate to your store admin URL directly. The web interface on mobile browsers always shows the full settings menu. For more on managing online accounts from your phone, see our guide on how to log out of the Amazon app or website.
How to Cancel Shopify During the Free Trial
If you are still within the free trial period and have not selected a paid plan, cancellation is even simpler. You are not billed during the trial, so there are no outstanding charges to settle. The process has a slightly different path compared to deactivating a paid store.
- Step 1: Log in to your Shopify admin dashboard.
- Step 2: Go to Settings > Plan.
- Step 3: Instead of “Deactivate store,” you will see a Cancel trial or Cancel plan button. Click it.
- Step 4: Confirm the cancellation when prompted.
No charges apply, and you do not need to worry about data exports or domain transfers if you never launched the store publicly. The trial store simply expires and becomes inaccessible.
How to Pause a Shopify Store (Instead of Deleting)
Pausing is a smart alternative if you are not ready to permanently close your store. Shopify offers pausing options that keep your store data, products, and settings intact while disabling checkout and reducing your monthly costs. This is useful for seasonal businesses, personal breaks, website redesigns, or temporary supplier transitions.
Shopify currently offers the Pause and Build plan, which costs a reduced monthly rate and lets you keep working on your store behind the scenes. Under this plan, your storefront remains accessible for browsing, but the checkout is disabled. You retain full access to your admin dashboard, can edit products, update themes, and make changes. When you are ready to sell again, simply switch back to an active plan and checkout re-enables immediately.
- Step 1: Log in to your Shopify admin with the store owner account. Only the account owner can change the store plan.
- Step 2: Go to Settings in the bottom-left corner, then click Plan.
- Step 3: Click Change plan or look for the Pause and Build option directly on the Plan page.
- Step 4: Select the Pause and Build plan from the available options.
- Step 5: Review the details (reduced monthly cost, checkout disabled, admin access retained) and click Switch to Pause and Build.
- Step 6: Confirm the switch. Your store plan changes immediately, and billing adjusts to the Pause and Build rate.
Important correction: Some older guides instruct you to click “Deactivate store” to reach the pause option. That path is incorrect for pausing. Deactivation is a different action that takes your store offline entirely. To pause, use Settings > Plan > Change plan > Pause and Build. This keeps your store active in a reduced-capacity mode without the full shutdown process.
To resume full operations later, return to Settings > Plan, select a standard plan, and confirm. Your checkout and sales functionality returns instantly, and all your store data, customer information, and product listings are exactly where you left them.
What Happens After You Delete Your Shopify Account
Understanding what happens after deactivation helps set the right expectations. Several changes take effect immediately, while others unfold over the following weeks. Here is a breakdown of what occurs when you close your store.
Your storefront goes inactive immediately. Anyone who visits your store URL sees a “store is unavailable” page. Your products, collections, and pages are no longer accessible to the public. Your myshopify.com domain stops resolving, and any custom domains you did not transfer also stop working.
Billing stops at the end of your current cycle. Shopify does not charge you for the next billing period. However, you are responsible for any charges accrued up to the point of deactivation. If you had outstanding invoices, app charges, or shipping label purchases, those are finalized in a closing invoice. You receive a final email summarizing these charges.
Third-party apps are disconnected but may still bill you. As covered in the pre-deletion checklist, app subscriptions set up outside of Shopify’s billing system can continue charging. This is why canceling each app individually before deactivation is so important.
Your data is retained temporarily. Shopify keeps your store data for a limited period after deactivation. This retention period exists so you can reactivate the store if you change your mind. However, you cannot access this data without reactivating the store and selecting a paid plan. If you need your data, export it before deactivating.
You lose admin access. Once deactivated, you can no longer log in to the admin dashboard unless you reactivate the store. Any staff accounts, settings configurations, or analytics dashboards become inaccessible. Make sure you have downloaded everything you need before closing.
Delete vs Pause vs Transfer vs Sell: Which Option Is Right for You?
Before you commit to permanent deactivation, consider whether a different option might serve you better. The table below compares the four main paths available to Shopify store owners who are considering stepping away.
| Option | Best For | Keeps Store Data | Monthly Cost | Reversible? |
|---|---|---|---|---|
| Delete (Deactivate) | Closing permanently, switching platforms | Retained temporarily, then erased | No charge after deactivation | Yes, within reactivation window |
| Pause and Build | Seasonal breaks, redesigns, temporary pause | Yes, fully retained | Reduced monthly rate | Yes, anytime by switching plans |
| Transfer Ownership | Handing the business to a partner or buyer | Yes, fully retained under new owner | Same as current plan | No (ownership transfers permanently) |
| Sell Store | Monetizing a profitable store before exiting | Yes, transferred to buyer | No charge (buyer takes over) | No |
Common Problems When Deleting a Shopify Account (Troubleshooting)
Not every deactivation goes smoothly. Reddit threads and Shopify Community forum posts reveal a handful of recurring issues that users encounter when trying to close their stores. Here are the most common problems and how to solve each one.
Problem 1: “I cannot find the Deactivate store option.” This happens almost every time because the user is logged in as a staff member rather than the store owner. Only the store owner account has permission to deactivate the store. If you are a staff member, ask the owner to perform the deactivation or to transfer ownership to you first. You can verify your account role in Settings > Users and permissions.
Problem 2: “Shopify is still charging me after I closed my store.” This is the most common complaint on Reddit. The cause is almost always third-party app subscriptions that were billed independently and not canceled before deactivation. Review your credit card statement to identify the charging entity, then contact that app developer directly to cancel and request a refund for charges made after your store closed.
Problem 3: “I cannot log in to my admin to delete the store.” If you have lost access to the email address associated with your store owner account, you cannot log in to deactivate. Try resetting your password from the login page using the original email. If you cannot access that email at all, contact Shopify Support with proof of identity and ownership (such as the credit card used for billing, store URL, and account details) to request manual assistance.
Problem 4: “I never get the verification code email to confirm deletion.” Some users report not receiving the email or SMS code needed to confirm deactivation. Check your spam and junk folders first. If the code still does not arrive, wait 15 minutes and try again. Persistent issues may be caused by email filtering on your mail provider. Contact Shopify Support if the problem continues.
Problem 5: “I closed my store and lost my custom domain.” If you deactivated before transferring your domain, you can still recover it. Log back in to your store admin (you can reactivate temporarily), go to Settings > Domains, and initiate the transfer. If you cannot reactivate, contact Shopify Support with your domain name and proof of purchase to request a manual domain release.
Alternatives to Deleting Your Shopify Store
Deactivating permanently is not the only option. Depending on your situation, one of these alternatives might save you money, preserve your business assets, or help you pivot without starting from zero.
Pause and Build plan: As described earlier, this plan reduces your monthly costs while keeping your store data and admin access intact. It is the right choice if you are taking a break but plan to return to ecommerce within a few months.
Downgrade to a cheaper plan: Shopify offers multiple plan tiers. If cost is your primary concern, switching to a lower-tier plan reduces your monthly overhead while keeping your store fully operational. Compare the available plans in Settings > Plan to see if a cheaper option meets your needs.
Sell your Shopify store: If your store has revenue, traffic, or valuable assets, selling it can put money in your pocket instead of just shutting things down. Marketplaces like Flippa, BizBuySell, and QuietLight specialize in ecommerce business sales. OpenStore is another option that buys qualifying Shopify stores directly for a cash payout. Before listing, gather your financials, traffic data, and inventory records to establish a fair valuation.
Migrate to another platform: If you are leaving Shopify for a different reason (customization limits, transaction fees, payment restrictions), consider migrating to WooCommerce, BigCommerce, or Etsy for handmade goods. Migration tools like Cart2Cart can transfer your products, customers, and orders to the new platform. If you are exploring entirely different business models, you might want to explore dropshipping or look into alternative marketplaces like eBay and Amazon. For handmade and craft sellers, platforms like Etsy offer specialized marketplaces with lower overhead.
How to Permanently Erase Your Personal Data from Shopify (GDPR)
Deactivating your store closes the business and stops billing, but it does not permanently erase all of your personal data from Shopify’s servers. For users who want complete data removal (for privacy, GDPR compliance, or personal preference), Shopify provides a separate data erasure process through its Privacy controls.
The distinction matters: deactivation is a business action that retains data for a limited period so you can reactivate if needed. Permanent data erasure is a privacy action that removes your personal information from Shopify’s systems in compliance with data protection regulations like GDPR (General Data Protection Regulation) and CCPA (California Consumer Privacy Act).
- Step 1: After deactivating your store, go to the Shopify Privacy portal or contact Shopify Support directly.
- Step 2: Submit a formal data erasure request. Specify that you want all personal data permanently removed from Shopify’s systems.
- Step 3: Shopify processes the request and removes your personal data within their compliance timeframe. Note that certain transaction records may be retained for legal, tax, or regulatory purposes even after erasure.
- Step 4: You receive confirmation once the erasure is complete.
Shopify notes that some data may be retained temporarily for legal and compliance purposes, such as fraud prevention and tax record requirements. This is standard practice across all major ecommerce platforms and is not unique to Shopify.
If you are securing your other accounts as part of a broader privacy cleanup, remember to also review data retention settings on any other platforms where you held accounts. And if you are transitioning to selling on Amazon, take time to understand Amazon’s account level reserve policies before you begin.
Frequently Asked Questions
Does deleting a Shopify account cancel the subscription?
Yes. When you deactivate your Shopify store through Settings u0026gt; Plan u0026gt; Deactivate store, your subscription is canceled and billing stops at the end of your current cycle. However, you must pay off any outstanding charges before deactivation is allowed, and third-party app subscriptions billed separately may continue unless you cancel them directly with each app developer.
Does deleting a Shopify app cancel the subscription?
Not always. Removing an app from your Shopify store only disconnects it from your store. If the app developer bills you through their own payment system rather than through Shopify’s billing, you must log in to the app developer’s website and cancel separately. Always check your credit card statements for two billing cycles after removal to catch any lingering charges.
Can you permanently delete a Shopify account?
Yes. Deactivating your store closes the storefront and stops billing. For complete permanent data removal, you need to submit a separate data erasure request through Shopify Privacy controls or Shopify Support. This ensures your personal data is removed in compliance with GDPR and other privacy regulations. Some transaction records may be retained for legal and tax purposes.
How do I cancel my Shopify subscription and get my money back?
Shopify does not offer automatic refunds when you cancel your subscription. To request a refund, contact Shopify Support directly after deactivation. Refund eligibility depends on your specific situation, billing cycle, and plan type. Annual plan subscribers are generally responsible for the remainder of their billing period and should review their plan terms before canceling.
What happens when I delete my Shopify account?
Your storefront goes inactive immediately, visitors see a store unavailable page, billing stops at the end of your current cycle, third-party apps disconnect, and you lose admin dashboard access. Shopify retains your store data temporarily so you can reactivate if needed, but you must export your data to CSV files before closing if you want permanent offline copies.
Why can’t I deactivate my Shopify store?
The most common reason is that you are logged in as a staff member instead of the store owner. Only the store owner account has permission to deactivate the store. Check your role in Settings u0026gt; Users and permissions. Other reasons include unpaid outstanding charges on your account or being on a plan type that requires support assistance for cancellation.
If I delete my Shopify account, will I still be charged?
Shopify will not charge you after deactivation. However, third-party app subscriptions that bill independently can continue charging your card. This is the most common reason users report unexpected charges after closing their store. Cancel every app subscription individually before deactivating to prevent this, and monitor your statements for two billing cycles.
Can I reopen a closed Shopify store?
Yes, Shopify allows reactivation of a deactivated store within a limited window. Log back in to your admin using your store owner credentials and select a plan to reactivate. Your store data, products, and settings are restored. However, the longer you wait, the less likely recovery becomes. If too much time passes, Shopify may permanently remove the data.
How do I delete my Shopify account on iPhone?
Open the Shopify app, tap Store, go to Settings (gear icon), tap Plan, scroll to Deactivate store, select a reason, enter your password, and tap Deactivate now. If the option does not appear in the app, open your phone’s browser and navigate to your store admin URL directly for the full settings menu.
How long does Shopify keep store data after deletion?
Shopify retains your store data for a limited period after deactivation to allow for reactivation. The exact retention period is not publicly specified in detail, but competitors reference windows ranging from 30 days to 2 years depending on data type. If you need your data permanently, export everything to CSV files before deactivating.
Conclusion
Knowing how to delete a Shopify account properly means following a clear sequence: export your data, transfer your domain, cancel your app subscriptions, settle any outstanding charges, and then deactivate through Settings > Plan > Deactivate store. Each step exists to protect something important, whether that is your customer records, your web address, or your monthly budget.
If you are not certain about closing permanently, consider the Pause and Build plan first. It reduces your costs while keeping everything intact, giving you time to make a final decision without losing your store data. And if your store has value, explore selling it on a marketplace like Flippa or OpenStore before walking away.
Whatever path you choose, the key is preparation. Export your data, cancel your apps, handle your domain, and keep your deactivation confirmation email. With these steps complete, you can close your Shopify account with confidence and move on to whatever comes next in 2026.
Leave a Reply