
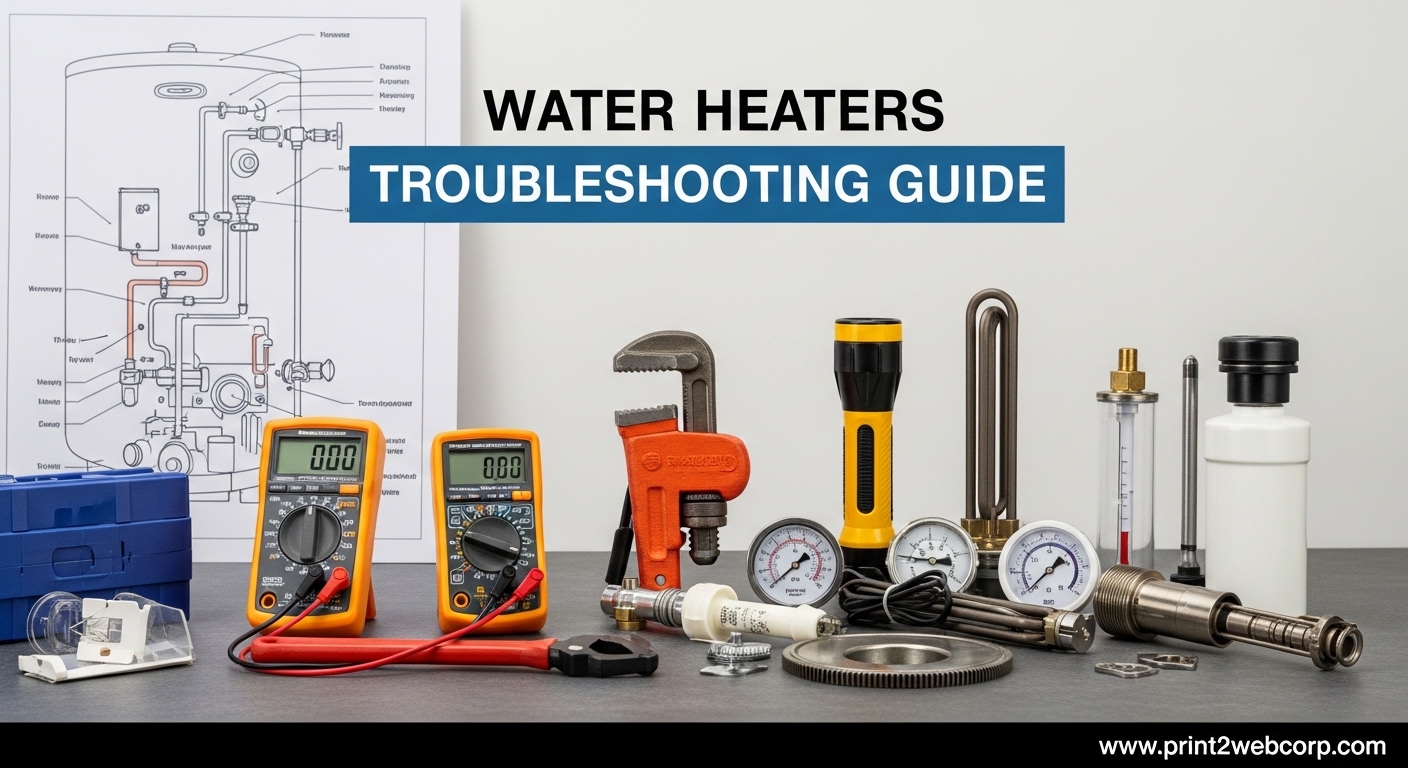
There’s nothing quite like stepping into a cold shower when you expected hot water. Water heater problems always seem to strike at the worst possible moment. I’ve spent years helping homeowners diagnose and fix their water heater issues, and I’ve learned that most problems have straightforward solutions if you know where to look.
Water Heaters Troubleshooting doesn’t require advanced plumbing skills in most cases. Many common issues like no hot water, strange noises, or leaks can be diagnosed and sometimes fixed with basic tools and a bit of patience. This guide covers both electric and gas water heaters, along with tankless models, so you can identify your specific problem and determine whether it’s a DIY fix or time to call a professional.
Before diving into any troubleshooting, it’s important to understand your water heater’s basic components. The heating elements or gas burner do the actual work of heating water, while thermostats control temperature. Safety devices like the temperature-pressure relief valve protect against dangerous pressure buildup. Understanding these parts helps you pinpoint problems faster.
Safety First – Pre-Troubleshooting Checklist
Never skip safety precautions when working on water heaters. These appliances combine electricity or gas with scalding-hot water under pressure – a dangerous combination that demands respect.
For electric water heaters, always turn off power at the circuit breaker panel before touching any components. Use a non-contact voltage tester to confirm power is off. Never work on an electric water heater with wet hands or while standing on a wet surface.
Gas water heater safety requires turning off the gas supply valve before any repairs. If you smell gas at any point, leave your home immediately and call your gas company from outside. Never attempt to fix gas line issues yourself – this requires professional training and licensing.
Hot water burns can cause serious injury. Always assume water inside the tank is at maximum temperature (120-140°F). Wear heavy gloves and eye protection when draining tanks or working on pressure relief valves. Keep children and pets away from your work area.
Water Heaters Troubleshooting: No Hot Water
The most common water heater problem is also the most frustrating – no hot water at all. This issue manifests differently depending on your heater type, so let’s address electric and gas models separately.
Electric Water Heater – No Hot Water
Start troubleshooting an electric water heater by checking the circuit breaker. Water heaters require dedicated 240-volt circuits that can trip when elements fail. If the breaker has tripped, reset it once. If it trips again immediately, you likely have a shorted heating element that needs replacement.
The high-temperature cutoff switch is another common culprit. This safety device shuts off power if water exceeds safe temperatures. Look for a small reset button near the upper thermostat. Press it firmly – if it clicks, the switch had tripped. If it trips again shortly after resetting, you may have a faulty thermostat.
Failed heating elements cause most no-hot-water situations in electric heaters. Upper elements typically fail first, preventing any heating at all. Lower element failures allow some hot water but not enough. Testing elements requires a multimeter to check for continuity – a simple test that takes about five minutes.
Gas Water Heater – No Hot Water
A extinguished pilot light is the leading cause of no hot water in gas water heaters. The small flame that ignites the main burner can go out from drafts, thermocouple failure, or gas supply issues. Relighting the pilot is often a simple fix, but if it won’t stay lit, the thermocouple likely needs replacement.
The thermocouple is a safety device that shuts off gas if the pilot light goes out. When it fails, the pilot won’t stay lit. This copper tube sensor costs about $15 and takes about 30 minutes to replace. It’s a DIY-friendly repair if you’re comfortable working with gas connections.
Gas valve problems can also prevent heating. If the pilot light is on but the main burner won’t ignite, the gas valve or control module may have failed. These repairs typically require professional service due to the complexity and safety considerations involved.
Not Enough Hot Water
Running out of hot water mid-shower indicates different problems than having no hot water at all. Electric water heaters often suffer from sediment buildup that covers lower heating elements, reducing efficiency. Flushing the tank annually prevents this issue and can restore performance.
Thermostat settings also affect hot water quantity. Most electric heaters have two thermostats – upper and lower. Both should be set to the same temperature (120°F is recommended for safety and efficiency). If they’re set differently, the lower element may not be contributing enough heat.
Gas water heaters with inadequate hot water often have a dirty or partially clogged burner. Sediment and debris can accumulate on the burner assembly, reducing heat output. Professional cleaning typically resolves this issue. Dip tube failures can also cause problems – when this internal plastic tube breaks, cold water mixes with hot at the top of the tank, reducing overall temperature.
Water Too Hot
Scalding-hot water presents immediate safety risks, especially for households with children or elderly residents. The most common cause is simply thermostat settings that are too high. Recommended maximum temperature is 120°F to prevent burns while maintaining comfortable showers.
Faulty thermostats can cause runaway heating. When a thermostat fails in the closed position, it continuously calls for heat even after reaching set temperatures. This is dangerous because it can lead to dangerous pressure buildup. The high-temperature cutoff switch provides backup protection, but if the thermostat itself is malfunctioning, replacement is necessary.
Gas water heaters with runaway heating often have stuck gas valves that don’t close properly. This creates dangerous situations and requires immediate professional attention. Never attempt to bypass or modify safety devices to compensate for overheating issues.
Water Heater Leaking – Diagnosis and Fixes
Water leaks range from minor condensation to catastrophic tank failures. Identifying the leak source determines whether you have a simple repair or need complete replacement.
Temperature-Pressure Relief Valve Leaks
The T&P valve prevents dangerous pressure buildup by releasing water if pressure or temperature exceeds safe limits. Some dripping is normal during heating cycles, but continuous leaking indicates problems. Test the valve by lifting the test lever briefly – water should flow freely and stop when released.
Constant dripping usually means excessive pressure in your system or a failing valve. Installing an expansion tank often resolves pressure-related leaks. If the valve itself is faulty, replacement costs about $20 and takes 30 minutes. Never plug or cap a leaking T&P valve – this creates a dangerous situation that could cause tank explosion.
Drain Valve Leaks
The drain valve at the tank bottom allows for sediment flushing and tank draining. Plastic drain valves on newer heaters often crack or develop leaks. Replacing with a brass valve costs about $15 and provides much better durability. Tightening the valve carefully with a wrench sometimes stops minor leaks.
Professional replacement is recommended if the valve is corroded or the tank threads are damaged. Improper installation can cause tank damage that necessitates complete replacement.
Condensation vs. Actual Leaks
Many homeowners mistake condensation for leaks. Cold water entering hot tanks creates moisture that drips down the exterior. This is normal and more common in humid climates or during high-usage periods. Wiping the tank dry and monitoring helps distinguish condensation from actual leaks.
Tank Leaks – Replacement Required
Leaks from the tank itself mean replacement is necessary. Corrosion eventually penetrates the steel tank, usually at the bottom where sediment accumulates. Internal rust creates holes that cannot be repaired. Rusty water appearing consistently indicates advanced tank corrosion.
Compare replacement costs to your heater’s age. Most tanks last 10-12 years. If yours is near this age and leaking, replacement makes more sense than repair. New models offer significantly better efficiency that can offset replacement costs over time.
Rusty or Smelly Water Problems
Discolored or foul-smelling water indicates specific water heater problems. Identifying whether the issue affects only hot water or both hot and cold helps pinpoint the source.
Rusty Water from Heater
Rust-colored water from hot taps only indicates internal tank corrosion. The sacrificial anode rod protects the tank by corroding instead of the steel. When this magnesium or aluminum rod depletes completely, the tank itself begins rusting. Replacing the anode rod every 3-5 years extends tank life significantly.
Galvanized steel piping in older homes can also cause rusty water. If both hot and cold water show rust, your pipes rather than the heater are likely the culprit. Replacing affected sections with modern PEX or copper piping resolves this issue.
Rotten Egg Smell – Bacteria Growth
A sulfur or rotten egg odor comes from bacteria growing in the tank. These harmless but smelly bacteria thrive in warm, stagnant water. The smell is most pronounced when water hasn’t been used for several days.
Flushing the tank with hydrogen peroxide solution eliminates bacteria. Drain the tank completely, then fill with a mixture of water and one gallon of 3% hydrogen peroxide. Let it sit for two hours, then flush thoroughly. This treatment typically resolves the smell for several months.
Raising water temperature above 140°F for several hours can also kill bacteria, but this creates scalding risks and should only be done temporarily. Installing a powered anode rod provides permanent odor prevention by creating an environment bacteria cannot survive in.
Water Heater Making Noise – Popping and Sizzling
Strange noises from your water heater usually indicate specific problems. Understanding what different sounds mean helps you address issues before they cause serious damage.
Popping and Rumbling Sounds
Loud popping or rumbling during heating cycles signals sediment buildup at the tank bottom. Minerals from hard water settle and form a layer that traps water beneath it. When the burner heats this trapped water, it explodes steam bubbles that create the popping sound.
Flushing the sediment typically resolves the noise. Attach a hose to the drain valve and run several gallons of water into a bucket or drain until it runs clear. Annual flushing prevents buildup from becoming severe. Persistent popping after flushing indicates hardened sediment that may require professional descaling.
Sizzling or Hissing Sounds
Sizzling usually indicates condensation dripping onto the burner or heating elements. This is normal during cold weather when incoming water is very cold. The sound should stop once the tank heats up.
Continuous hissing may indicate a leak spraying onto hot components. Inspect all fittings and connections carefully. Leaks around heating elements require element replacement with new gaskets. Gas burner hissing indicates improper combustion that needs professional adjustment.
Humming or Vibrating
Electric water heaters sometimes hum when heating elements vibrate against sediment buildup. Tightening the heating element mounting bolts usually stops the vibration. The sound itself isn’t harmful but indicates sediment that should be flushed.
Hammering or Banging
Loud banging when water turns off indicates water hammer – pressure shock waves traveling through pipes. This damages both your water heater and plumbing over time. Installing water hammer arrestors near the water heater and washing machine absorbs these shock waves and prevents damage.
Pressure Relief Valve Issues
The temperature-pressure relief valve is your water heater’s most critical safety device. This brass valve on the side or top of the tank prevents catastrophic failures by releasing water if pressure or temperature exceeds safe limits.
Testing Your T&P Valve
Annual T&P valve testing is essential maintenance. Place a bucket under the valve discharge pipe, then lift the test lever gently. Water should flow freely through the discharge pipe. Release the lever – water flow should stop completely.
No water flow during testing means the valve is stuck closed and must be replaced immediately. This creates dangerous pressure buildup potential. Continuous dripping after releasing the lever means the valve is failing and should be replaced. Always use the exact pressure-rated replacement specified for your heater.
Excessive T&P Valve Discharge
Frequent T&P valve activation usually means system pressure is too high. This often occurs when the home’s main water pressure exceeds 80 PSI. Installing a pressure-reducing valve where water enters your home solves this problem. Thermal expansion from water heating can also cause excessive pressure – an expansion tank absorbs this expansion and prevents T&P valve discharge.
Low Hot Water Pressure Causes
Reduced hot water pressure while cold water flows normally indicates specific water heater problems. Unlike whole-house low pressure issues, these problems originate within the heater itself.
Dip Tube Problems
The dip tube directs cold incoming water to the tank bottom for heating. When this plastic tube breaks or cracks, cold water mixes with hot water at the top of the tank, reducing output temperature and apparent pressure. Broken dip tube pieces can also clog faucet aerators, further reducing flow.
Replacing the dip tube requires draining the tank and removing the cold water inlet pipe. The new tube simply inserts into the opening. This repair takes about an hour and costs around $20 for the part.
Sediment Clogging
Hard water minerals can clog the heat trap fittings on top of the heater. These plastic nipples check valves prevent heat loss but can accumulate sediment that restricts flow. Removing and cleaning these fittings usually restores flow. In severe cases, replacing them with standard dielectric nipples eliminates the problem.
Galvanized Pipe Corrosion
Older homes with galvanized steel pipes often develop internal corrosion that restricts flow. If only hot water pressure is low and your home has galvanized piping, the hot water pipes likely need replacement. Upgrading to PEX or copper piping provides permanent resolution.
Tankless Water Heater Troubleshooting
Tankless water heaters experience different problems than tank models. Understanding these unique issues helps you diagnose and address them properly.
Cold Water Sandwich
The cold water sandwich effect occurs when hot water is briefly interrupted by cold water mid-shower. This happens when the unit pauses between heating cycles and water remaining in pipes cools down. Installing a small buffer tank or recirculation system eliminates this annoyance. Some newer units include built-in buffer technology that prevents the issue.
Flow Rate Problems
Tankless heaters require minimum flow rates to activate heating. Low-flow fixtures and simultaneous hot water use can drop flow below activation thresholds. This causes the unit to shut off heating, resulting in cold water. Cleaning the inlet filter screen often resolves flow issues. For chronic low-flow problems, descaling the heat exchanger removes mineral buildup that restricts water flow.
Error Codes
Most tankless units display error codes when problems occur. These codes pinpoint specific issues like ignition failure, overheating, or airflow problems. Consult your manual for code definitions – many problems have simple fixes like cleaning filters or resetting the unit. Professional service is required for combustion-related errors and heat exchanger issues.
When to Call a Professional Plumber
Knowing your limits prevents dangerous situations and costly mistakes. Some water heater repairs should always be handled by licensed professionals due to safety risks and complexity.
Gas Line Repairs
Any work involving gas lines requires professional licensing and specialized equipment. Gas leaks create explosion hazards and carbon monoxide risks. Never attempt to repair gas valves, supply lines, or burners yourself. Professional plumbers have leak detection equipment and pressure testing tools that ensure safe repairs.
Complete Heater Replacement
Installing a new water heater involves plumbing, electrical or gas connections, and code-compliant venting. Improper installation creates safety hazards and voids warranties. Professional installation typically costs $500-1,500 but ensures code compliance and safe operation. Most manufacturers require professional installation for warranty coverage.
Complex Electrical Repairs
While replacing heating elements and thermostats is DIY-friendly, internal wiring problems require professional service. If you’re uncomfortable working with 240-volt circuits or lack proper testing equipment, calling an electrician is the safer choice. Professional service costs around $100-150 per hour but prevents shock hazards and ensures proper repairs.
Recurring Problems
Repeated issues indicate underlying problems that professional diagnosis can identify. If the same problem returns after repair, there may be system-wide issues like improper sizing, voltage problems, or gas pressure irregularities. Professional evaluation saves money long-term by addressing root causes rather than symptoms.
Repair vs Replace Decision Guide
Water heater age should guide your repair-or-replace decision. Tanks over 10 years old that develop problems usually warrant replacement rather than repair. The average tank-style water heater lasts 10-12 years, after which corrosion and wear make failure increasingly likely.
Consider repair costs versus replacement. Repairs under $300 on heaters under 8 years old typically make economic sense. Major component failures on older heaters – like tank leaks or combustion chamber issues – usually mean replacement is more cost-effective. New models offer 15-20% better efficiency than units from just 10 years ago, providing energy savings that offset replacement costs over time.
Preventative Maintenance Tips
Annual maintenance extends water heater lifespan and prevents most common problems. A simple maintenance routine takes about an hour and significantly reduces the likelihood of emergency failures.
Annual Tank Flush
Flushing sediment annually is the most important maintenance task. Attach a hose to the drain valve and run 3-5 gallons of water into a bucket or floor drain. Continue until water runs clear. This prevents the hard mineral buildup that causes popping noises, reduced efficiency, and eventual element failure.
Anode Rod Inspection
Check the anode rod every 3 years and replace it when more than 50% corroded. This $20-40 part sacrificially corrodes to protect your steel tank. Once it’s depleted, the tank itself begins rusting. Anode replacement takes about 30 minutes and can double your water heater’s lifespan.
Temperature Settings
Maintain thermostat settings at 120°F for optimal safety and efficiency. Higher temperatures increase scalding risks and accelerate tank corrosion. Lower temperatures promote bacteria growth. If you need hotter water for dishwashing or laundry, consider a booster heater at the point of use rather than raising the main tank temperature.
T&P Valve Testing
Test the temperature-pressure relief valve annually by lifting the test lever briefly. Water should flow freely and stop completely when released. Replace valves that don’t operate properly – this $15-25 part prevents catastrophic tank failures from excessive pressure.
Professional Inspection
Schedule professional inspection every 3-5 years for gas water heaters. Technicians check burner operation, gas pressure, venting, and combustion safety. This $100-150 service catches problems early and ensures safe operation. Electric heaters benefit from professional inspection if you notice performance changes or recurring problems.
Frequently Asked Questions
What is the most common failure of a water heater?
The most common water heater failure is the heating element in electric models and the thermocouple in gas models. Electric heating elements typically fail after 8-12 years due to mineral buildup and normal wear. Gas thermocouples fail every 3-5 years and cause pilot light issues. Both are inexpensive repairs that restore normal operation.
What are some signs your hot water heater is going bad?
Warning signs include rusty water appearing consistently, unusual popping or rumbling noises during heating, visible leaks or corrosion on the tank exterior, reduced hot water output, water taking longer to heat, and the unit being over 10 years old. If you notice multiple signs together, replacement is likely more cost-effective than repair.
How many years does a hot water heater typically last?
Tank-style water heaters typically last 10-12 years with proper maintenance. Units without regular maintenance may fail in 6-8 years, while well-maintained heaters can last 15 years. Tankless models last 20+ years with proper care. Annual flushing and anode rod inspection significantly extend lifespan for all heater types.
How to diagnose hot water heater problems?
Start by identifying the specific symptom – no hot water, inadequate hot water, leaks, noises, or rusty water. Check power sources first (breaker for electric, gas supply and pilot light for gas). Test components systematically using a multimeter for electric models. Inspect visible connections and valves for leaks. Consult troubleshooting guides for your specific symptom, and call a professional if issues persist or involve gas lines.
What is usually the most common water heater problem?
Sediment buildup is the most common water heater problem, affecting both electric and gas models. Minerals from hard water settle at the tank bottom, causing popping noises, reduced efficiency, and eventual heating element failure. Annual tank flushing prevents 80% of common water heater problems and extends unit lifespan by several years.
How much does it cost to diagnose a water heater?
Professional water heater diagnostic service typically costs $100-150, with many companies waiving the fee if you proceed with their recommended repair. DIY diagnosis is free using troubleshooting guides and basic tools like multimeters. Simple repairs like element replacement cost $30-50 in parts, while major repairs or replacements range from $800-2,500 installed.
Conclusion
Water Heaters Troubleshooting becomes much less intimidating when you understand how these systems work and what problems typically occur. Most issues – no hot water, strange noises, leaks, or rusty water – have clear diagnostic paths that lead to either DIY fixes or professional service. The key is knowing which repairs you can safely handle yourself and when to call in licensed professionals.
Regular maintenance prevents most water heater problems and extends unit life significantly. The annual tank flush alone prevents the sediment buildup that causes 80% of common issues. Replacing the anode rod every few years protects your tank from corrosion and can double its lifespan. Simple maintenance tasks take little time but save significant money on repairs and premature replacement.
Always prioritize safety when troubleshooting water heaters. These appliances combine high temperatures, pressure, and either electricity or gas – a combination that demands respect and caution. When in doubt, calling a professional costs far less than emergency repairs or injuries. Your hot water will be restored quickly and safely either way.
Leave a Reply