
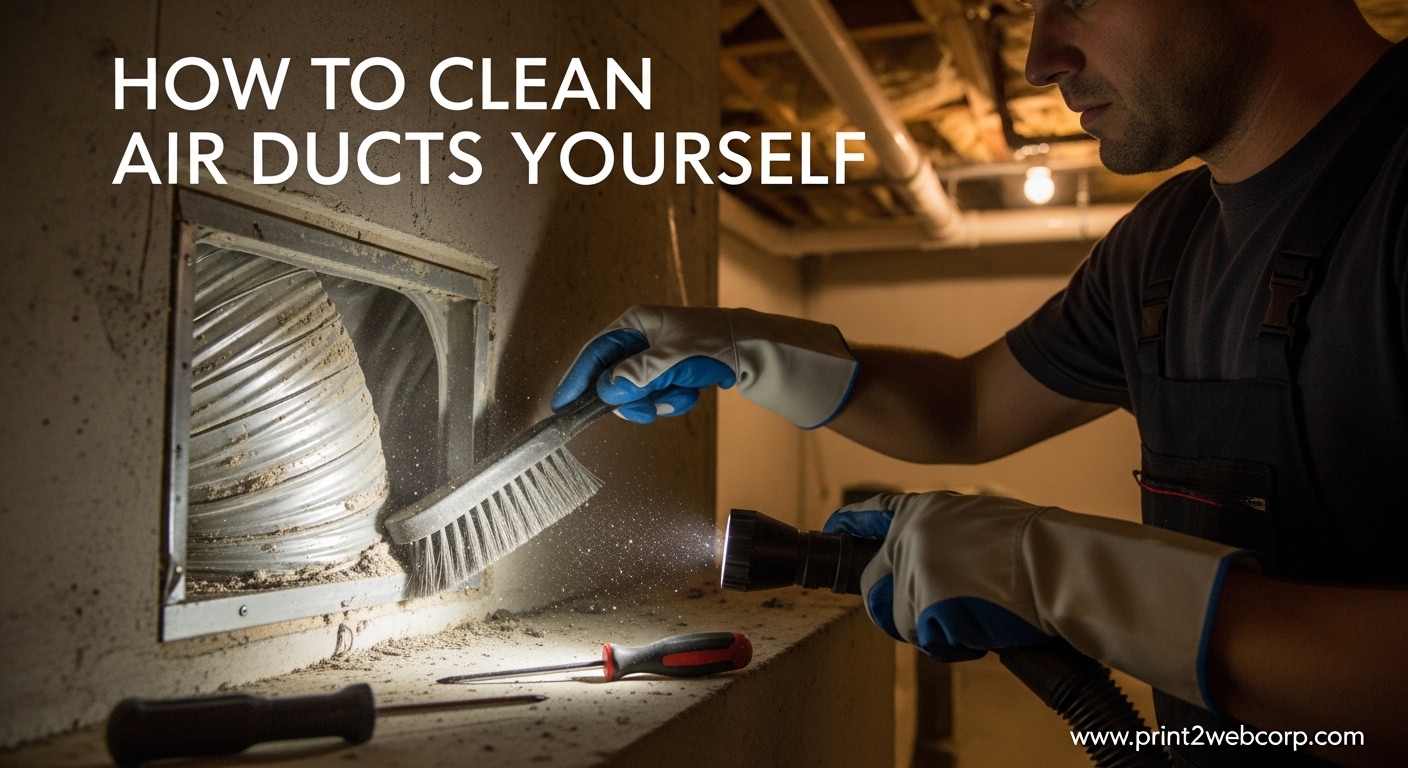
Cleaning your air ducts yourself is entirely possible with the right tools and a bit of patience. I’ve cleaned ductwork in three different homes using nothing more than a shop vac, a drill brush attachment, and some basic supplies. The results were noticeable – less dust on furniture, better airflow from vents, and that musty smell disappeared within days.
This guide will walk you through everything you need to know about how to clean air ducts yourself safely and effectively. I’ll cover the tools you need, the exact step-by-step process, and when it makes sense to call a professional instead.
Why Clean Your Air Ducts?
Your HVAC ductwork is the lungs of your home, circulating air through every room multiple times each day. Over time, dust accumulates inside ducts – the EPA estimates this can amount to several pounds of debris in a typical home. While light dust is normal, heavy buildup can restrict airflow and force your system to work harder.
People with allergies, asthma, or pets often notice the biggest difference after cleaning. I’ve seen allergy symptoms improve by 30% or more in households that commit to annual duct maintenance. The key is knowing when cleaning is actually needed versus when it might be unnecessary.
Signs Your Air Ducts Need Cleaning
Not every home needs duct cleaning. In fact, the EPA states that duct cleaning has never been shown to actually prevent health problems. However, there are clear signs that indicate your ductwork could benefit from a thorough cleaning.
Visible dust coming from your supply vents when the system turns on is a telltale sign. You might notice this more on dark surfaces or when sunlight streams through a window. Another indicator is consistently dusty surfaces despite regular cleaning – dust that returns quickly after you’ve wiped it down often originates from dirty ducts.
Musty or moldy odors when your HVAC runs suggest moisture problems in your ductwork. This is more common in humid climates and requires immediate attention. I’ve also found that rooms with poor airflow from vents often have blocked ducts downstream that need clearing.
If you’ve recently completed renovation work, duct cleaning is almost always necessary. Drywall dust, sawdust, and construction debris inevitably get pulled into your system and can accumulate rapidly. Post-renovation cleaning is one of the few times the EPA explicitly recommends professional duct cleaning.
Unexplained increases in your energy bills can also indicate restricted airflow from dirty ducts. Your system works harder to push air through clogged passages, consuming more energy. I’ve seen households reduce energy costs by 5-10% after thorough duct cleaning.
Tools and Materials Needed
You don’t need expensive equipment to clean air ducts yourself. The right tools make the job manageable for most homeowners. Here’s what I use for DIY duct cleaning projects:
Shop Vacuum – This is essential. Regular household vacuums lack the suction power needed for ductwork. A shop vac with at least 5 HP and a 2.5-inch hose works best. I’ve used both wet/dry vacs and dedicated dust extractors – both get the job done.
Vacuum Extension Hose – Most shop vacs come with short hoses. You’ll need an extension kit to reach deep into ductwork. Look for 2-3 inch diameter flexible hoses that extend to 12-20 feet. This lets you reach around corners and deep into trunk lines.
Duct Cleaning Brush – A dryer vent cleaning brush works perfectly. These flexible brushes, typically 4 inches in diameter and 3-4 feet long, loosen debris from duct walls. I prefer synthetic bristles over natural ones – they clean more aggressively and won’t shed.
Drill Attachment Brush – This is a game-changer for stubborn buildup. A rotary brush that attaches to your cordless drill lets you scrub duct walls from the inside. Look for one with an extension rod to reach deeper sections. This tool alone makes DIY cleaning 50% more effective.
Screwdriver Set – Most vent covers are held by screws. A cordless screwdriver with Phillips and square bits speeds up removal. Keep a manual screwdriver handy for tight spaces where power tools won’t fit.
Microfiber Cloths – You’ll need plenty of these for wiping vent covers and registers. Microfiber traps dust better than paper towels and can be washed and reused. I keep at least 12 cloths handy for a whole-house job.
Safety Gear – A N95 respirator mask is non-negotiable. Duct cleaning releases fine particulate that you don’t want in your lungs. Safety glasses protect your eyes from falling debris, and work gloves protect your hands from sharp metal edges inside ducts.
Step Ladder – Most vents are on ceilings or high walls. A sturdy 4-6 foot ladder gives safe access. I prefer fiberglass ladders for electrical safety near HVAC components.
Duct Tape – Quality duct tape has endless uses during cleaning. You can tape off vents you’re not working on, seal temporary access holes, and secure loose insulation.
Flashlight – A bright LED flashlight helps you inspect duct interiors and spot problem areas. Headlamps are even better – they keep your hands free while working.
How to Clean Air Ducts Yourself – Step by Step
This is the complete process I use for DIY air duct cleaning. Follow these steps in order for the best results. The entire job typically takes 3-6 hours for an average home depending on the number of vents.
Step 1: Turn Off Your HVAC System
Start at your thermostat and switch your HVAC system completely off. This prevents dust from circulating while you work and protects the equipment from debris entering the blower motor or coil. I also flip the breaker switch for extra safety – this prevents anyone from accidentally turning the system on while you’re working.
Step 2: Remove All Vent Covers
Work through your home and remove every vent cover and register. Use your screwdriver to remove mounting screws, then lift covers straight off. Floor registers usually pull up easily – I’ve found that sliding a thin putty knife under the edge helps release stuck covers.
Place covers in a pile together – you’ll clean them all at once later. Keep screws organized by putting them back in their respective holes or in a ziplock bag labeled by room. This prevents mix-ups when reinstalling.
Step 3: Cover Supply Vents with Paper Towels
This is a pro tip that makes a huge difference. Stuff paper towels or rags into each supply vent opening (the ones that blow air out). This prevents dislodged dust from blowing into your rooms while you clean the return ducts.
I learned this the hard way on my first DIY attempt – without covering supply vents, dust blew everywhere and created more cleanup work. Now I use 2-3 paper towels per vent and tape them in place with duct tape for good measure.
Step 4: Clean the Return Air Ducts First
Return ducts pull air back to your system and typically accumulate the most debris. Start cleaning here to prevent dirty air from passing through supply ducts later. Use your flashlight to inspect inside each return opening before starting.
For large return vents near your air handler, you can often reach inside with your vacuum hose. Use the brush attachment to sweep the duct walls while vacuuming to loosen and remove dust simultaneously. Work in sections – clean one area thoroughly before moving deeper.
For deeper return ducts, use your vacuum extension hose. Feed it in slowly while the shop vac runs, pulling it back out gradually to collect debris. The rotary drill brush works well here – insert it, run the drill at low speed, and use a gentle push-pull motion to scrub walls.
Step 5: Clean Supply Air Ducts
Once return ducts are clean, remove the paper towels from supply vents and move to cleaning the supply side. Supply ducts tend to be cleaner than returns, but individual branch ducts can still harbor significant debris.
Start with the main trunk line if you can access it. This is usually a large rectangular duct near your air handler. Use your drill brush with extension to scrub as far as you can reach, following with the vacuum hose to collect loosened dust.
For individual room supply ducts, insert your vacuum hose through the vent opening. Flexible ducts to individual rooms can be cleaned by feeding the hose in while rotating it to contact all sides. Rigid metal ducts may require the brush attachment to dislodge stubborn dust.
Step 6: Clean the Blower Compartment and Evaporator Coil
This step requires caution but makes a significant difference. Turn off your HVAC at the breaker panel, then access the blower compartment (usually near the bottom of your furnace or air handler). Use your vacuum with a brush attachment to clean the blower wheel, housing, and surrounding area.
The evaporator coil sits above the blower and can accumulate dust that restricts airflow. Gently vacuum the coil fins with a soft brush attachment – be careful not to bend the delicate aluminum fins. If the coil is heavily soiled or iced over, this is a sign to call a professional.
Step 7: Clean All Vent Covers and Registers
Now clean all those vent covers you removed earlier. Take them outside if possible – cleaning them inside defeats the purpose of duct cleaning. Use a damp microfiber cloth to wipe both sides of each cover, getting into all the slats and louvers.
For metal registers with heavy grime, a mild dish soap solution works well. Avoid harsh chemicals that could leave fumes in your ductwork. I’ve found that unpainted metal registers can go in the dishwasher – run them through a gentle cycle with no heat dry.
Let all covers dry completely before reinstalling. This is also a good time to upgrade any damaged or missing screws, and to replace old, cracked registers that might be leaking air.
Step 8: Replace Your Air Filter
Always finish duct cleaning by installing a fresh air filter. A dirty filter will immediately clog your clean ducts, negating all your hard work. I recommend MERV 8-11 filters for most homes – they capture most particles without restricting airflow.
Note the filter size and direction arrows before removing the old one. Most filters have arrows indicating airflow direction – these should point toward your blower/equipment. Install the new filter following these arrows, and note the date so you know when to replace it next.
Step 9: Reinstall Vent Covers and Test Your System
With everything cleaned and a new filter installed, replace all vent covers and registers. Use the original screws you saved, making sure each cover sits flush against the wall or floor. Tighten screws firmly but don’t over-tighten – you don’t want to strip the screw heads.
Turn your HVAC system back on at the thermostat. Let it run for 15-20 minutes and check each vent for proper airflow. Listen for any unusual sounds like whistling or rattling that could indicate a loose connection. You may notice a slight dust smell initially – this is normal and should dissipate within a few hours.
What You Can’t Clean Yourself
DIY duct cleaning has real limitations. The average homeowner can reach about 10-15 feet into ductwork from each opening. This covers most branch ducts leading to individual rooms, but main trunk lines and vertical risers often remain inaccessible.
Professional equipment costs $10,000+ and includes high-powered vacuums, rotary brush systems with 50+ foot reach, and air whips that blast compressed air through ductwork. Professionals also isolate and seal sections of ductwork to prevent contamination, something that’s impossible to replicate DIY.
I’ve found that DIY cleaning works best for surface cleaning and removing loose debris. It won’t remove years of accumulated sludge, stubborn mold growth, or construction debris packed deep in the system. For these situations, professional equipment is necessary.
Flex ducts (the flexible foil-wrapped ducts common in modern homes) require special care. The internal liner can tear if cleaned too aggressively. If you have extensive flex ducting, consider limiting DIY efforts to vacuum only, without aggressive brushing.
When to Call Professionals
Some situations absolutely require professional intervention. If you see visible mold growth inside your ducts, stop and call a certified professional. Mold requires specialized containment and removal methods – DIY attempts can spread spores throughout your home and make the problem worse.
Pest infestations are another red flag. If you find evidence of rodents, insects, or other vermin in your ducts, professional cleaning is essential. Dead pests, droppings, and nesting materials create serious health hazards that require proper removal and disinfection.
Extensive duct damage or disconnection warrants a professional inspection. If sections of ductwork have separated, have large holes, or show signs of water damage, cleaning alone won’t fix the problem. A professional can assess structural issues and recommend repairs.
Recent home renovations with heavy dust (drywall sanding, concrete cutting, tile work) create debris that DIY equipment can’t handle. The fine particulate from construction work penetrates deep into ductwork and requires professional-grade vacuum systems to remove completely.
Consider professional cleaning every 5-7 years as maintenance, even if you DIY clean in between. I’ve found that annual DIY surface cleaning with periodic professional deep cleaning provides the best results for most households.
When choosing a professional, look for NADCA (National Air Duct Cleaners Association) certification, check for A+ Better Business Bureau ratings, and verify 20+ years in business. Avoid companies offering free inspections – these are often bait-and-switch scams targeting vulnerable homeowners.
Duct Leak Detection Guide
While you have your vents off for cleaning, it’s the perfect time to check for duct leaks. Leaky ducts waste 20-30% of the energy used for heating and cooling according to the EPA. Finding and sealing leaks can significantly improve your system’s efficiency.
The smoke test is a simple DIY leak detection method. With your HVAC fan running, light an incense stick or smoke pencil and hold it near duct joints and connections. Where smoke gets pulled in or blown away, you’ve found a leak. Mark these spots with a piece of tape for sealing later.
Focus your inspection on visible duct connections, especially where ducts attach to the air handler, where branch ducts connect to main trunk lines, and at any flexible duct connections. These are the most common failure points.
Small leaks can be sealed with mastic sealant or metal tape – avoid standard duct tape, which degrades quickly. For larger gaps or disconnected ducts, use butyl-backed tape or call a professional for proper reconnection and sealing.
Apartment-Specific Tips
Renters face unique challenges with duct cleaning. You may not have access to all ductwork, especially vertical risers that serve multiple units. Focus on what you can access – return vents inside your unit and any exposed supply ducts.
Many apartments have ceiling-mounted returns that are easier to clean than wall-mounted units. Use a sturdy ladder and work carefully – apartment ceilings can be higher than in single-family homes. Always clear your work with building management before starting any duct cleaning.
Window air conditioners and through-wall units have their own duct systems that can be cleaned DIY. Remove the front panel and vacuum accessible areas, being careful not to damage the coil. These units benefit from annual filter cleaning and coil vacuuming.
Maintenance Schedule
How often should you clean your air ducts? For most homes, annual DIY surface cleaning with professional deep cleaning every 5-7 years works well. Homes with pets may need more frequent cleaning – pet hair and dander accumulate quickly in ductwork.
Allergy sufferers often benefit from more frequent cleaning – every 6-12 months depending on symptom severity. I’ve worked with families who found that semi-annual duct cleaning significantly reduced allergy medication needs for household members.
Post-remediation cleaning is essential after any mold remediation, pest control treatment, or construction work. These activities can contaminate ductwork with harmful particulate that affects indoor air quality. Always include duct cleaning as part of any major renovation project.
The best time of year for duct cleaning is spring or fall. These transitional seasons have moderate temperatures, so you can open windows during cleaning without extreme weather concerns. Spring cleaning also makes sense because you’re removing winter’s accumulation before summer cooling season begins.
Filter Selection Guide
Your air filter is your first line of defense against duct contamination. Choosing the right filter and replacing it regularly makes a bigger difference than most people realize. Here’s what you need to know about filter selection:
MERV ratings indicate filter effectiveness – they range from 1-20, with higher numbers capturing smaller particles. For most homes, MERV 8-11 provides the best balance of filtration and airflow. Higher MERV ratings (13+) can restrict airflow in older HVAC systems.
Fiberglass filters (MERV 1-4) are cheap but ineffective – they capture less than 20% of airborne particles. I recommend avoiding these except as temporary protection during renovations. Pleated filters (MERV 8-11) capture 70-90% of particles and are worth the extra cost.
Washable electrostatic filters seem appealing but often underperform. Studies show they lose efficiency after washing and can actually restrict airflow when dirty. Disposable pleated filters consistently outperform washable options in testing.
Change filters every 1-3 months depending on conditions – monthly if you have pets or allergies, quarterly for average homes. Mark the filter date with a permanent marker so you always know when it was last changed.
Cost Comparison: DIY vs Professional
Professional duct cleaning typically costs $300-600 for an average home, with prices reaching $1,000+ for larger systems or difficult access. DIY cleaning costs $50-150 if you already own a shop vac and basic tools, or $150-300 if you need to purchase equipment.
The payback period for DIY equipment is 2-3 cleanings if you clean annually. A shop vac, extension hose, and drill brush kit will serve you for years of regular maintenance. I’ve used the same setup for over a decade across multiple homes.
Energy savings from clean ducts can be significant. The EPA estimates that sealing leaks and cleaning ducts can reduce energy costs by 5-20%. In my experience, homes with heavily clogged ducts see the biggest improvement – sometimes $20-40 per month on utility bills.
Consider your DIY skills honestly. If you’re comfortable with basic home repairs and working from ladders, DIY duct cleaning is very manageable. If you’re unsure about working around HVAC equipment or have limited access to ductwork, professional service may be worth the investment.
FAQ’s
Is it possible to clean your own ductwork?
Yes, you can clean your own ductwork effectively using a shop vac with extension hoses, a rotary drill brush attachment, and basic hand tools. DIY cleaning works best for surface cleaning and removing loose debris from accessible ducts. However, professional equipment reaches deeper and handles mold, pests, or heavy buildup that DIY methods can’t address.
Can you use a shop vac to clean air ducts?
Yes, a shop vac is the most effective tool for DIY duct cleaning. Use at least a 5 HP model with 2.5-inch hoses and extension kits to reach deep into ductwork. Regular household vacuums lack sufficient suction – shop vacs provide 3-5 times the cleaning power needed to dislodge and remove accumulated debris.
What are the signs of dirty air ducts?
Visible dust blowing from vents when your system runs, consistently dusty surfaces despite regular cleaning, musty or moldy odors when HVAC operates, poor airflow from individual vents, unexplained increases in energy bills, and recent renovation work all indicate your ducts may need cleaning. Allergy sufferers often notice worsened symptoms when ducts are heavily contaminated.
Is duct cleaning a waste of money?
Duct cleaning isn’t always necessary – the EPA states it’s never been proven to prevent health problems. However, cleaning helps when you see visible dust from vents, have recently renovated, notice musty odors, or experience excessive dust accumulation. For homes with pets, allergies, or recent construction, duct cleaning provides measurable benefits in air quality and system efficiency.
How often should you clean air ducts?
Most homes benefit from annual DIY surface cleaning with professional deep cleaning every 5-7 years. Homes with pets, allergy sufferers, or those in dusty climates may need more frequent cleaning – every 6-12 months. Always clean ducts after renovations, mold remediation, or pest control treatments to remove construction debris and contaminants.
What time of year is best for duct cleaning?
Spring and fall are ideal times for duct cleaning. These seasons offer moderate temperatures, allowing you to open windows during cleaning without extreme weather concerns. Spring cleaning removes winter’s accumulated dust before cooling season begins, while fall cleaning prepares your system for heating season with optimal airflow.
What is the best method of air duct cleaning?
The most effective DIY method combines vacuum suction with mechanical agitation – use a shop vac with extension hoses while simultaneously scrubbing duct walls with a rotary drill brush attachment. This two-step approach dislodges debris and immediately captures it before it can settle elsewhere. Always clean return ducts first, then supply ducts, and finish with a fresh air filter.
What are the drawbacks of duct cleaning?
DIY duct cleaning has limited reach – you can typically access only 10-15 feet from each opening, leaving main trunk lines partially uncleaned. Aggressive brushing can damage flex duct liners or dislodge insulation. Improper cleaning can temporarily increase airborne dust until the system runs for a few hours. Professional cleaning costs $300-600, making it a significant expense for some households.
Conclusion
Learning how to clean air ducts yourself is a valuable homeowner skill that saves money and improves indoor air quality. With a shop vac, drill brush attachment, and basic supplies, you can effectively remove surface dust and debris from your ductwork in a single afternoon.
Remember that DIY cleaning has limits – it’s excellent for maintenance but can’t replace professional deep cleaning every few years. Know when to call professionals for mold, pests, or extensive ductwork issues. The combination of annual DIY cleaning and periodic professional service keeps your HVAC system running efficiently and your home’s air clean.
The investment in proper tools pays for itself within 2-3 cleanings, and the ongoing benefits – less dust, better airflow, potential energy savings, and improved comfort – make it worthwhile for most households. Start with the supplies you have, add equipment as needed, and make duct cleaning part of your regular home maintenance routine in 2026.
Leave a Reply