
Is your bathroom exhaust fan screaming like a dying banshee every time you turn it on? That grinding, squealing noise isn’t just annoying—it’s a warning sign. After years of pulling moisture and dust from your bathroom, the motor bearings dry out and your fan starts struggling. I’ve seen dozens of fans that homeowners thought were dead, but they just needed a few drops of oil in the right spot.
Learning how to oil a bathroom exhaust fan can save you $100-200 on a replacement and extend your fan’s life by another decade. The process takes about 30 minutes and requires basic tools you probably already own. In this guide, I’ll walk you through everything from identifying if your fan can be oiled to the exact technique that professional repair techs use.
How to Tell If Your Fan Can Be Oiled
Not every bathroom exhaust fan can be lubricated. Before you dive in, you need to identify what type of motor you have. Most older fans (15-20+ years) have oil wick bearings that can be serviced. These motors have a small felt or bronze wick that draws oil to the shaft where it spins.
Permanently lubricated motors became common in the 2000s and are marked as such on the label. These have sealed bearings and adding oil won’t help—if anything, it can cause damage. Look for a sticker on the motor housing that says “permanently lubricated” or “sealed bearings.” If you don’t see any label, there’s a good chance it’s an older oilable model.
Signs your fan needs oiling include: gradual increase in noise over months, squealing or grinding sounds that change pitch, slower fan speed than usual, or the fan struggling to start. If your fan makes a clicking sound or won’t spin at all, the bearings may be shot and oiling won’t fix it.
Tools and Materials You’ll Need
Before starting this project, gather these items. Having everything ready will make the process smoother and prevent those frustrating trips to the garage mid-project.
Essential Tools:
Screwdriver set (Phillips and flathead), step stool or ladder, voltage tester (critical for safety), vacuum with hose attachment, small brush or old toothbrush, clean rags or paper towels, flashlight, and needle-nose pliers (for wiring clips).
Choosing the Right Oil:
The type of lubricant matters more than you might think. I’ve tested various options over years of fan maintenance, and here’s what works best for different situations:
| Oil Type | Best For | Pros | Cons |
|---|---|---|---|
| Silicone Spray | Most bathroom fans | Clean application, moisture-resistant, long-lasting | Can be messy if oversprayed |
| 3-in-1 Oil | Older fans with oil ports | Classic choice, precise application | Attracts dust over time |
| 20W Motor Oil | Large industrial fans | High-quality lubrication | Overkill for residential fans |
| WD-40 | NOT RECOMMENDED | Good for loosening stuck parts | Dries out quickly, not a long-term lubricant |
Step 1: Safety First – Turn Off Power
This is the most critical step and the one most people skip. I can’t stress this enough: bathroom exhaust fans are connected to 120-volt wiring that can kill you. Don’t just flip the wall switch—someone could accidentally turn it back on while you’re working.
Go to your electrical panel and flip the breaker that controls your bathroom. If you’re unsure which breaker it is, turn off the main breaker or test the circuit with a voltage tester. Once the power is off, flip the bathroom fan switch a few times to verify nothing happens.
Use a non-contact voltage tester to double-check that no power is reaching the fan unit. Touch the tester to the wire nuts and motor housing—it should remain silent and dark. Only proceed when you’re absolutely certain the power is off.
Step 2: Remove the Fan Cover
Bathroom fan covers attach in different ways depending on the brand and age. Most covers either have spring-loaded clips or are held by screws. Look closely at your cover to identify the attachment method.
For spring-clip covers: Gently pull down on one corner of the cover while pushing up slightly. You’ll feel the clip release. Work your way around each corner until all clips are free. Don’t force it—if it’s stuck, check for hidden screws in the grille pattern.
For screw-mounted covers: Use your flashlight to find the screws. They’re often painted over and can be tricky to spot. Look near the corners or along the edges. Once removed, the cover should pull straight down. Clean the cover while you’re at it—soak it in warm soapy water to remove years of grime.
Step 3: Remove the Fan Assembly
Now you’ll see the fan motor and blade assembly. This is typically held in place by 3-4 mounting screws or a mounting bracket. Before removing anything, take a photo of the wiring so you know how to reconnect it later.
The fan should have a plug connecting it to the wiring in the ceiling, or wire nuts connecting the wires directly. If it’s a plug, simply disconnect it. If you see wire nuts, untwist them carefully and separate the wires. If there’s a metal clamp securing the wires, release it with your needle-nose pliers.
Support the fan unit with one hand while removing the mounting screws with the other. The assembly is heavier than it looks and can fall unexpectedly. Lower it slowly and place it on your work surface.
Step 4: Clean Everything Thoroughly
Before adding fresh oil, you need to remove the old gunk. Years of dust and moisture combine to form a crusty coating that prevents oil from reaching the bearings. This cleaning step is what separates a quick fix from a lasting repair.
Use your vacuum with the hose attachment to remove loose dust from the motor housing, fan blade, and surrounding areas. Pay special attention to the area around the motor shaft—that’s where the worst buildup accumulates.
For caked-on dust that the vacuum can’t remove, use your small brush or toothbrush to gently loosen it. Avoid using water or cleaning solvents directly on the motor—these can damage the electrical components. If you need extra cleaning power, use compressed air to blow dust from tight spaces, but wear eye protection and do this outside if possible.
Wipe down the fan blade with a damp cloth. If it’s heavily coated with grease, use a mild degreaser. Let everything dry completely before proceeding to the next step.
How to Oil a Bathroom Exhaust Fan Motor
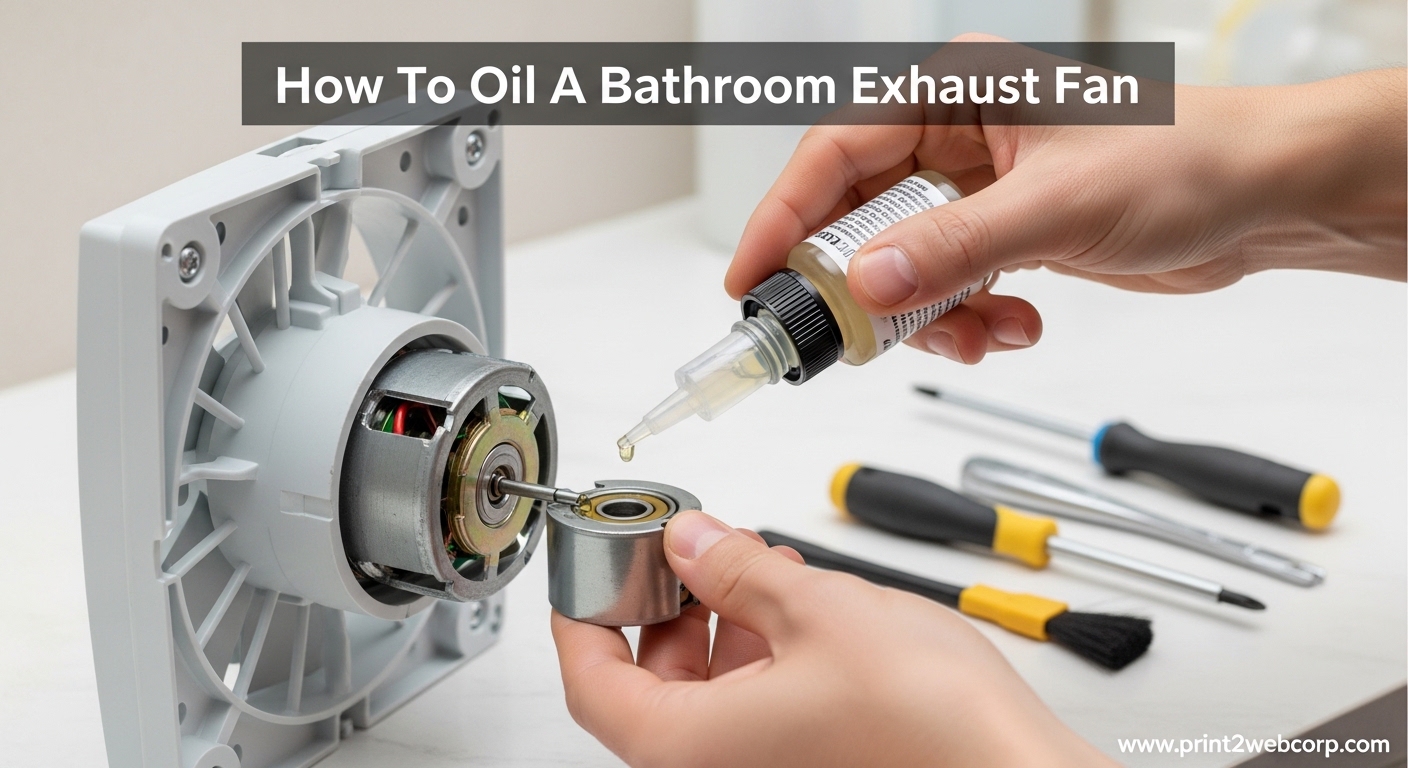
Now for the main event. Locate the motor shaft—the metal rod that connects to the fan blade. Follow this shaft to where it enters the motor housing. You’ll see a small bronze or felt ring around the shaft. This is the oil wick bearing, and it’s exactly where you need to apply the lubricant.
Apply 2-3 drops of silicone spray or 3-in-1 oil directly to this bearing. Don’t overdo it—excess oil will drip and attract more dust. The goal is to saturate the wick so it can continuously lubricate the shaft as it spins.
If your fan has visible oil ports (small holes near the motor bearings), add a drop or two to each port. Some older fans have a small oil cup specifically designed for this purpose. If you see one, fill it about halfway.
After applying the oil, manually spin the fan blade several times. This helps distribute the lubricant throughout the bearing. You should notice it spinning more freely and quietly with each rotation. Let the oil soak in for 5-10 minutes before reassembling.
Step 6: Reassemble and Test
Reassembly is essentially the reverse of disassembly. Lift the fan unit back into position and secure it with the mounting screws. Don’t overtighten—just snug is fine. Reconnect the wiring, referring to your photo if needed. Make sure wire nuts are tight and no bare wire is exposed.
Attach the fan cover, making sure all clips engage or screws are tight. Now for the moment of truth: turn the breaker back on and flip the fan switch. Listen for smooth, quiet operation. The squealing should be gone, replaced by the gentle hum of a properly lubricated motor.
If the fan still makes noise, check that the blade isn’t hitting anything and that all screws are tight. Sometimes the blade can slip on the shaft during reassembly—make sure it’s properly seated. Run the fan for 5 minutes to ensure the oil circulates and everything operates smoothly.
Oiling vs Replacement: When to Call It Quits
Most bathroom exhaust fans will respond well to oiling, but some have reached the end of their lifespan. If oiling doesn’t solve the problem, consider these replacement indicators:
Replace If:
The motor shaft has visible play or wobble, the fan smells like burning plastic when running, there’s physical damage to the motor housing, or the fan is over 20 years old and replacement parts aren’t available. Modern fans are more efficient and quieter—sometimes replacement is the smarter choice.
Repair If:
The noise decreases significantly after oiling (even if not completely silent), the fan runs faster after lubrication, or you can see visible improvement in blade movement. These signs indicate the bearings were the problem and oiling was the right solution.
How Often Should You Oil Your Bathroom Exhaust Fan?
Preventive maintenance beats emergency repairs every time. For bathroom exhaust fan lubrication, I recommend checking your fan annually and oiling every 1-2 years. Bathrooms with heavy use or high humidity may need more frequent attention.
Set a reminder on your phone for the same time each year—maybe when you change smoke detector batteries. A quick inspection takes 5 minutes and can alert you to problems before they become noisy emergencies.
Signs it’s time for maintenance include: gradual increase in noise, visible dust buildup on the cover, reduced airflow, or the fan struggling to start. Addressing these early prevents motor burnout and extends your fan’s life significantly.
FAQ’s
Can I lubricate a bathroom exhaust fan?
Yes, most older bathroom exhaust fans can be lubricated. Fans made before 2000 typically have oil wick bearings that can be serviced. Look for a small bronze or felt ring where the motor shaft enters the housing—this is your oiling point. Newer fans may be permanently lubricated and cannot be oiled.
Can I spray WD-40 on a bathroom exhaust fan?
I don’t recommend using WD-40 for bathroom fan lubrication. WD-40 is primarily a solvent and water displacer, not a long-term lubricant. It will provide temporary relief but dries out quickly, often leaving the fan noisier than before. Use silicone spray or 3-in-1 oil instead—these are designed for lasting lubrication in high-humidity environments.
Where to put oil in an exhaust fan?
Apply oil directly to the oil wick bearing where the motor shaft enters the motor housing. Look for a small bronze or felt ring around the shaft—this is the bearing that needs lubrication. Add 2-3 drops of silicone spray or 3-in-1 oil. If your fan has visible oil ports near the motor bearings, add a drop to each port. Avoid getting oil on the fan blade or electrical components.
How often should I oil my bathroom exhaust fan?
Oil your bathroom exhaust fan every 1-2 years for optimal performance. Bathrooms with heavy use or high humidity may need more frequent oiling. I recommend inspecting your fan annually—check for dust buildup, unusual noises, or reduced airflow. Set a reminder for the same time each year, like when you change smoke detector batteries, to make maintenance part of your routine.
Conclusion
Learning how to oil a bathroom exhaust fan is one of those DIY skills that pays dividends for years. A properly maintained fan operates quietly, removes moisture effectively, and won’t become a fire hazard from dust buildup. The 30 minutes you invest today can save you hundreds in replacement costs and prevent noisy midnight surprises.
Remember: always turn off power at the breaker before starting, use the right lubricant for your fan type, and clean thoroughly before applying fresh oil. Your bathroom—and your ears—will thank you. Set that annual maintenance reminder and enjoy a quieter, more efficient home in 2026.
Leave a Reply