
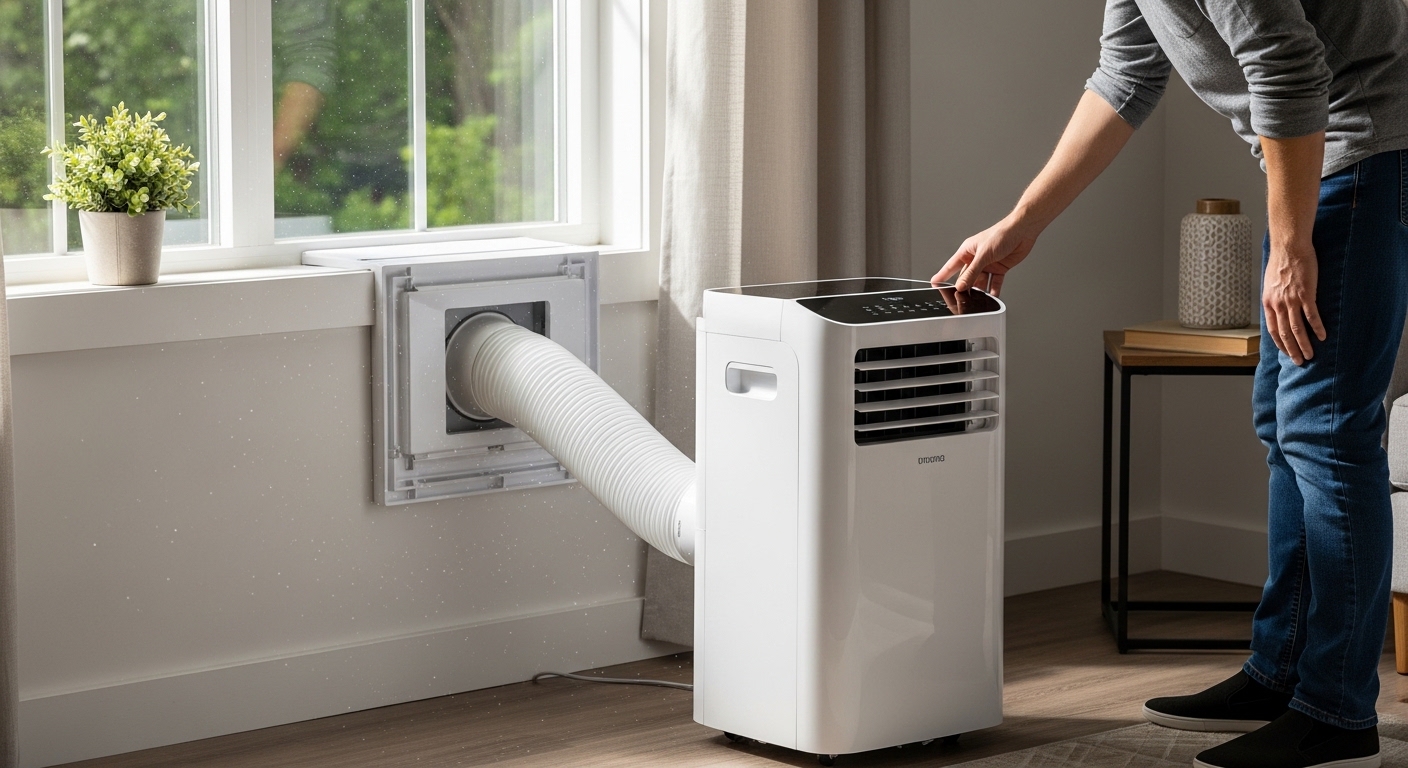
Installing a portable air conditioner is one of the easiest DIY projects you can tackle to beat the summer heat. Most units take between 30-60 minutes to set up, and you don’t need any special tools or skills. I’ve installed dozens of portable AC units over the years, and I’ll walk you through everything you need to know.
Whether you’re dealing with sliding windows, casement windows, or even trying to figure out how to install portable air conditioner in an apartment, this guide covers all the scenarios. Let’s get your space cooled down quickly.
How Portable Air Conditioners Work?
Before diving into installation, it helps to understand what makes portable ACs unique. Unlike window units that sit entirely in a window frame, portable air conditioners are standalone units that pull warm room air through evaporator coils cooled by refrigerant. The unit then exhausts the hot air outside through a hose while blowing cooled air back into your room.
This is why proper venting is critical. Without venting the hot air outside, your portable AC would just be circulating warm air around the room. Most portable ACs use a single hose system, though some advanced models feature dual hoses for more efficient cooling.
The cooling capacity is measured in BTUs (British Thermal Units), with higher BTU ratings suitable for larger rooms. A 10,000 BTU unit typically cools a 300-400 square foot room, while 14,000 BTU can handle 500+ square feet.
Tools and Materials Needed
The good news is that most portable AC installations require minimal tools. Your unit typically comes with a window kit that includes the essential components. Here’s what you’ll need:
Included with your unit:
- Window bracket or panel
- Exhaust hose (usually 4-5 feet long)
- Window adapter/coupling
- Foam weather stripping
- Extension panels (for wider windows)
- Mounting hardware (screws, brackets)
Tools you may need:
- Phillips head screwdriver
- Measuring tape
- Level (optional but helpful)
- Scissors or utility knife
- Pencil for marking
Optional items for better installation:
- Additional weather stripping
- HVAC foil tape (better than duct tape)
- Plexiglass sheet (for casement windows)
- AC surge protector for electrical safety
How to Install Portable Air Conditioner: Step-by-Step Guide
Step 1: Choose the Right Location
Start by selecting where to place your portable AC unit. You want it near a window or venting option, but also consider airflow around the unit. Leave at least 6-8 inches of clearance on all sides for proper ventilation.
Place the unit on a level surface. If your floor is uneven, the unit may vibrate or make noise. Some portable ACs come with adjustable feet to help with leveling.
Make sure there’s an electrical outlet within reach. Most portable ACs plug into standard 110-120V outlets, but avoid using extension cords if possible. If you must use one, ensure it’s rated for the unit’s amperage draw (typically 10-15 amps).
Step 2: Assemble the Window Kit
Most window kits come in two or three pieces that slide together to fit your window width. Start by measuring your window opening. The kit typically adjusts from about 20 to 50 inches wide.
Connect the slider sections according to your manufacturer’s instructions. This usually involves sliding the pieces together until they reach your window width. Some kits use locking pins or screws to secure the sections in place.
Apply the adhesive foam weather stripping to the window kit where it will contact your window frame. This creates that critical airtight seal that prevents hot air from leaking back into your room.
Step 3: Install the Window Bracket
Open your window and place the window kit in the opening. For vertical sliding windows, the bracket sits in the bottom track. For horizontal sliding windows, it may attach to the side frame.
Most kits include a small support bracket that screws into the window frame. Use your screwdriver to secure this bracket. This prevents the window kit from falling out when the window is closed against it.
Close the window gently against the window kit until it makes contact. The window should hold the kit firmly in place. Some kits include a window lock bracket that screws into the window frame to prevent the window from being opened accidentally.
Step 4: Connect the Exhaust Hose
Attach one end of the exhaust hose to the portable AC unit. This usually involves twisting the hose onto the exhaust outlet until it clicks or locks into place. Some models use a coupling that slides into the rear of the unit.
Connect the other end of the hose to the window adapter. The adapter is typically a rectangular or circular piece that fits into the window kit. Again, twist or slide until secure.
Important tip: Keep the exhaust hose as straight and short as possible. Every bend or kink in the hose reduces cooling efficiency. If the hose is too long, you can typically shorten it, but never extend it beyond its original length.
Step 5: Create an Airtight Seal
This step is crucial for efficient cooling. Any gaps around the window kit will let hot air back in and cooled air out. Use the included foam seals to fill any spaces between the window kit and your window frame.
Pay special attention to the corners and edges. If you still have gaps, you can purchase additional weather stripping at any hardware store. HVAC foil tape works great for sealing odd-shaped gaps and lasts longer than standard duct tape.
For the bottom of the window where it meets the sill, use non-adhesive foam if possible. This prevents damage to your window frame and makes removal easier later.
Step 6: Test Your Installation
Plug in your portable AC and turn it on. Set it to “cool” mode and lower the temperature setting. Within a few minutes, you should feel cool air blowing from the unit and warm air exhaust from the hose outside.
Check for any air leaks around the window kit. Run your hand around the edges to feel for air movement. If you detect leaks, add more weather stripping or tape as needed.
Listen for unusual sounds. Some noise is normal, but loud rattling or vibrating may indicate the unit isn’t level or the exhaust hose is kinked. Adjust as necessary.
After 15-20 minutes, the room should start feeling noticeably cooler. If not, check that all windows and doors in the room are closed. Portable ACs work best in enclosed spaces.
Installing in Different Window Types
Not all windows are created equal when it comes to portable AC installation. Here’s a breakdown of the most common window types and how to handle each:
| Window Type | Difficulty | Standard Kit Works? | Special Considerations |
|---|---|---|---|
| Vertical Sliding | Easy | Yes | Most common, standard kit fits perfectly |
| Horizontal Sliding | Easy | Yes | May need to reposition kit to side |
| Double-Hung | Easy | Yes | Choose top or bottom sash for venting |
| Casement/Crank | Hard | No | Requires custom plexiglass panel |
| Jalousie/Louvered | Very Hard | No | Remove glass panels, custom sealing needed |
Sliding Windows
Sliding windows (both vertical and horizontal) are the easiest for portable AC installation. Simply place the window kit in the track and close the window against it. The kit typically fits windows from 20-50 inches wide.
For horizontal sliding windows, you may need to install the kit on the left or right side rather than the center. Make sure the exhaust hose can reach the adapter without stretching or kinking.
Double-Hung Windows
Double-hung windows have two movable sashes. You can install the window kit in either the top or bottom opening. Most people prefer the bottom as it’s easier to reach.
If installing in the bottom sash, make sure the top sash is closed tightly. Some users recommend closing the top sash completely, then installing the kit in the bottom for the most secure fit.
Casement/Crank Windows
Casement windows are the most challenging for portable AC installation. Standard window kits don’t work because these windows crank outward rather than sliding.
The best solution is to cut a piece of plexiglass to fit your window opening, then cut a hole in it for the exhaust hose. Secure the plexiglass in place with the window crank mechanism, and seal around the hose with foam tape.
Alternatively, some users remove the crank arm entirely and install a piece of plywood cut to size with a hose hole. This is more permanent but creates a better seal.
Jalousie/Louvered Windows
Jalousie windows, common in older homes and some regions like Hawaii, have multiple glass slats that crank open. These require creative solutions.
One approach is to remove the bottom two or three glass slats entirely and replace them with a solid panel (plywood or plexiglass) with a hole for the exhaust hose. Seal around the panel thoroughly to maintain the weather seal.
How to Install Portable Air Conditioner Without a Window?
What if you don’t have a suitable window? Don’t worry, there are several alternative venting options available:
Sliding Glass Door Installation
For sliding glass doors, you can purchase a specialized door kit or create your own panel. Measure the door opening and cut a piece of plexiglass or thin plywood to fit.
Cut a hole for the exhaust hose adapter and mount the panel in the door track. You may need to use L-brackets to secure it in place. Seal thoroughly with weather stripping to maintain the door’s weather seal.
Wall Venting
Venting through a wall requires more work but provides a permanent solution. You’ll need to cut a hole through an exterior wall (typically 5-6 inches in diameter for the hose).
This option is best handled by a professional unless you’re experienced with home improvement projects. You’ll need to consider structural elements, electrical wiring, and plumbing that may be inside the wall.
A wall vent cap on the exterior keeps pests out and weather out while allowing hot air to escape.
Ceiling Venting
In some situations, you can vent through a dropped ceiling into an attic space, provided the attic is ventilated to the outside. This requires a ceiling vent kit and careful installation to maintain the ceiling’s integrity.
This option works well in apartments where windows aren’t suitable but a dropped ceiling is present.
Fireplace Venting
If you have a non-functional fireplace, you can vent the portable AC up the chimney. This works surprisingly well, but there are important caveats:
First, ensure the damper is open. Second, never use a working fireplace for AC venting. Third, consider installing a chimney cap to prevent rain or animals from entering. Fourth, this should be a temporary solution as moisture from the AC can affect the chimney structure over time.
Common Installation Problems and Solutions
Even with careful installation, issues can arise. Here are the most common problems and how to fix them:
Unit isn’t cooling properly: First, check that the exhaust hose is connected securely at both ends. Look for kinks or sharp bends in the hose. Ensure the window kit is sealed properly with no gaps. The room should be enclosed with doors and windows closed.
Water leaking from unit: Most portable ACs remove moisture from the air as they cool. This water typically collects in a tank or is exhausted through the hose. If you see water, check if the drain tank is full and needs emptying. Some units have a continuous drain option if water buildup is a persistent issue. For more information on AC water problems, see our guide on window air conditioner leaking water.
Exhaust hose won’t stay connected: Ensure the hose is properly twisted or locked into place. If the connection is worn, some users have success with a small piece of HVAC tape around the connection (but don’t completely cover the opening).
Window kit is too small/too large: Most kits adjust from 20-50 inches. If your window is narrower, you may need to use a filler piece of wood or plexiglass. For wider windows, you can typically purchase extension panels from the manufacturer.
Unit is too noisy: Some noise is normal, but excessive vibration usually means the unit isn’t level. Adjust the feet or place a rubber mat underneath. Also ensure the exhaust hose isn’t pressing against anything.
Frequently Asked Questions
Is it easy to install a portable air conditioner?
Yes, most portable air conditioners can be installed in 30-60 minutes with minimal tools. Standard sliding or double-hung windows are the easiest and work with the included window kit. Simply assemble the window bracket, connect the exhaust hose, seal any gaps, and plug in the unit.
Do portable air conditioners have to be attached to a window?
No, while windows are the most common venting option, you can also vent portable ACs through sliding glass doors, walls, ceilings, or even non-functional fireplaces. Each alternative method requires some customization but is entirely possible with the right materials and approach.
Do all portable air conditioners need to be vented out?
Yes, all portable air conditioners require venting to work properly. They cool your room by removing heat and exhausting it outside through a hose. Without proper venting, the unit would simply circulate warm air around the room, providing no cooling benefit. The venting hose is essential for the cooling process.
How long does it take to install a portable AC?
Most portable air conditioner installations take 30-60 minutes from start to finish. This includes unpacking, assembling the window kit, installing the bracket, connecting the hose, sealing gaps, and testing the unit. First-time installations may take closer to an hour, while subsequent setups can be done in as little as 20 minutes.
What tools do I need to install a portable air conditioner?
Most installations only require a Phillips head screwdriver and measuring tape. The window kit included with your unit contains the necessary brackets, hoses, and hardware. Optional items that can help include a level, scissors for cutting weather stripping, and additional sealing materials like HVAC foil tape for a more airtight installation.
Final Installation Tips
Learning how to install portable air conditioner units properly makes a huge difference in cooling performance. The key is creating an airtight seal and keeping the exhaust hose as straight as possible. Poor installation can reduce efficiency by 20-30%, meaning your room won’t cool as effectively and your energy bills will be higher.
For ongoing maintenance, clean the air filter every 2-4 weeks during heavy use. A clogged filter reduces airflow and can cause the unit to freeze up. Also check the exhaust hose connection periodically to ensure it hasn’t loosened over time.
When the cooling season ends, drain any water from the tank, clean the filter, and store the unit in a dry place. Keep all installation components together for easy setup next year.
With proper installation and maintenance, your portable air conditioner will keep you comfortable for many summers to come. If you run into persistent issues or have an unusual window setup, don’t hesitate to consult a professional HVAC technician for advice specific to your situation.
Leave a Reply