
![Why Is My Window Air Conditioner Leaking Water? ([nmf] [cy])](https://print2webcorp.com/wp-content/uploads/2026/07/featured-update-13137-1783158259044.jpg)
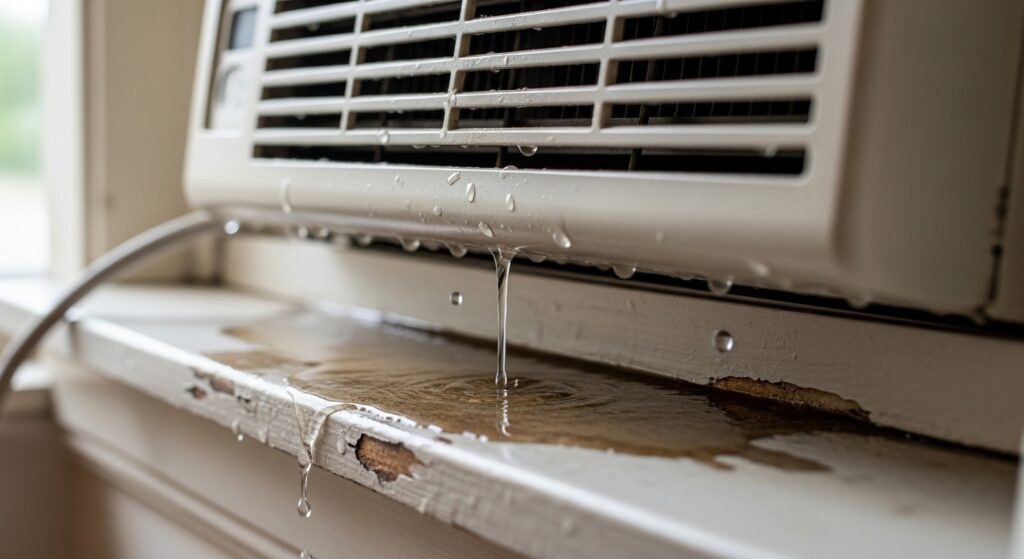
When your window air conditioner is leaking water into your home, the cause almost always comes down to one of three things: a clogged drain hole, an improper installation tilt, or a dirty air filter that has frozen the evaporator coils. These three issues account for the vast majority of indoor AC leaks, and all of them are fixable with basic tools in under an hour. Less common culprits include a rusted drain pan, a refrigerant leak, or extreme humidity overload that overwhelms the unit’s drainage capacity.
The reason your window AC produces water in the first place is condensation. As warm indoor air passes over cold evaporator coils, humidity condenses into liquid droplets, exactly like water beading on a cold glass on a summer day. Under normal conditions, that condensation collects in a drain pan and flows harmlessly outside through a drain hole at the rear of the unit. When something interrupts that drainage path, water backs up and spills into your living space instead.
This guide walks through every common cause of a window air conditioner leaking water, explains exactly how to diagnose each one, and provides step-by-step fixes you can do yourself. Whether your unit is brand new or a decade old, you will find the troubleshooting path you need below.
Why Window Air Conditioners Produce Water
Every window air conditioner removes moisture from your indoor air as a natural byproduct of cooling. Warm room air is drawn across a cold evaporator coil inside the unit, and the temperature drop causes water vapor in that air to condense into liquid. In humid climates, a single window AC can extract several gallons of water from the air in a single day. This is normal operation, not a defect.
That condensed water drips down into a drain pan located at the base of the unit. From there, gravity carries it through a drain hole or drain line at the rear bottom corner, where it drips outside. A properly installed window AC has a slight downward slope toward the exterior, roughly a quarter-inch of drop per foot of unit width, which helps gravity do its job. When the slope is correct and the drain path is clear, you should only see water dripping from the outside rear of the unit.
Leaks appear when something disrupts this drainage flow. A blockage, a wrong angle, or an overwhelmed system causes the drain pan to overflow. The water then follows the path of least resistance, which often leads to your windowsill, wall, or floor. Understanding where the breakdown happens is the key to fixing it quickly.
Quick Summary: Common Causes and Fixes
Here is a fast-reference breakdown of the six most common reasons your window AC might be leaking water indoors, paired with the fix for each one. Use this as a diagnostic checklist before diving into the detailed sections below.
Clogged drain hole or drain line. Dirt, algae, and debris block the water exit path. The Fix: Unplug the unit, locate the drain hole at the rear bottom, and clear it with a toothpick, pipe cleaner, or stiff brush. Flush with vinegar for stubborn clogs.
Improper installation tilt. The unit is level or tilted backward, so water pools inside instead of draining out. The Fix: Adjust the unit or support brackets so the outside sits roughly 1/4 inch lower per foot of unit width.
Dirty air filter causing frozen coils. Restricted airflow freezes the evaporator coil, and the melt-off overflows the drain pan. The Fix: Remove the front grille, clean or replace the filter, and let the coil thaw completely before restarting.
Damaged or rusty drain pan. Holes or cracks in the pan let water escape before it reaches the drain hole. The Fix: Inspect the pan for rust or cracks. Patch small holes with waterproof epoxy, or replace the pan if damage is extensive.
Refrigerant leak. Low refrigerant freezes the coil unevenly, producing excess melt water. The Fix: This requires an EPA-certified HVAC technician. Do not attempt refrigerant repairs yourself.
Extreme humidity overload. The unit produces more condensation than the drain system can handle during heat waves. The Fix: Run a dehumidifier alongside the AC, or set the fan to continuous to keep air moving and reduce localized freezing.
Safety warning: Always unplug your window AC before performing any cleaning, inspection, or repair. Water and electricity are a dangerous combination, and even a small drip near live components can create a shock hazard. If you notice sparking, burning smells, or tripped breakers, stop immediately and call a professional.
6 Common Reasons Your Window AC Is Leaking Water
Now let us examine each cause in detail. Every section below follows the same structure: first the problem, then the fix. Work through them in order, starting with the most common and easiest to resolve.
1. Clogged Drain Hole or Drain Line
The Problem: The drain hole at the rear bottom of your window AC is the exit point for all condensation. Over months of operation, dust, dirt, algae, and mineral deposits accumulate inside that hole and the connected drain line. Once the opening narrows enough, water cannot exit fast enough and the drain pan overflows into your home. This is the single most common cause of indoor AC leaks, and it develops so gradually that you may not notice anything wrong until the clog is complete and water suddenly appears on your sill.
Outdoor debris adds to the problem. Leaves, spider webs, and insect nests can block the external drain opening, especially if the unit sat unused or uncovered during the off-season. Hard water deposits are another frequent offender in areas with high mineral content, gradually narrowing the drain passage until even normal condensation flow is restricted.
The Fix: Unplug the unit and locate the drain hole on the exterior bottom rear. Shine a flashlight into the opening to look for visible blockages. Use a toothpick, pipe cleaner, or wooden chopstick to gently dislodge debris. For deeper clogs in the drain line, flush the passage with white vinegar using a turkey baster, let it sit for 15 to 20 minutes to break down algae and mineral buildup, then flush with warm water. Some homeowners report success using a wet/dry vacuum on the external drain opening to pull clogs outward. Avoid wire coat hangers or other sharp metal tools, as they can puncture the drain line and create a worse problem.
2. Improper Installation Tilt
The Problem: Your window AC must slope slightly downward toward the outside so gravity can move condensation to the drain hole. Many installers mount the unit perfectly level for aesthetic reasons, but a level unit has no gravitational assist. Even worse, a unit tilted backward, with the outside edge higher than the inside edge, actively traps water inside the drain pan and channels it toward your interior. This installation error is common in rental apartments and in units installed by someone unfamiliar with AC setup.
The Fix: Check the angle by placing a small level on top of the running unit. If you do not have a level, pour a small amount of water near the back interior of the unit and watch which direction it flows. Water should run steadily toward the outdoor side. If it pools or moves indoors, you need to adjust the angle.
Tilt Measurement Tip
The correct tilt is approximately 1/4 inch of downward drop per foot of unit width. For a typical 24-inch-wide window AC, that means the outside edge should sit roughly half an inch lower than the inside edge. You can achieve this with adjustable support brackets, wooden shims placed under the interior edge of the unit, or a purpose-built AC support shelf mounted to the exterior wall. This small angle is barely visible but makes an enormous difference in drainage performance. Correcting the tilt often resolves leaks immediately, especially in units that have leaked since the day they were installed.
3. Dirty Air Filter Causing Frozen Coils
The Problem: A clogged air filter chokes off airflow across the evaporator coil. Without enough warm air flowing over the coil to keep it above freezing, the coil temperature drops until ice forms on the fins. When the compressor cycles off and the ice melts, the resulting water volume overwhelms the drain pan and spills indoors. You will often notice reduced cooling performance and weaker airflow from the vents before the leaking starts.
The ice itself creates a secondary problem by physically blocking the drain opening, so even a clear drain line cannot carry the melt water away fast enough. This dual failure mode means filter-related leaks can appear suddenly and seem severe, even though the underlying cause is simply a dirty filter.
The Fix: Turn off the unit and let the coil thaw completely, which can take 2 to 4 hours depending on ice thickness. Remove the front grille and slide out the air filter. Hold it up to a light source; if you cannot see light through it clearly, it needs attention. Wash reusable filters with warm water and mild dish soap, rinse thoroughly, and let them air dry completely before reinstalling. Replace disposable filters with the correct size for your model. Once the filter is clean and the coil is fully thawed, restart the unit and monitor for proper drainage.
4. Damaged or Rusty Drain Pan
The Problem: The drain pan at the base of your unit collects condensation and channels it toward the drain hole. In older units, metal pans corrode after years of constant moisture exposure, eventually rusting through and developing pinholes or cracks. Plastic pans are not immune either, as temperature cycling and vibration from the compressor can cause structural fatigue and splitting over time. Even a small crack allows water to escape the drainage path and leak directly onto your windowsill.
Drain pan leaks tend to start small and worsen gradually. You might notice a few drips at first that become a steady trickle as the damage spreads. Unfortunately, accessing the drain pan usually requires removing the unit from the window or taking off the outer cabinet, which makes this one of the more labor-intensive fixes.
The Fix: Remove the unit from the window and take off the cabinet cover to expose the drain pan. Inspect the entire pan surface for rust holes, cracks, or corroded seams. Small holes in metal pans can be patched temporarily with waterproof epoxy putty or silicone sealant designed for wet surfaces. Clean and dry the area thoroughly before applying any patch, and allow full curing time before reinstalling. If the pan is severely corroded or cracked across a wide area, replacement is the better long-term option. For units older than 8 to 10 years, consider whether pan replacement cost justifies the repair versus investing in a new, more efficient unit.
5. Refrigerant Leak
The Problem: Low refrigerant charge causes the evaporator coil to run excessively cold, leading to ice formation similar to the dirty filter scenario. The key difference is that a clean filter and good airflow do not resolve the freezing. When the ice melts, the water volume overloads the drain system just as it does with filter-related ice. Additional warning signs include reduced cooling capacity, hissing or bubbling sounds from the refrigerant lines, oily residue near fittings, and uneven or patchy ice patterns along the coil.
The Fix: Refrigerant work is not a DIY repair. Federal law requires EPA Section 608 certification for anyone handling refrigerants, and the process requires specialized recovery and charging equipment. If you suspect a refrigerant leak after ruling out filter, drainage, and tilt issues, contact a licensed HVAC technician. Get multiple quotes, as pricing for small window AC refrigerant work varies widely between companies. In many cases, especially with older units, the cost of leak repair and recharge approaches the cost of a replacement unit.
6. Extreme Humidity Overload
The Problem: Sometimes your unit is functioning perfectly, but conditions are simply more than it was designed to handle. During heat waves or in persistently humid climates, a window AC may generate condensation faster than the drain system can carry it away. This is most common with smaller units, units that are undersized for the room they cool, or units running continuously on the lowest fan speed in a particularly muggy environment.
You might notice that the leaking only happens during the most humid stretches of summer and resolves on its own when the weather dries out. This pattern is a strong clue that humidity overload, rather than a mechanical problem, is the cause.
The Fix: Run a portable dehumidifier in the same room to reduce the moisture load on your AC. Set the AC fan to continuous rather than auto, which keeps air moving across the coil and reduces the localized temperature drops that cause irregular freezing and melt surges. If your unit is undersized for the room, consider upgrading to a higher BTU model rated for your square footage. Closing blinds and curtains during peak sun hours also reduces the cooling demand and the resulting condensation volume.
How to Fix Window Air Conditioner Leaking Water: Step by Step
If you have read through the causes above and want a single ordered workflow, follow these steps in sequence. Each one builds on the previous, so do not skip ahead. Unplug your unit before starting any work.
Tools and Supplies You Will Need
Gather these items before you begin: a flashlight, a screwdriver set, a stiff brush or old toothbrush, wooden toothpicks or pipe cleaners, a turkey baster or small squeeze bottle, white vinegar, mild dish soap, towels or a shallow pan for water collection, a small spirit level, and a replacement air filter if your current one is disposable. Having everything ready prevents mid-project interruptions while the unit is disassembled.
Step 1: Unplug and Assess
Unplug the unit from the wall outlet. Never work on an AC that is still connected to power, even if it is switched off. Lay towels beneath the unit to catch any water that may spill during disassembly. Remove the front grille, usually held by clips or a couple of screws, to access the filter and evaporator coil area.
Step 2: Clean or Replace the Air Filter
Slide the filter out and inspect it. If light does not pass through clearly, clean or replace it. Wash reusable filters with warm soapy water, rinse, and let them dry fully before reinstalling. Replace disposable filters with the exact size printed on the filter frame. A clean filter restores airflow and prevents the coil freezing that causes so many leaks.
Step 3: Check for and Thaw Ice on the Coil
With the filter removed, look at the evaporator coil behind it. If you see frost or solid ice on the fins, do not chip it off, as that can damage the delicate aluminum fins. Instead, let the unit sit unplugged until the ice melts completely, typically 2 to 4 hours. Place towels beneath to catch the melt water. Once thawed, the coil should be dry and the fins visible.
Step 4: Clear the Drain Hole and Drain Line
Go to the exterior side of the unit and locate the drain hole at the bottom rear corner. Use your flashlight to inspect the opening. Clear visible debris with a toothpick or pipe cleaner, working gently to avoid pushing material deeper into the line. For stubborn clogs, use a turkey baster to flush the drain with white vinegar. Let it sit for 15 to 20 minutes, then flush with warm water. Repeat if necessary until water flows freely from the drain opening.
Step 5: Check and Correct the Tilt
Place a small level on top of the unit. The bubble should indicate a slight slope toward the outside. If the unit is level or tilted backward, insert wooden shims under the interior edge or adjust the support brackets to create the proper downward angle. The target is approximately 1/4 inch of drop per foot of unit width. If you do not have a level, pour a small amount of water into the drain pan area and confirm it flows toward the outdoor drain hole.
Step 6: Inspect the Drain Pan for Damage
If the drain is clear and the tilt is correct but leaking persists, the drain pan itself may be compromised. Accessing the pan may require removing the unit from the window or taking off the outer cabinet. Look for rust holes, cracks, or corroded seams. Patch small holes with waterproof epoxy putty, following the product instructions for surface preparation and curing time. For extensively damaged pans, consider replacement or consult a professional.
Step 7: Test the Unit and Monitor
Reassemble the unit, reinstall the filter and front grille, and plug it back in. Run the AC on its normal cooling setting for 30 to 60 minutes. Check the exterior drain hole for steady dripping, which confirms the drainage system is working. Check the interior sill and surrounding area for any signs of water. If the leak is resolved, you are done. If it persists, move on to the refrigerant and humidity overload possibilities described above, both of which may require professional assessment.
Preventing Future Window AC Leaks
The best fix for an AC leak is preventing it from happening in the first place. A few simple maintenance habits, performed consistently, will keep your drainage system flowing and your evaporator coil ice-free through every cooling season. These tasks take only a few minutes each but save hours of troubleshooting and hundreds of dollars in potential water damage repairs.
Clean or Replace the Air Filter Regularly
This is the single most effective preventive measure. Check your filter every 4 to 6 weeks during peak cooling season, and more frequently if you have pets, live in a dusty area, or run the unit continuously. A clogged filter is the root cause behind both frozen coils and the resulting melt-off leaks. Mark a recurring reminder on your phone or calendar so this does not slip through the cracks during the busy summer months.
Flush the Drain Line at Season Start
Before the first hot day of the season, flush the drain hole and line with white vinegar to dissolve any algae or mineral deposits that formed during storage. This takes about five minutes and prevents the gradual clogging that causes most mid-summer leaks. Use a turkey baster to push vinegar through the drain opening, let it sit for 15 minutes, then flush with warm water until the flow runs clear.
Verify the Tilt Each Spring
Weather, vibration, and accidental bumps can shift a window AC out of its proper angle over time. Each spring, before firing up the unit for the season, place a level on top and confirm the slight downward slope toward the outside. Adjust brackets or shims as needed. This quick check prevents the most frustrating leaks, the ones caused by an angle that drifted a fraction of an inch over the winter.
Keep the Surrounding Area Clear
Trim back any vegetation growing near the exterior portion of your unit, as leaves and stems can block the drain opening. Clear spider webs and insect nests from the rear of the unit periodically, especially in late spring when pests are most active. If you live in a dusty climate, wipe down the exterior coil fins occasionally to maintain airflow and reduce the debris that eventually washes into the drain system.
Consider a Coil Cleaning Treatment
Once or twice per season, use a commercially available no-rinse evaporator coil cleaner to remove dust and biological growth from the coil fins. These cleaners come in aerosol or spray form and break down the grime that restricts airflow and contributes to ice formation. Follow the product label for application instructions, and always apply to an unplugged unit with the filter removed.
Seasonal Maintenance Schedule
A structured maintenance calendar keeps your window AC leak-free year after year. Here is a month-by-month breakdown for a typical cooling season in a temperate climate. Adjust the timing if you live in a region with a longer or shorter cooling window.
March or April (pre-season): Remove the unit from storage or uncover it if it stayed in the window. Inspect the exterior for any visible damage from winter weather. Clean or replace the air filter. Flush the drain line with vinegar. Verify the tilt with a level. Test-run the unit for an hour and confirm water drips from the exterior drain.
May: Cooling season begins. Check the filter and clean if needed. Inspect the exterior drain area for blockages from spring pollen, seeds, or insect activity. Wipe down the front grille and visible coil fins.
June: Peak cooling begins. Perform a filter check. Inspect the area around the unit for any early signs of moisture on the sill or wall. Catching small leaks early prevents larger problems in July and August when the unit is under maximum load.
July: Mid-season filter check. Flush the drain line again if you have not done so since spring, as algae growth accelerates in hot, humid weather. Apply a no-rinse coil cleaner if airflow feels weaker than at season start.
August: Repeat the filter check. This is typically the most humid month, so monitor the exterior drain for steady flow. If you notice reduced dripping, the drain may be partially clogged and due for another vinegar flush.
September: Cooling demand begins to drop. Do one final filter cleaning. Check the drain pan and coil for any issues that should be addressed before storing the unit. Note any parts that need replacement so you can order them during the off-season.
October (post-season): Remove the unit from the window if possible. Clean it thoroughly inside and out, including the filter, coil fins, and drain pan. Let it dry completely for 24 to 48 hours before storing to prevent mold and corrosion. Store in a dry location, or cover it securely with a fitted AC cover if it must remain in the window. Proper storage prevents the rust, cracking, and pest infiltration that cause leaks the following spring.
When to Call a Professional
Most window AC leaks are well within the reach of a competent DIYer, but certain situations call for professional service. Knowing where that line falls saves you time, money, and potential safety risks.
Call a professional if: You suspect a refrigerant leak, as this requires EPA-certified handling and specialized equipment. You notice electrical issues such as sparking, burning smells, or breakers that trip repeatedly when the unit runs. The unit is installed in a difficult-to-access upper-story window where safe removal is impractical without proper equipment. Or you have worked through all the steps in this guide and the leak persists, which suggests a problem beyond the common causes.
Consider replacing the unit if: Repair costs exceed roughly 50 percent of the price of a new air conditioner, especially if your current unit is more than 10 years old. Modern window ACs are significantly more energy efficient than models from a decade ago, and the electricity savings alone can offset the replacement cost over a few cooling seasons. If your drain pan is extensively rusted, the compressor is failing, or the refrigerant needs recharging on an older R-22 unit, replacement is almost always the better financial decision.
When calling for service, describe the symptoms in detail. Mention whether the leak is from the interior or exterior, whether you have noticed ice on the coils, what maintenance you have already performed, and the age and brand of the unit. This information helps the technician diagnose the problem faster and quote a more accurate price.
FAQs
How do I stop my window air conditioner from leaking water?
Start by unplugging the unit and checking the air filter. Clean or replace it if dirty, then locate and clear the drain hole on the back exterior using a toothpick or pipe cleaner. Ensure your unit tilts downward toward the outside by about 1/4 inch per foot of width. These three steps fix most window AC leaks within an hour.
Should I turn off my AC if it’s leaking water outside?
Small drips outside are normal and indicate your unit is working correctly. However, turn off your AC immediately if water is leaking inside your home, if you see ice forming on the unit, or if you notice electrical issues like sparking. Inside leaks can cause water damage and mold growth, while ice buildup suggests a frozen coil problem that worsens with continued operation.
Why is my AC dripping water underneath?
Water dripping underneath usually indicates a clogged drain line, improper tilt, or a damaged drain pan. The drain system can’t handle the condensation, so water overflows and finds alternative paths. Start by checking the drain hole for blockages and verify the unit tilts toward the outside. If these don’t solve the problem, inspect the drain pan for holes or cracks.
How to unclog drain on window air conditioner?
First unplug the unit for safety. Locate the drain hole on the exterior bottom rear. Use a toothpick, pipe cleaner, or stiff brush to gently remove visible debris. For stubborn clogs, flush with vinegar using a turkey baster, let it sit for 15 minutes, then flush with warm water. Compressed air can help but use low pressure to avoid damaging components.
Can I still use my AC if it’s leaking water?
You should not continue using your AC if it’s leaking water inside your home. This can cause water damage, mold growth, and electrical hazards. Outside dripping is normal operation. If water is leaking inside, turn off the unit until you identify and fix the problem. Continuing to run a leaking AC can make the problem worse and lead to more expensive repairs.
Why is my air conditioner leaking water from the inside?
Inside leaks typically mean condensation isn’t draining properly outside. Common causes include a clogged drain line, improper tilt (level or backward-sloping installation), or a damaged drain pan. Frozen coils from a dirty filter or low refrigerant can also cause inside leaking when the ice melts. Address these issues promptly to prevent water damage and mold growth.
How much should a window AC drip?
A window AC in normal operation should produce a steady drip from the exterior drain hole whenever it is actively cooling, especially in humid weather. In high humidity, a unit can produce several gallons of condensation per day. Dripping outside is completely normal and shows the unit is removing moisture from your air. If dripping stops entirely, the drain may be clogged. If water appears inside instead of outside, there is a drainage problem that needs attention.
Is water dripping from window AC dangerous?
Water dripping from the exterior of your window AC is normal and not dangerous. However, water leaking inside your home can be dangerous in several ways. It can cause structural water damage to your wall, sill, and floor. It can promote mold and mildew growth within 24 to 48 hours. And if water reaches electrical components or wiring, it creates a serious shock and fire hazard. If you see water inside, turn off and unplug the unit immediately before investigating.
Final Thoughts
A window air conditioner leaking water inside your home is one of the most common and most fixable AC problems you will encounter. In nearly every case, the root cause traces back to a clogged drain, a wrong tilt angle, or a dirty filter that has frozen the coil. Each of these can be diagnosed and resolved in a single afternoon with tools you likely already have at home. The detailed cause-and-fix sections above walk you through every scenario, and the step-by-step workflow gives you a clear path from first inspection to confirmed repair.
The key to staying ahead of leaks is consistent preventive maintenance. A clean filter, a clear drain line, and a properly tilted unit will prevent the vast majority of problems before they start. The seasonal schedule in this guide takes the guesswork out of when to perform each task, so you can keep your cooling system running efficiently through the hottest months without surprises. Remember that some dripping from the exterior of your unit is completely normal and simply means your AC is doing its job of pulling humidity from your indoor air.
If you have worked through every step and the leak persists, or if you encounter refrigerant or electrical issues, do not hesitate to call a professional. Sometimes the most cost-effective decision, especially for an older unit, is replacement rather than repair. Whatever your situation, addressing the problem promptly protects your home from water damage and keeps you cool and comfortable through every cooling season in 2026 and beyond.
Leave a Reply