
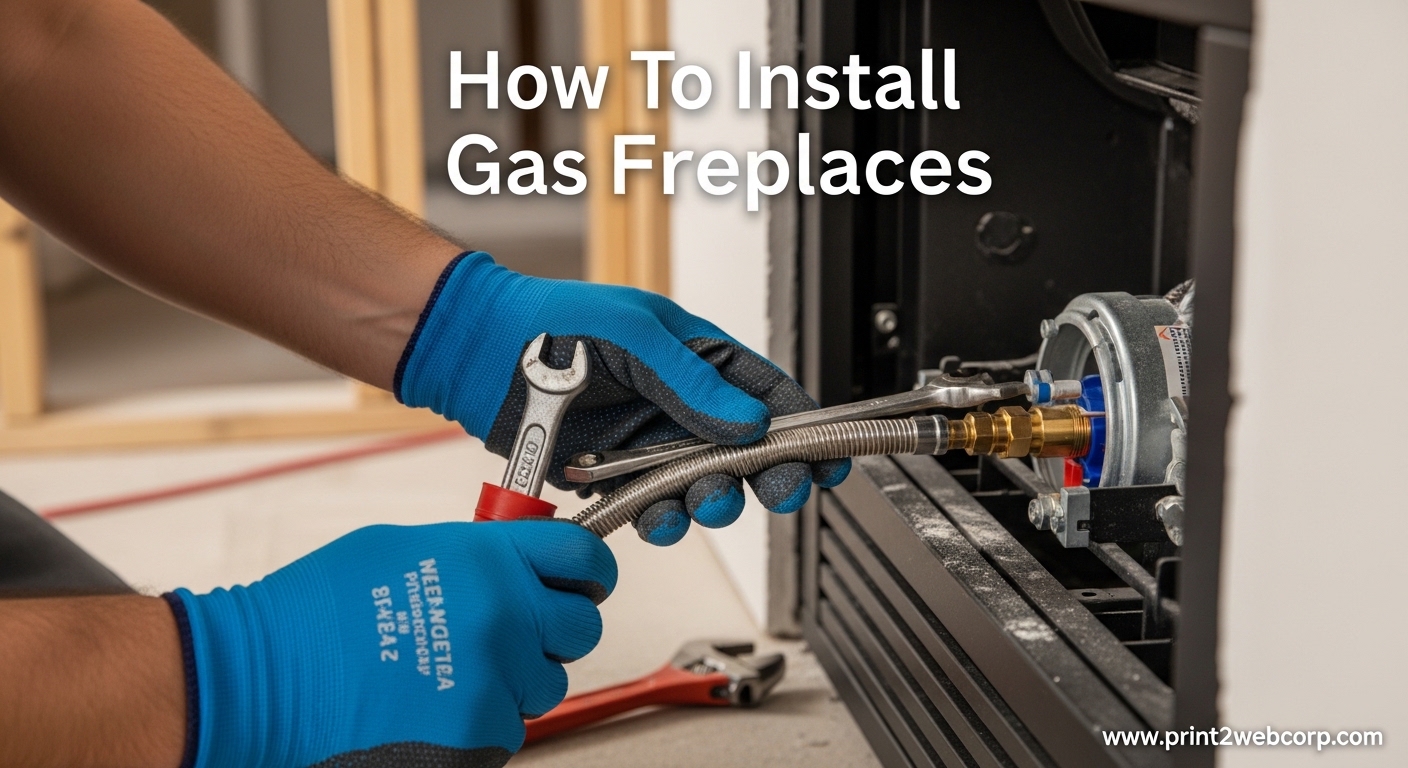
Installing a gas fireplace transforms your living space with efficient, clean warmth at the touch of a button. Unlike wood-burning units, gas fireplaces provide consistent heat without the mess of ash, soot, or hauling logs. The installation process involves several critical steps including framing, running gas lines, installing specialized venting, and connecting electrical components, with total costs typically ranging from $2,300 to $8,000 depending on your setup and location.
Whether you’re converting an existing wood fireplace or installing a new unit in a blank wall, understanding the complete process helps you make informed decisions. This guide walks you through everything you need to know about how to install gas fireplaces, from choosing the right type to navigating permits and deciding what to tackle yourself versus hiring professionals.
Gas fireplace installation combines technical precision with safety-critical work. While some homeowners successfully handle portions like framing and finishing, gas line connections and venting typically require licensed professionals. Let’s explore what’s involved so you can plan your project confidently.
What Is a Gas Fireplace?
A gas fireplace is a heating appliance that burns natural gas or propane to produce realistic flames and substantial heat. Modern units use ceramic logs, glass media, or contemporary stone beds that glow when heated, creating the ambiance of a traditional fire without the maintenance requirements. The firebox connects to your home’s gas supply through a dedicated line, and most models include electronic ignition systems that eliminate the need for a standing pilot light.
Gas fireplaces come in two main configurations: inserts designed to fit into existing wood-burning fireplaces, and zero-clearance units built for new construction or wall installations. Zero-clearance models can be installed directly against wood framing because their insulated or double-walled construction keeps exterior temperatures safe. This versatility makes gas fireplaces popular for renovations, new builds, and room additions where traditional masonry fireplaces aren’t practical.
The efficiency advantage is significant. While wood fireplaces lose most of their heat up the chimney, modern direct-vent gas units achieve 70-85% efficiency, meaning most of the heat generated stays in your home. Many homeowners use gas fireplaces for zone heating, warming the rooms they actually use rather than firing up the whole-house furnace.
Types of Gas Fireplaces
Understanding the different types of gas fireplaces helps you choose the right unit for your space and installation scenario. Each type has specific venting requirements and applications.
Direct-Vent Fireplaces
Direct-vent models represent the most popular choice for new installations. These units use a coaxial vent pipe system that pulls fresh outdoor air for combustion while exhaust gases exit through the outer chamber. The vent typically terminates horizontally through an exterior wall, though vertical installations through a roof are also possible. Direct-vent fireplaces are sealed combustion units, meaning they don’t use indoor air for burning, which maintains better indoor air quality and efficiency.
Installation requires access to an exterior wall for venting, making these ideal for perimeter walls. The double-walled vent pipe maintains safe clearances to framing and combustible materials, simplifying the rough-in process. Most direct-vent units offer high efficiency ratings and realistic flame patterns because the sealed combustion chamber allows precise control of the air-fuel mixture.
Vent-Free Fireplaces
Vent-free or ventless gas fireplaces don’t require any chimney or exterior venting. They burn gas very cleanly and release all heat into the room, achieving near-perfect efficiency ratings. These units install virtually anywhere with access to a gas line, including interior walls where venting would be impossible.
However, vent-free fireplaces have limitations. They produce moisture and combustion byproducts that remain in your living space, requiring adequate room ventilation. Most building codes limit their BTU output based on room size, and some jurisdictions prohibit them entirely. Oxygen depletion sensors (ODS) are mandatory safety features that shut off the unit if oxygen levels drop. While convenient for certain applications, vent-free models aren’t ideal for primary heating or for anyone with respiratory sensitivities.
B-Vent (Natural Vent) Fireplaces
B-vent fireplaces use a single pipe system that exhausts combustion gases through the roof, similar to a traditional water heater. They draw combustion air from the room rather than from outside, which makes them less efficient than direct-vent alternatives. B-vent units are primarily used when replacing an existing wood fireplace with a gas insert while reusing the chimney structure.
The installation requires adequate draft and proper chimney sizing to ensure safe operation. Because these units use indoor air for combustion, they’re not recommended for tightly sealed, energy-efficient homes where depressurization could cause venting problems. B-vent fireplaces have largely been replaced by direct-vent technology in new installations but remain common in retrofit scenarios.
Gas Fireplace Inserts
Gas inserts are designed specifically to convert existing wood-burning fireplaces to gas. They’re self-contained units that slide into the firebox opening, dramatically improving efficiency while preserving the traditional fireplace aesthetic. Most inserts use either direct-vent technology (requiring a new vent liner up the chimney) or B-vent systems that utilize the existing chimney structure.
Insert installation involves measuring your existing fireplace opening, removing the damper, and running gas and electrical lines to the firebox. A surround panel covers the gap between the insert and the fireplace facing. This conversion option appeals to homeowners who want the convenience of gas without losing their traditional masonry fireplace’s visual appeal.
How To Install Gas Fireplaces: Pre-Installation Planning
Proper planning prevents costly mistakes and ensures your gas fireplace installation meets all safety requirements and local codes. Rushing this phase leads to problems ranging from inadequate clearances to failed inspections.
Choosing the Right Location
Location selection depends on your fireplace type and intended use. For new construction, exterior walls provide the easiest installation for direct-vent units because horizontal venting through a rim joist is straightforward. Interior wall installations are possible but require vertical venting through the roof, which adds complexity and cost.
Consider how you’ll use the fireplace. Is it primarily for ambiance, supplemental heating, or as a primary heat source for a specific zone? The location should optimize both viewing angles and heat distribution. Common installation spots include living room exterior walls, great room focal points, and even bedroom walls where local codes permit.
Clearance requirements are critical. Manufacturers specify minimum distances to combustible materials for the sides, top, and bottom of the unit. These clearances must be maintained to the framing, mantel, and any nearby trim. Zero-clearance units can be installed directly against wood framing, but the specified trim and surround materials must still meet fire safety requirements.
The 7-11 Rule for Fireplace Sizing
The 7-11 rule provides a guideline for selecting the appropriate gas fireplace size for your room. This rule states that you need 1 square inch of fireplace glass area for every 10-12 square feet of floor space, with some variations depending on ceiling height and insulation. For example, a 400-square-foot room would require approximately 33-40 square inches of glass viewing area, translating to a 36-inch wide fireplace unit.
However, this rule is just a starting point. Other factors include your climate, insulation quality, ceiling height, and whether the fireplace is for primary heating or occasional ambiance. In colder climates or poorly insulated spaces, you might opt for a larger unit with higher BTU output. Conversely, a well-insulated room in a moderate climate might require less heating capacity.
Always consult the manufacturer’s heating capacity specifications, which are expressed in BTUs and include a recommended square footage range. Undersized units won’t adequately heat the space, while oversized models may cycle on and off rapidly, reducing comfort and efficiency.
Permit and Code Requirements
Gas fireplace installations almost always require building permits, regardless of whether you’re hiring professionals or tackling portions yourself. The permit process ensures your installation meets local building codes and safety standards. Requirements vary by jurisdiction, but typically include mechanical permits for gas line work and electrical permits for power connections.
Start by contacting your local building department early in the planning process. They’ll provide specific permit applications, inspection requirements, and any local code amendments. Most municipalities require inspections at various stages: rough-in inspection after framing and gas line installation, and a final inspection after the unit is fully connected and operational.
Key code considerations include clearance to combustibles, venting requirements, gas line sizing and materials, and carbon monoxide detector placement. National codes like the NFPA 54 (National Fuel Gas Code) and NFPA 211 (Chimneys, Fireplaces, Vents, and Solid Fuel-Burning Appliances) provide baseline standards, but local jurisdictions may have additional requirements.
Gas Line Considerations
Your existing gas line capacity determines whether you can add a fireplace without modifications. Older homes with smaller gas lines may require upgrades to support additional appliances. A qualified plumber or HVAC contractor can calculate your gas load and determine if the existing line provides sufficient pressure and volume.
Gas line sizing depends on the length of the run and the BTU input of all connected appliances. Undersized lines cause performance issues and may create safety hazards. The line material matters too—black steel pipe is traditional, but flexible corrugated stainless steel tubing (CSST) is increasingly common for its easier installation in tight spaces.
Plan the gas line route carefully. It should be protected from physical damage, properly supported with straps or hangers, and include a shut-off valve accessible within 6 feet of the fireplace. The gas connection point on the unit must be accessible for servicing. Most installations include a sediment trap (drip leg) to catch debris and moisture before it reaches the fireplace valve.
How To Install Gas Fireplaces: Step-by-Step Process
The actual installation process follows a logical sequence from rough framing through final finishing. While the specifics vary by unit and installation type, this general process applies to most gas fireplace installations.
Step 1: Site Preparation and Framing
Begin by marking the fireplace location on the wall, following the manufacturer’s rough-in dimensions exactly. These specifications include the required opening width, height, and depth, plus clearance requirements to combustible materials. Transfer these measurements to the floor and wall, then mark the locations for the gas line, electrical outlet, and vent penetration.
For new construction or major remodels, frame the rough opening using 2×4 lumber. The framing must be plumb, square, and securely fastened to the existing structure. If you’re installing into an exterior wall, mark the vent penetration location and cut the opening through the sheathing from the exterior after framing is complete. Use a level and tape measure—precision here prevents headaches later when the unit doesn’t fit properly.
Install a firestop at each framing level according to code requirements. Firestops prevent flames from spreading between floors through wall cavities. The framing should include adequate nailer backing for finishing materials like drywall, stone, or tile. For installations on concrete slabs, you may need to install a sill seal or thermal break between the concrete and framing to prevent moisture transfer.
Step 2: Venting Installation
Venting installation varies by type, but direct-vent horizontal installations are most common for new construction. Begin by drilling a pilot hole from the interior through the rim joist at the marked vent location, then use a hole saw sized for your vent pipe to cut the complete opening from both sides.
Assemble the vent pipe sections according to the manufacturer’s instructions, using the provided high-temperature silicone sealant at each joint. The vent system must maintain the specified clearances to combustible materials throughout its run. For horizontal terminations, install the vent cap with the proper flashing to prevent water intrusion. The vent should slope slightly back toward the fireplace (typically 1/4 inch per foot) to allow condensation to drain back into the unit rather than leaking out.
Vertical venting through a roof requires additional components including a roof flashing, storm collar, and termination cap rated for your specific vent diameter. Maintain the required distance from the roof edge, adjacent walls, windows, and any other roof penetrations. The vent must extend above the roofline enough to draw properly and prevent downdrafts from wind. For complex vertical installations, professional installation is strongly recommended.
Step 3: Gas Line Connection
Gas line installation and connection represents the most safety-critical portion of the project and is best left to licensed professionals. If you’re handling this yourself, ensure you have the necessary permits and understand local code requirements thoroughly.
Run the gas line from the existing gas supply to the fireplace location, properly supporting it with pipe straps every 4-6 feet. Include a manual shut-off valve accessible within 6 feet of the unit, and install a sediment trap (drip leg) as close to the fireplace as the code requires. All connections must be made with approved materials and techniques—pipe dope or Teflon tape for threaded connections, welded or press fittings for CSST systems.
After completing the gas connection, pressure testing is mandatory. This involves pressurizing the line with air or inert gas and monitoring for pressure drop, which would indicate a leak. Most jurisdictions require a pressure test before the gas is turned on, with an inspector witnessing the test. Never attempt to operate a gas appliance without completing this critical safety step.
Step 4: Electrical Setup
Most gas fireplaces require electrical power for ignition systems, blowers, and controls. Install a properly grounded electrical outlet within the rough opening according to the manufacturer’s specifications. This outlet should be fed from a dedicated circuit if the fireplace includes a powerful blower, or can share a circuit with other general-purpose outlets for simpler units.
The electrical rough-in must be completed before the fireplace unit is set, as access afterward is limited. Include a switch leg to a wall switch location if you want wall control in addition to the unit’s remote or integrated controls. Some homeowners opt for a dedicated outlet switched from a thermostat location for automatic operation based on room temperature.
Consider installing a battery backup or ensuring the outlet is on a circuit that’s unlikely to be turned off accidentally. Gas fireplaces with electronic ignition won’t operate during power outages without either a battery backup or a standing pilot option. Plan the wiring route to avoid interference with the gas line, vent pipe, or fireplace unit itself.
Step 5: Unit Installation
With rough-in work complete and inspections passed, it’s time to install the fireplace unit. This typically requires two people—the units are heavy and awkward to maneuver. Carefully slide the fireplace into the rough opening, centering it within the framed space. Use the provided brackets or nailing flanges to secure the unit to the framing, ensuring it’s level and plumb.
Connect the gas line to the fireplace’s gas valve using the proper fitting and approved sealant. Hand-tighten plus a quarter turn with a wrench is usually sufficient—over-tightening can damage the valve. Connect the electrical power cord to the installed outlet, and connect any optional components like blowers or remote receivers according to the wiring diagram.
For direct-vent units, connect the vent pipe to the fireplace’s vent collar, ensuring a secure seal with the provided gaskets or sealant. The connection should be snug but not forced—misalignment indicates the vent system needs adjustment. Verify that all connections are complete and secure before proceeding to testing.
Step 6: Testing and Inspection
Before finishing, test the fireplace operation thoroughly. Turn on the gas supply at the manual shut-off valve, then check for gas leaks using a gas leak detection solution or electronic leak detector. Bubbles forming at any connection indicate a leak that must be repaired before proceeding.
Light the fireplace according to the manufacturer’s startup procedure. This may involve activating the electronic ignition or manually lighting the pilot (if equipped). Observe the flame pattern—it should be steady, blue at the base with yellow tips, and distributed evenly across the burner. Yellow or lazy flames indicate improper combustion that may require air shutter adjustment or gas pressure correction.
Test all functions including flame height adjustment, blower operation (if equipped), and remote or wall switch control. Let the unit run for 15-20 minutes to verify proper operation and check for unusual odors or sounds. Schedule your final inspection once everything is operating correctly, and complete any finishing touches after inspection approval.
Professional vs DIY Installation: What You Can Handle
One of the most common questions homeowners ask is whether they can install a gas fireplace themselves. The answer depends on your skills, local regulations, and which portions of the project you’re considering. Understanding what’s legally and practically DIY-friendly helps you plan effectively and avoid dangerous situations.
What Homeowners Can Do Themselves
Framing and finishing represent the most homeowner-friendly portions of a gas fireplace installation. If you have basic carpentry skills, you can frame the rough opening, install drywall, and apply stone, tile, or wood finishing materials around the unit. Many homeowners successfully complete these portions themselves, saving significant labor costs in the process.
Electrical rough-in is also within reach for experienced DIYers. Running a new circuit from the panel, installing a box, and wiring an outlet are straightforward tasks for those comfortable with basic electrical work. However, this work must meet all code requirements and pass inspection, so if you’re uncertain, hiring an electrician is money well spent.
Some jurisdictions allow homeowners to perform their own gas work if they pass a competency exam and pull the proper permits. However, this is rare and generally not recommended unless you have professional plumbing or HVAC experience. The risks of improper gas line installation are simply too high for most homeowners to accept.
What Requires Licensed Professionals
Gas line installation and connection should always be handled by licensed plumbers or HVAC contractors. This is not just a recommendation—it’s a code requirement in most jurisdictions. Improper gas line installation creates explosion hazards, carbon monoxide risks, and code violations that can affect your insurance coverage.
Professional installation is also critical for venting systems. While the components seem straightforward, proper vent sizing, pitch, and termination require expertise. Improper venting causes performance issues, safety hazards, and failed inspections. The investment in professional installation for gas and venting work pays for itself in safety and peace of mind.
Some manufacturers require professional installation to maintain warranty coverage. Check your specific unit’s warranty terms—some become void if not installed by certified professionals. This requirement exists because proper installation directly affects safety and performance.
Cost Comparison: DIY vs Professional
Full professional installation typically ranges from $3,000 to $8,000 depending on complexity, location, and the specific unit. This includes all labor, materials, permits, and inspections. Reddit users in high-cost areas like the Pacific Northwest report paying $8,000-$12,000 for complete professional installations in recent years.
By handling framing and finishing yourself, you can save $1,500-$3,000 in labor costs. However, you’ll still need professionals for gas line work ($500-$1,500), venting installation ($500-$1,000), and electrical rough-in ($200-$500 if you hire an electrician). Your actual savings depend on your skill level and the complexity of your chosen finishes.
Factor in the cost of tools you might need to purchase or rent, the value of your time, and the potential cost of mistakes that require professional correction. When budgeting, always include a contingency fund of 15-20% for unexpected issues that arise during installation.
Finding Qualified Installers
If you’re hiring professionals for some or all of the installation, finding qualified contractors is crucial. Start by asking for recommendations from local fireplace retailers—they often maintain lists of certified installers who know their products inside and out. Online reviews and community forums can provide insights into local contractors’ reliability and quality of work.
Always verify that any contractor you hire is properly licensed, bonded, and insured. Ask specifically about experience with gas fireplace installations—general handymen may not have the specialized knowledge required for gas line and venting work. Request references from recent projects and follow up with those homeowners about their experience.
Get multiple written estimates before choosing a contractor. Each quote should detail the scope of work, materials to be used, timeline, payment schedule, and warranty information. The lowest bid isn’t always the best value—consider experience, reputation, and thoroughness alongside price when making your decision.
Safety Requirements and Inspections
Safety must be the top priority throughout any gas fireplace installation. Gas appliances present specific hazards that proper installation and ongoing attention can effectively mitigate. Understanding these requirements protects your family and home.
Clearance Requirements
Every gas fireplace comes with specific clearance requirements that must be maintained to combustible materials. These clearances specify the minimum distance needed from the sides, top, and bottom of the unit to framing, mantels, trim, and other combustible materials. Typical requirements range from 6 inches to 48 inches depending on the unit and direction.
Mantel clearance is particularly important. The manufacturer provides a minimum height above the fireplace opening based on the mantel projection depth. Deeper mantels must be mounted higher to prevent heat damage. Metal hoods can sometimes reduce clearance requirements by deflecting heat away from the mantel.
Never reduce specified clearances or assume that adding materials like stone or tile reduces the required distance. Combustible materials behind non-combustible finishes still count as combustible for clearance purposes. Your inspector will verify clearances during the final inspection, so get them right from the start.
Carbon Monoxide Safety
Carbon monoxide (CO) is an odorless, colorless gas produced by incomplete combustion of fuel. While properly functioning gas fireplaces produce minimal CO, malfunctioning units or blocked vents can create dangerous conditions. Every home with gas appliances should have CO detectors installed according to manufacturer and local code requirements.
Install CO detectors on each level of your home, including the basement if you have one. Place them outside sleeping areas and near the fireplace location if possible. Test detectors monthly and replace batteries at least annually, or choose units with sealed 10-year batteries that eliminate battery replacement tasks.
Direct-vent fireplaces have a safety advantage here—their sealed combustion chamber separates indoor air from combustion gases, dramatically reducing CO risks. Vent-free units include oxygen depletion sensors that shut off the unit if oxygen levels drop, but CO detectors remain essential for any gas appliance installation.
Gas Leak Testing
Gas leak testing is mandatory after any gas line installation or modification. This test pressurizes the gas line with air or inert gas and monitors the pressure gauge for any drop, which would indicate a leak. Most jurisdictions require this test to be witnessed by an inspector before the gas supply is turned on.
In addition to the formal pressure test, perform a visual and soap test on all connections. Apply a gas leak detection solution or soapy water to each joint and watch for bubbles forming, which indicate escaping gas. Check connections at the shut-off valve, the fireplace gas valve, and every joint in the gas line run.
Never ignore the smell of gas. Mercaptan, the additive that gives natural gas its distinctive rotten egg odor, is your first warning of a leak. If you smell gas, leave the area immediately, call your gas company or emergency services from outside, and don’t re-enter until the area has been cleared by professionals.
Ongoing Maintenance
Proper installation sets the stage for safe operation, but ongoing maintenance keeps your fireplace running safely and efficiently. Annual professional servicing is recommended for all gas fireplaces. This service typically includes cleaning the burner and pilot, checking venting systems, verifying proper combustion, and testing all safety controls.
Between professional service visits, keep the fireplace area clear of combustible materials. Don’t store newspapers, kindling, or other flammable items near the unit. Keep vents and air intakes clear of debris, dust, and obstructions. For vent-free units, clean the front glass and log set periodically according to the manufacturer’s instructions.
Test your carbon monoxide and smoke detectors monthly. Keep the area around the fireplace clean and dust-free. If you notice any changes in flame appearance, unusual odors, or performance issues, contact a qualified service technician promptly rather than continuing to operate the unit.
Cost Considerations for Gas Fireplace Installation
Understanding the costs involved helps you budget appropriately and make informed decisions about your gas fireplace project. Prices vary significantly based on installation type, unit selection, and your location.
Unit Costs
Gas fireplace units range from $800 to $4,000+ depending on type, size, and features. Basic direct-vent units start around $800-$1,200, while premium models with realistic flames, high BTU outputs, and advanced controls can exceed $3,000. Inserts typically cost $1,500-$3,500, reflecting their more complex design and specialized application.
Features that increase price include electronic ignition systems, variable flame height controls, integrated blowers, remote operation, and premium media like crushed glass or designer logs. While these features add upfront cost, they enhance convenience, efficiency, and aesthetics. Consider which features matter most for your usage patterns rather than automatically choosing the most feature-rich model.
Installation Costs
Professional installation costs range from $2,000 to $5,000+ depending on complexity. Simple installations on exterior walls with easy gas line access fall at the lower end of this range. Complex installations requiring new gas lines from the meter, vertical venting through the roof, or extensive framing work push costs higher.
Gas line installation typically costs $500-$1,500 depending on the length of the run and local labor rates. Venting materials cost $300-$800 for direct-vent horizontal systems, with vertical venting running higher due to additional components. Electrical rough-in adds $200-$500 if hired out to an electrician.
Finishing materials vary widely based on your choices. Basic drywall and paint might cost a few hundred dollars, while natural stone surrounds can exceed $2,000. Factor these costs into your budget from the beginning rather than treating them as an afterthought.
Permit and Inspection Fees
Building permits typically cost $100-$500 depending on your jurisdiction and the scope of work. Separate permits may be required for mechanical work (gas line), electrical work, and structural modifications. Budget for permit fees early in your planning process.
Inspection fees are often included in permit costs, but some municipalities charge separately for each inspection required. Most gas fireplace installations require at minimum a rough-in inspection and a final inspection. Factor these into your timeline as well—inspectors typically require advance scheduling and may have limited availability.
Operating Costs
After installation, ongoing operating costs include fuel consumption and electricity for blowers or ignition systems. Natural gas fireplaces typically cost $0.20-$0.60 per hour to operate depending on gas rates and BTU input. Propane units cost significantly more due to higher fuel prices—typically $1.50-$3.00 per hour.
Annual servicing by a qualified technician costs $100-$200 depending on your location and the service performed. This maintenance investment extends unit life, ensures safe operation, and maintains efficiency. Consider this a necessary operating cost rather than an optional expense.
FAQ’s
Can I install a gas fireplace myself?
Homeowners can handle framing, finishing, and sometimes electrical rough-in themselves. However, gas line installation and venting typically require licensed professionals due to safety risks and code requirements. Some jurisdictions allow homeowners to perform gas work with proper permits and testing, but this is rare and not recommended without professional experience. Improper gas installation creates explosion and carbon monoxide hazards.
What is the 7 11 rule for fireplaces?
The 7-11 rule helps determine the right fireplace size for your room. It suggests 1 square inch of fireplace glass area for every 10-12 square feet of floor space. For a 400-square-foot room, this means approximately 33-40 square inches of glass viewing area, typically a 36-inch wide unit. However, this is just a guideline—consider climate, insulation, ceiling height, and whether the fireplace is for primary heat or ambiance.
How much would it cost to have a gas fireplace installed?
Full professional installation typically ranges from $3,000 to $8,000 depending on complexity, unit selection, and location. Basic installations on exterior walls with easy gas access cost less, while complex installations requiring new gas lines, vertical venting, or extensive framing cost more. Reddit users in high-cost areas report paying $8,000-$12,000 for complete professional installations. DIY framing and finishing can save $1,500-$3,000 in labor costs.
How long does gas fireplace installation take?
A complete gas fireplace installation typically takes 3-10 days from start to finish. This timeline includes permitting (1-5 days depending on your municipality), rough-in work (1-2 days for framing, gas line, and venting), inspection scheduling (variable), unit installation (0.5-1 day), and finishing (1-3 days depending on materials). Simple retrofit installations in existing structures may be faster, while new construction with complex venting takes longer.
Do I need a permit to install a gas fireplace?
Yes, gas fireplace installations almost always require building permits. Most municipalities require separate permits for mechanical work (gas line), electrical work, and structural modifications. The permit process ensures your installation meets local building codes and safety standards. Required inspections typically include rough-in inspection after framing and gas line installation, and a final inspection after the unit is fully connected and operational. Always check with your local building department early in the planning process.
Conclusion
Installing a gas fireplace adds warmth, ambiance, and value to your home when done correctly. The process involves multiple technical steps from selecting the right unit and obtaining permits to framing, venting, gas connections, and finishing. While the complexity varies based on your specific installation type, proper planning and attention to safety requirements are essential for every project.
Understanding how to install gas fireplaces helps you make informed decisions about what to tackle yourself and where to hire professionals. Gas line and venting work require licensed contractors in most cases, but many homeowners successfully handle framing, finishing, and even electrical rough-in to reduce overall project costs. The investment in professional installation for safety-critical components protects your family and ensures your fireplace operates reliably for years to come.
Whether you’re converting an existing wood fireplace or installing a new unit in a blank wall, the result is worth the effort. A properly installed gas fireplace provides efficient zone heating, reduces reliance on your central furnace, and creates a cozy gathering spot for family and friends. Start planning your project today, and enjoy the comfort and convenience of gas fireplace warmth for many 2026 winters to come.
Leave a Reply