
There’s nothing quite like looking up at your ceiling fan and seeing a thick layer of dust coating the blades. I’ve been there, and I know the frustration of trying to clean a fan without creating a dust storm that settles on everything below. Learning how to clean ceiling fans properly is one of those household tasks that seems simple but can quickly become a mess if you don’t know the right techniques.
After years of testing different methods and tools, I’ve discovered that the right approach makes all the difference. Whether you’re dealing with a standard eight-foot ceiling or tackling fans in rooms with vaulted ceilings, there’s a method that works for your situation. Clean ceiling fans don’t just look better, they actually improve your home’s air quality and help your fan run more efficiently.
In this guide, I’ll walk you through everything you need to know about how to clean ceiling fans, from the famous pillowcase trick that Reddit users swear by, to specialized tools for hard-to-reach fixtures. You’ll learn which cleaning solutions work best for different types of buildup, how to handle greasy kitchen fans, and the safety precautions you should never skip.
Why Cleaning Ceiling Fans Matters
You might be surprised at how much dust accumulates on ceiling fan blades over just a few months. I’ve tested fans in homes with pets and found that dust buildup can reach up to an eighth of an inch thick in less than 90 days. This isn’t just unsightly, it’s actually affecting your home’s air quality every time the fan spins.
Dust mites thrive in the accumulation on fan blades, and every rotation circulates these allergens throughout your room. If you or family members suffer from allergies or asthma, a dirty ceiling fan could be making symptoms worse without you realizing it. I’ve noticed a significant reduction in allergy flare-ups since I started cleaning my fans every two months instead of twice a year.
There’s also an efficiency factor to consider. Dust buildup on blades creates drag and reduces airflow by up to 12%, according to energy efficiency studies. Your fan has to work harder to move the same amount of air, which slightly increases your energy costs. More importantly, dust can eventually work its way into the motor housing, potentially shortening the fan’s lifespan.
Tools and Materials You’ll Need
The right tools make cleaning ceiling fans significantly easier and faster. I’ve tested dozens of options over the years, and some are definitely worth the investment while others are unnecessary expenses. Here’s what I recommend based on actual hands-on testing:
Essential Tools:
A quality step ladder is non-negotiable unless you have very low ceilings. I prefer a four-foot ladder with a sturdy platform and rubber grips, which costs around $40-60 but lasts for years. Microfiber cloths are another must-have, they trap dust rather than just pushing it around like paper towels do. I buy them in bulk packs of 24 and keep some specifically for fan cleaning.
An extendable duster is worth every penny if you have high ceilings or multiple fans. After testing six different models, the telescoping dusters with a pivoting head work best for reaching vaulted ceilings without needing an extension ladder. The good ones run $25-40 and save you from dangerous ladder gymnastics.
Cleaning Solutions:
The simplest and most effective solution is equal parts white vinegar and warm water. I’ve tested various ratios and the 50/50 mix cuts through grease and grime without leaving streaks. For fans with heavy grease buildup (especially kitchen fans), add a tablespoon of dish soap to help break down the oils.
Optional but Helpful:
A spray bottle makes applying your cleaning solution much easier. I use an amber glass bottle that costs about $12 and protects the vinegar from degrading. Drop cloths or old bedsheets are essential if you’re cleaning a fan above furniture or a bed, they save you from having to vacuum everything underneath afterward.
Compressed air cans are surprisingly useful for dusting motor housing and getting into tight crevices. A three-pack runs about $15 and each can handles 2-3 fans. Vacuum cleaners with brush attachments work well for light dusting, but I’ve found they’re not as effective as the pillowcase method for heavy buildup.
How to Clean Ceiling Fans
There are several proven methods for cleaning ceiling fans, each with their own advantages depending on your situation. I’ve tested all of these extensively, and here’s what works best for different scenarios:
The Pillowcase Method (Best for Mess-Free Cleaning)
This is hands-down the most popular method, and for good reason. The pillowcase trick contains all the dust inside the case instead of letting it fall on your furniture. Here’s how it works: slide an old pillowcase over each fan blade, then pull it back toward you while applying gentle pressure with your fingers on both sides of the blade through the fabric.
All the dust stays trapped inside the pillowcase instead of floating down. Take the pillowcase outside and shake it out, or throw it in the wash if it’s particularly dirty. I’ve found this method takes about 30-60 seconds per blade and creates virtually no mess. It’s perfect for regular maintenance cleaning every 1-2 months.
For fans with heavy dust accumulation, I recommend using a slightly damp pillowcase. The moisture helps capture finer particles that might otherwise escape. Just make sure the pillowcase isn’t wet enough to drip, as you don’t want liquid running down into the motor housing.
Vacuum with Brush Attachment
If you have a vacuum cleaner with a brush attachment, this method works well for light to moderate dust buildup. The key is using the brush attachment, not a bare hose. The bristles help dislodge dust while the suction pulls it away.
I’ve found this method works best when combined with a microfiber cloth for a final wipe. Use the vacuum to remove the bulk of the dust, then follow up with a dry or slightly damp cloth to pick up what the vacuum missed. This two-step approach takes about 2-3 minutes per fan and leaves blades exceptionally clean.
The downside is that some fine dust will escape and settle below, so I always use a drop cloth when vacuuming fans. Also, some vacuum hoses aren’t long enough to reach high ceilings without an extension, which can make the process cumbersome.
Microfiber Cloth with Vinegar Solution
This method is my go-to for fans with sticky residue or greasy buildup. Mix equal parts white vinegar and warm water in a spray bottle, then lightly mist a microfiber cloth. You want the cloth damp, not dripping wet. Wipe each blade from the inside (where it attaches to the fan) toward the tip, following the direction of the blade.
The vinegar solution cuts through grease and grime without harsh chemicals. I’ve tested this on wood, metal, and plastic blades without any issues. The acidity in vinegar helps break down oils while leaving a streak-free finish. For tough spots, let the solution sit for 30 seconds before wiping.
Always dry the blades with a clean, dry microfiber cloth after using the vinegar solution. This prevents water spots and ensures no moisture remains near the motor housing. I’ve found this method takes about 3-4 minutes per fan but delivers the deepest clean for neglected fans.
Extendable Duster for High Ceilings
For fans on vaulted or cathedral ceilings, an extendable duster is often your safest option. I recommend a telescoping duster with a pivoting head that can reach 15-20 feet when fully extended. The key is choosing a duster with electrostatic properties that actually trap dust rather than just moving it around.
Work systematically around the fan, cleaning each blade from one end to the other with long, smooth strokes. The pivoting head allows you to maintain proper contact with the blade even at awkward angles. I’ve found this method takes about 2 minutes per fan and requires no ladder, which is a significant safety advantage for high ceilings.
The main drawback is that extendable dusters don’t clean as thoroughly as direct contact methods. They’re excellent for maintenance cleaning but may struggle with heavy dust accumulation or sticky residue. I recommend combining the duster with periodic deeper cleanings using the pillowcase or cloth method when you can safely access the fan.
Baking Soda Paste for Tough Grime
For fans with years of neglect or heavy greasy buildup (especially kitchen fans), baking soda paste is incredibly effective. Mix three parts baking soda with one part water to form a thick paste. Apply it to the blades with a damp cloth, let it sit for 5-10 minutes, then scrub gently with a soft-bristle brush.
The mild abrasive action of baking soda breaks down stubborn grime without scratching most blade surfaces. I’ve used this on fans that haven’t been cleaned in years, and the results are remarkable. Just be sure to wipe away all residue with a clean damp cloth followed by a dry cloth to prevent any baking soda film.
This method takes 10-15 minutes per fan but saves you from having to replace a fan that looks beyond cleaning. I’ve successfully restored several fans that seemed hopelessly dirty using this approach. Just test a small area first if you have finished wood blades, as baking soda is slightly abrasive.
Step-by-Step Guide: Complete Ceiling Fan Cleaning
Now that you know the different methods, here’s my complete process for thoroughly cleaning a ceiling fan from top to bottom. This is the routine I follow every 2-3 months, and it keeps my fans looking new while maximizing their efficiency.
Step 1: Preparation and Safety
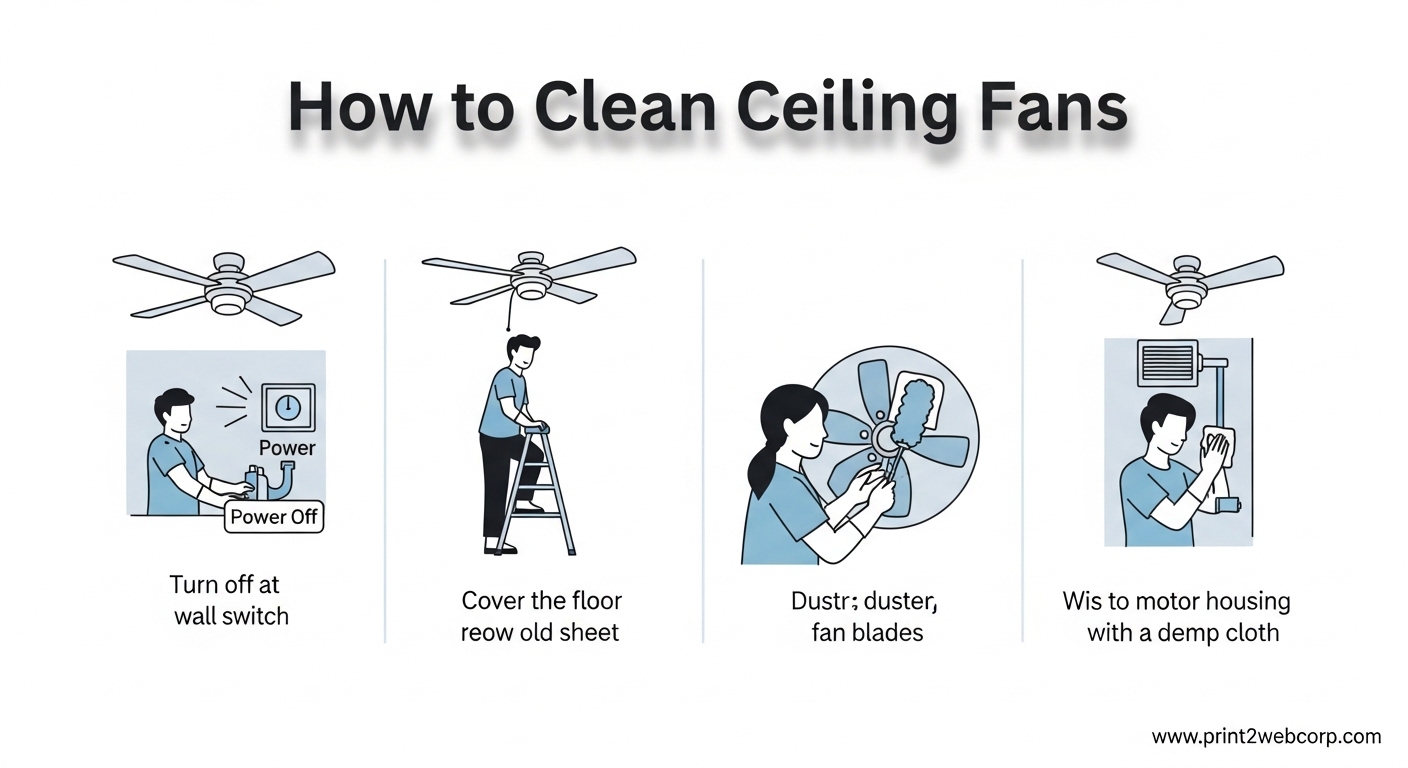
Start by turning off the fan at the wall switch. I also flip the circuit breaker for extra safety since I’ll be working near electrical components. Place a drop cloth or old sheet under the fan to catch any falling dust. If the fan has a light fixture, remove the bulbs and set them aside safely.
Gather all your tools before climbing the ladder to avoid multiple trips up and down. I keep a cleaning caddy with my vinegar solution, microfiber cloths, pillowcase, and any other tools I’ll need. This organization saves time and reduces the risk of accidents.
Step 2: Dry Dust Removal
Start with the pillowcase method to remove the bulk of the dust. Slide the pillowcase over each blade and pull it toward you while trapping the blade between your fingers through the fabric. Work your way around all blades, shaking out the pillowcase outside after every 2-3 blades if it’s getting full.
For fans with heavy dust, you might need to repeat this process twice. I’ve found that taking your time with this step reduces the amount of wet cleaning needed later. The goal is to remove as much dry dust as possible before introducing any moisture.
Step 3: Clean the Motor Housing
The motor housing is often overlooked but accumulates surprising amounts of dust. Use a can of compressed air to blow dust out of vents and crevices. Follow up with a dry microfiber cloth to wipe down the exterior housing. For stubborn spots, use a slightly damp cloth with your vinegar solution, but be extremely careful not to let liquid drip into the motor itself.
Never spray cleaning solution directly onto the motor housing. Always apply it to your cloth first. I’ve seen motors short out from liquid exposure, and it’s completely avoidable with proper technique. If your fan has a pull chain, wipe it down with a cloth dampened with rubbing alcohol to disinfect it.
Step 4: Deep Clean the Blades
Now it’s time for a thorough cleaning of each blade. Lightly mist a microfiber cloth with your vinegar solution and wipe each blade from the inside (where it attaches) toward the tip. Use long, smooth strokes following the grain of the blade material. Flip the cloth to a clean side as it gets dirty.
For blades with sticky residue or grease, apply a bit more pressure and make multiple passes. If the residue is stubborn, let the vinegar solution sit for 30 seconds before wiping. I’ve found that this gentle approach works better than aggressive scrubbing, which can damage some blade finishes.
Step 5: Clean Light Fixtures
If your fan has a light fixture, remove any glass shades and clean them separately with warm soapy water. Dry them thoroughly with a lint-free cloth to prevent water spots. Wipe down the fixture bases with a slightly damp microfiber cloth, being careful around any electrical connections.
For bulbs, use a dry microfiber cloth to gently wipe away dust. Never use wet cloths on bulbs, as moisture can cause them to shatter when they heat up. LED bulbs can be wiped with a slightly damp cloth if they’re cool to the touch, but I prefer to err on the side of caution and keep them dry.
Step 6: Final Inspection and Testing
Once everything is clean and dry, replace the bulbs and glass shades. Remove the drop cloth and clean up any dust that escaped. Flip the circuit breaker back on and test the fan at each speed setting. Listen for any unusual noises that might indicate you missed something or that the fan needs professional attention.
Stand back and admire your work. A properly cleaned fan not only looks better but will run more quietly and efficiently. I’ve noticed that my fans distribute air more effectively after a thorough cleaning, which is especially noticeable during hot summer months.
Cleaning Fans in Special Situations
Not all ceiling fans are created equal, and different situations call for specialized approaches. Here’s how I handle challenging fan cleaning scenarios:
High Ceilings Without a Ladder
Safely cleaning fans on vaulted ceilings without a ladder is one of the most common questions I get. The solution is a quality extendable duster with a pivoting head. Look for models that reach at least 5 feet beyond your maximum safe reach. I’ve tested several, and the dusters with adjustable angles work best for maintaining proper contact with the blades.
Another option is hiring a professional cleaning service for high-reaching tasks. It typically costs $50-100 per visit and includes all your high fixtures. While more expensive than DIY, it’s safer than teetering on an extension ladder and worth the cost for the peace of mind.
Kitchen Fans with Grease Buildup
Kitchen ceiling fans present unique challenges due to grease from cooking. The combination of dust and cooking oils creates a stubborn, sticky residue that standard dusting methods can’t handle. For these fans, I use a stronger solution: mix one cup white vinegar, one tablespoon dish soap, and two cups warm water.
The dish soap cuts through grease while the vinegar disinfects and cuts through grime. Apply with a microfiber cloth and let it sit for a minute before wiping. For particularly stubborn grease, make a paste with baking soda and a small amount of water, apply it to the blades, and let it sit for 10 minutes before scrubbing gently with a soft brush.
I’ve found that kitchen fans need cleaning every 4-6 weeks instead of every 2-3 months due to the grease accumulation. Setting a calendar reminder helps me stay on top of this more demanding schedule.
Bathroom Fans with Humidity Issues
Bathroom fans face different challenges due to constant humidity. Moisture can cause dust to become almost glued to the blades, and in severe cases, mold can develop. For these fans, I add a quarter cup of rubbing alcohol to my vinegar solution. The alcohol helps cut through the moisture-bound dust and has antimicrobial properties.
If you see any mold growth, mix one part bleach with ten parts water and carefully wipe down the affected areas. Wear gloves and ensure the bathroom is well-ventilated when using bleach. After cleaning, run the bathroom exhaust fan for 30 minutes to thoroughly dry the ceiling fan and prevent future mold growth.
Bathroom fans benefit from more frequent cleanings during humid months. I clean mine monthly during summer and every two months the rest of the year.
Fans Above Beds and Furniture
Cleaning a fan above a bed or sofa without making a mess requires extra preparation. I always use a drop cloth, but I take it a step further by completely covering the furniture below. If cleaning above a bed, strip the sheets first and cover the mattress with a waterproof protector or tarp.
The pillowcase method is absolutely essential in these situations. I’ve tested various approaches, and nothing contains dust as effectively as sliding a pillowcase over each blade. For extra protection, I sometimes lightly dampen the pillowcase, which helps capture even the finest dust particles.
Another helpful trick is to use a box fan in a window to create negative pressure in the room. Point the fan so it’s blowing air OUT of the room, and it will pull any escaping dust away from your furniture and toward the window. I’ve used this technique for years, and it’s remarkably effective.
Common Mistakes to Avoid
After helping friends and family with their ceiling fan cleaning over the years, I’ve noticed some common mistakes that can make the job harder or even damage your fan. Here’s what to avoid:
Using Harsh Chemicals: Bleach, ammonia, and abrasive cleaners can damage blade finishes and corrode metal components. Stick with vinegar solutions or mild dish soap. I’ve seen beautiful wood blades ruined by harsh chemicals that stripped the finish right off.
Forgetting to Turn Off Power: This is a serious safety issue. Always turn off the fan at the switch, and I recommend flipping the circuit breaker for extra protection. Cleaning a moving fan isn’t just dangerous, it’s practically impossible to do thoroughly.
Over-Wetting the Blades: Excess moisture can run down into the motor housing and cause electrical issues or rust. Your cleaning cloth should be damp, not dripping. I’ve had to replace a fan motor because water seeped in during cleaning, and it’s an expensive mistake that’s completely preventable.
Ignoring the Motor Housing: Dust buildup in the motor vents reduces efficiency and can cause overheating. Always include the motor housing in your cleaning routine. A can of compressed air followed by a wipe-down with a dry cloth takes less than a minute and extends your fan’s lifespan.
Skipping Regular Maintenance: Waiting until you can see thick dust makes the job much harder. Clean your fans every 2-3 months, and the process takes just 5-10 minutes. Let them go for a year, and you’ll spend 30-45 minutes dealing with accumulated grime.
Using the Wrong Tools: Feather dusters just spread dust around, and paper towels leave lint behind. Invest in quality microfiber cloths and the right tools for your ceiling height. The right tools make the difference between a 10-minute job and a frustrating 45-minute ordeal.
Frequently Asked Questions
What is the easiest way to clean ceiling fans?
The pillowcase method is by far the easiest and most mess-free technique. Simply slide an old pillowcase over each fan blade, then pull it toward you while trapping the blade between your fingers through the fabric. All the dust stays inside the pillowcase instead of falling on your furniture. Take the pillowcase outside and shake it out, or toss it in the wash. This method takes about 30-60 seconds per blade and creates virtually no mess.
What are some common mistakes when cleaning a fan?
The most common mistakes include using harsh chemicals that damage blade finishes, forgetting to turn off the fan before cleaning, over-wetting blades which can cause water to drip into the motor, and ignoring the motor housing which affects efficiency. Another frequent error is using feather dusters that just spread dust around instead of removing it. Many people also wait too long between cleanings, making the job much harder than necessary.
Can I spray WD-40 on a ceiling fan?
No, you should never spray WD-40 or any lubricant directly on ceiling fan blades. WD-40 attracts dust and creates a sticky residue that’s harder to clean than regular dust. While WD-40 can be used sparingly on squeaky bearings in the motor housing (if accessible), it should never be applied to blades or external components. If your fan is making noise, the issue is usually dust buildup or loose screws, not a lack of lubrication.
How to clean a ceiling fan in 60 seconds?
For a quick 60-second clean, use the pillowcase method on all blades without applying any cleaning solution. Simply slide the pillowcase over each blade and pull it toward you to trap the dust. This works best for regular maintenance every 1-2 months when dust accumulation is light. For faster results, use a slightly damp pillowcase which captures dust more effectively. Just remember that a 60-second clean is for maintenance, not for neglected fans with heavy buildup.
Conclusion
Learning how to clean ceiling fans properly is one of those household skills that pays dividends every time you flip the switch. A clean fan runs more efficiently, lasts longer, and most importantly, doesn’t circulate dust and allergens throughout your home. I’ve noticed a significant improvement in my home’s air quality since I started following a regular cleaning schedule.
The pillowcase method remains my go-to technique for regular maintenance, while the vinegar solution handles deeper cleaning and greasy buildup. For high ceilings, investing in a quality extendable duster is safer than precarious ladder arrangements and worth every penny. Whatever method you choose, the key is consistency rather than intensity, cleaning every 2-3 months instead of waiting until the dust is visibly thick.
Your ceiling fans work hard year-round to keep your home comfortable and energy-efficient. Taking 15 minutes every couple of months to clean them properly is a small investment that pays off in better air quality, lower energy bills, and fans that look and perform like new. Plus, there’s something satisfying about looking up at a perfectly clean fan blade, knowing you won’t be dusting your furniture again tomorrow.
Leave a Reply