
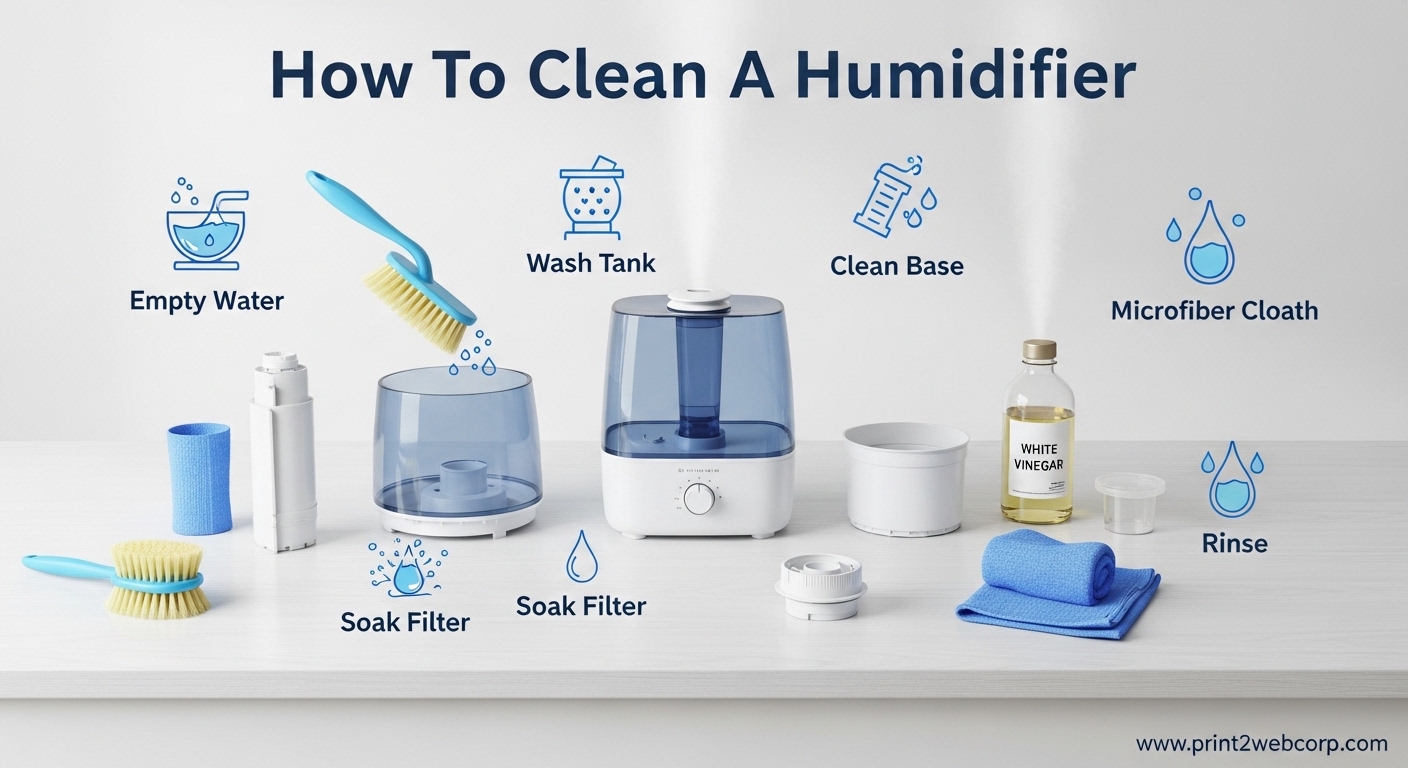
A dirty humidifier can be worse than no humidifier at all. I’ve seen firsthand what happens when these devices are neglected: mold spores, bacteria colonies, and mineral deposits get dispersed into the very air you’re trying to improve. Learning how to clean a humidifier properly isn’t just about maintenance—it’s about protecting your health.
In this guide, I’ll walk you through everything you need to know about humidifier cleaning. You’ll learn the daily habits that prevent buildup, the weekly vinegar routine that removes mineral deposits, and the monthly disinfecting protocol that keeps harmful microbes at bay.
Whether you have a cool mist ultrasonic unit, a warm mist vaporizer, or an evaporative model with a wick filter, these methods will keep your humidifier running safely and effectively. Let’s get started.
Why Cleaning Your Humidifier Matters
A humidifier’s warm, moist environment is exactly what mold and bacteria need to thrive. When you skip cleaning, you’re essentially creating a petri dish that aerosolizes contaminants into your living space.
The health risks are real. Mold spores can trigger allergic reactions and asthma attacks. Bacteria like Legionella can cause serious respiratory infections. Even mineral buildup from hard water creates fine white dust that irritates lungs and settles on furniture.
I’ve heard from many people who developed persistent coughs or worsening allergies, only to discover their humidifier was the culprit. The good news? All of this is completely preventable with regular cleaning.
Signs Your Humidifier Needs Cleaning
Your humidifier will give you clear signals when it’s time for a cleaning session. Watch for these warning signs:
A musty or unpleasant smell coming from the unit is the most obvious indicator. This usually means mold or bacteria have established themselves somewhere in the system.
Visible pink or black slimy film in the tank or base is mold growth—this needs immediate attention. White crusty deposits around openings or in the water tank are mineral buildup from hard water.
Reduced mist output or gurgling sounds can indicate scale clogging the system. If anyone in your home experiences increased allergy symptoms or respiratory issues while the humidifier runs, it’s time for a thorough cleaning.
What You’ll Need to Clean Your Humidifier
Before diving into the cleaning process, gather these supplies. Most are already in your home:
White vinegar is the star of humidifier cleaning. Its acidity dissolves mineral deposits and kills many types of mold and bacteria. Use distilled white vinegar for best results.
Unscented bleach or hydrogen peroxide handles the heavy-duty disinfecting. Bleach is more effective against a broad range of pathogens, but hydrogen peroxide is a good alternative if you prefer to avoid chlorine.
A soft-bristle brush, old toothbrush, or sponge helps scrub away stubborn deposits. For narrow openings, a pipe cleaner or bottle brush works well.
Clean, soft cloths or paper towels for wiping and drying. You’ll also need access to a sink for rinsing and a clean, dry surface for air drying parts.
Distilled water for refilling is highly recommended. Tap water contains minerals that create scale buildup, so using distilled water extends time between cleanings and reduces white dust.
Optional Supplies
For particularly stubborn mineral deposits, citric acid powder works even better than vinegar. Dissolve 1-2 tablespoons in hot water and soak affected parts.
Commercial humidifier cleaning solutions and bacteriostatic treatments are available. Products like Protec Humidifier Cleaner can help between deep cleanings, but they don’t replace regular disinfecting.
How Often Should You Clean Your Humidifier?
The frequency depends on how often you use your humidifier and your water quality. Here’s a schedule that works for most situations:
Daily: Empty, rinse, and dry. This takes just 2-3 minutes and prevents most problems before they start. Never let water sit in the unit when not in use.
Weekly: Deep clean with vinegar. This removes mineral buildup and light contamination. Weekly cleaning is essential if you run your humidifier daily.
Monthly: Disinfect with bleach or hydrogen peroxide. This kills any bacteria or mold that might have survived the vinegar treatment. Monthly disinfecting is non-negotiable for health safety.
Seasonally: Before storing away for spring/summer, do a complete cleaning and inspection. When bringing it out for fall/winter, clean again before first use.
If you have hard water, visible scale buildup, or notice any smells, increase the cleaning frequency. Some users in hard water areas find they need to descale weekly rather than monthly.
Daily Maintenance: The 3-Minute Routine
I can’t stress this enough: daily maintenance is the single most important habit for humidifier care. It prevents the problems that require deep cleaning.
Every day when you turn off your humidifier, empty any remaining water completely. Don’t let water sit overnight—this is when microorganisms multiply rapidly.
Rinse the water tank with fresh water. Swish it around to remove any film or residue. For ultrasonic humidifiers, also rinse the base where water sits.
Wipe all surfaces dry with a clean cloth or let them air dry completely. Moisture is the enemy, and allowing parts to dry fully prevents microbial growth.
When refilling, use fresh water each time. Never top off existing water—always empty and start fresh. If you can, use distilled water to minimize mineral deposits.
This simple routine takes less than three minutes but saves you hours of deep cleaning later. Make it part of your daily habit, like brushing your teeth or making coffee.
How To Clean A Humidifier With Vinegar (Weekly Deep Clean)
Vinegar is your first line of defense against mineral buildup and light microbial growth. Its acetic acid dissolves limescale and creates an environment hostile to many bacteria and mold species.
Step 1: Disassemble and Empty
Start by unplugging your humidifier completely. Safety first—water and electricity don’t mix.
Remove all detachable parts: water tank, cap, base, and any removable filters. Empty any remaining water down the drain.
Check your owner’s manual to identify which parts are removable. Some models have components that shouldn’t be submerged or removed.
Step 2: Prepare the Vinegar Solution
Mix a solution of equal parts white vinegar and water. For most humidifiers, you’ll need about 2-4 cups total.
Pour the solution into the water tank. If your tank is large, you may need more solution to reach the affected areas. The goal is to have enough liquid to cover all scaled surfaces when swished.
Step 3: Soak and Swish
Let the vinegar solution sit in the tank for 30 minutes to an hour. This gives the acid time to break down mineral deposits.
After soaking, swish the solution vigorously to scrub the interior surfaces. The movement helps dislodge loosened scale.
For stubborn buildup, add undiluted vinegar directly to problem areas and let it sit longer. Some users soak overnight for heavily scaled units.
Step 4: Scrub Problem Areas
Use your soft brush or old toothbrush to scrub away visible deposits. Pay special attention to corners, crevices, and any narrow openings.
For the base and other parts, you can either soak them in the vinegar solution or wipe them down with a vinegar-soaked cloth.
Be gentle with seals and gaskets—scrubbing too hard can damage them. A toothbrush is perfect for getting into tight spaces without applying excessive pressure.
Step 5: Rinse Thoroughly
This step is crucial. Rinse all parts with clean water multiple times until you can no longer smell any vinegar odor.
For the tank, fill and empty at least three times. Residual vinegar can damage some humidifier components and affect the mist quality.
Wipe down all parts with a clean cloth or let them air dry completely. Never reassemble your humidifier while parts are still damp.
Step 6: Reassemble and Test
Once everything is completely dry, reassemble your humidifier according to the manufacturer’s instructions.
Fill with fresh distilled water and run the unit for a few minutes in a well-ventilated area. This flushes out any remaining vinegar residue and ensures everything is working properly.
Your humidifier is now clean and ready for another week of use. Repeat this process weekly, and you’ll avoid most serious problems.
Monthly Disinfecting: How To Sanitize With Bleach
Vinegar is great for descaling, but bleach is what actually kills harmful microorganisms. Monthly disinfecting is essential for health safety, especially if anyone in your home has respiratory issues.
Safety First
Before working with bleach, protect yourself. Work in a well-ventilated area to avoid fumes. Wear rubber gloves to protect your skin.
Never mix bleach with vinegar or other cleaning products. This creates toxic chlorine gas. Use bleach separately, on a different day if possible.
Keep bleach away from clothes and surfaces you don’t want to bleach. Wipe up spills immediately.
Step 1: Prepare the Bleach Solution
The EPA recommends a solution of 1 part bleach to 10 parts water for disinfecting humidifiers. For a typical humidifier tank, this means about ½ teaspoon of bleach per ½ gallon of water.
Use unscented regular bleach (not concentrated or splashless) for best results. Measure carefully—more bleach isn’t better and can leave harmful residues.
Step 2: Fill and Coat
Pour the bleach solution into the water tank. Replace the cap and gently swirl to coat all interior surfaces.
Let the solution sit for 15-20 minutes. This gives the bleach time to kill bacteria, mold, and any other microorganisms.
Step 3: Clean All Parts
While the tank soaks, use the bleach solution to clean the base and other removable parts. You can soak smaller parts or wipe down larger components.
Pay special attention to any areas where water sits or accumulates. These are prime locations for microbial growth.
Step 4: Rinse Extensively
Rinsing is the most critical step after bleach cleaning. Residual bleach can damage your humidifier and release harmful fumes when the unit runs.
Rinse the tank at least 4-5 times with clean water. Fill, swish, empty—repeat until you cannot detect any bleach smell.
Rinse all other parts equally thoroughly. Don’t rush this step—proper rinsing takes time but is essential for safety.
Step 5: Dry Completely
Wipe all parts with clean towels and let them air dry in a well-ventilated area. Never put parts away damp.
Ensure all crevices and narrow openings are completely dry. Moisture trapped in small spaces is a recipe for mold growth.
Alternative: Hydrogen Peroxide Method
If you prefer to avoid bleach, hydrogen peroxide is an effective alternative. Use 3% hydrogen peroxide (the standard concentration sold in stores).
Add about 3 ounces of hydrogen peroxide per quart of water in the tank. Let it sit for 30 minutes, then rinse thoroughly. Hydrogen peroxide breaks down into water and oxygen, making it safer for residual concerns.
However, hydrogen peroxide is generally less effective than bleach against certain types of mold and bacteria. For households with immunocompromised individuals, bleach remains the recommended choice.
Filter Maintenance and Replacement
Filters require special attention because they’re designed to trap contaminants—making them prime breeding grounds for microbial growth if not maintained properly.
Evaporative Humidifier Wick Filters
Wick filters in evaporative humidifiers cannot be fully cleaned and should be replaced every 1-2 months, depending on use and water quality.
Between replacements, you can extend filter life by removing it weekly and rinsing with clean water. Gently squeeze out excess water—never wring or twist the filter, as this damages the internal structure.
Let the filter air dry completely before reinstalling. A damp filter encourages mold growth.
If your filter develops a moldy smell or visible mold growth, replace it immediately. Cleaning a moldy filter is rarely effective and can spread spores.
Ultrasonic Humidifier Filters
Many ultrasonic humidifiers have a small foam or mesh filter near the water intake. These can usually be cleaned rather than replaced.
Remove the filter weekly and rinse with clean water. For deeper cleaning, soak in vinegar solution for 15 minutes, then rinse thoroughly.
Allow to air dry completely before reinstalling. If the filter becomes torn or heavily mineralized, replace it according to manufacturer guidelines.
Permanent Ceramic or Metal Filters
Some higher-end humidifiers feature permanent filters made of ceramic or metal. These can be cleaned and reused indefinitely.
Remove the filter and rinse with clean water weekly. For mineral buildup, soak in vinegar solution for an hour, then scrub gently with a soft brush.
Rinse thoroughly and air dry before reinstalling. Inspect for cracks or damage annually and replace if compromised.
When to Replace Any Filter
Replace filters immediately if you notice: persistent odors that don’t go away after cleaning, visible mold growth that can’t be removed, reduced humidifier performance, or physical damage like tears or crumbling.
Using old, dirty filters defeats the purpose of having a humidifier. They can release trapped contaminants back into the air and reduce unit efficiency.
Troubleshooting Common Humidifier Problems
Even with regular maintenance, issues can arise. Here are solutions to the most common humidifier problems I’ve encountered.
Why Does My Humidifier Smell Bad?
A musty or moldy smell indicates microbial growth. This usually happens when water has been left sitting in the unit or cleaning has been neglected.
Immediate action is required. Empty the unit and perform a full bleach disinfection. Let the bleach solution sit for 30 minutes instead of the usual 15-20 to ensure thorough killing of microorganisms.
Rinse extremely thoroughly—5-6 times minimum. After reassembling, run the unit in a well-ventilated area for 30 minutes to air out any residual bleach smell.
If the smell persists after cleaning, check for mold in hidden areas like inside the cap or in narrow tubes. You may need to use a bottle brush to reach these spots.
How To Clean a Humidifier That Has Been Sitting
If you’ve neglected your humidifier for weeks or months, it needs extra attention. Don’t just run it—this can release accumulated contaminants.
Start with a visual inspection. If you see visible mold or heavy scale, put on gloves and clean carefully to avoid dispersing spores.
Perform the vinegar cleaning, but extend soaking time to 2-3 hours or overnight. This gives the acid more time to break down heavy deposits.
Follow with a thorough bleach disinfection, extending the soak time to 30 minutes. Rinse more times than usual—at least 6-7 complete rinses.
After cleaning, inspect all parts. If any components are heavily damaged or corroded, replacement may be safer than continued use.
Hard Water Deposits: Dealing with Stubborn Scale
Hard water leaves white mineral deposits that can be difficult to remove. If vinegar alone isn’t working, try citric acid.
Dissolve 1-2 tablespoons of citric acid powder in hot water. Pour into the tank and let sit for 1-2 hours. The acid dissolves even stubborn scale.
For extremely stubborn deposits, make a paste with baking soda and water. Apply to scaled areas, let sit for 15 minutes, then scrub with a brush.
Prevent future buildup by using distilled water exclusively. The small extra cost saves significant cleaning time and extends your humidifier’s lifespan.
Reduced Mist Output
If your humidifier isn’t producing as much mist as usual, mineral buildup may be clogging the system. This is especially common in ultrasonic models with a nebulizer.
Check the nebulizer (the metal plate in ultrasonic models) for white crusty deposits. Clean carefully with a soft cloth and vinegar solution—be gentle not to damage the delicate surface.
For evaporative models, check if the wick filter is heavily mineralized. A clogged filter can’t wick water effectively. Replacement may be necessary.
Also check that the water level is adequate and that all components are properly seated. Sometimes reduced output is simply due to improper assembly after cleaning.
How to Store Your Humidifier Between Seasons
Proper storage prevents problems when you bring your humidifier out next season. A little preparation now saves headaches later.
Before storing, perform a complete cleaning routine. Start with the vinegar descaling, then do a full bleach disinfection. This ensures no microorganisms survive months of storage.
Rinse more thoroughly than usual—7-8 times minimum. Any cleaning solution residue will be much harder to remove after sitting for months.
Dry everything completely. Use fans or air drying in a sunny spot if possible. Every drop of water must be evaporated before storage.
Remove and store filters separately. Wick filters should be discarded and replaced with fresh ones next season. Permanent filters should be cleaned, dried, and stored in a breathable bag.
Leave caps and compartments open during storage. This prevents moisture from getting trapped and allows air circulation.
Store in a cool, dry place away from direct sunlight. Avoid damp basements or hot attics. A closet in a temperature-controlled room is ideal.
When bringing your humidifier out of storage, inspect it carefully before use. Check for any mold growth that may have developed despite your precautions. If in doubt, clean again before running.
Frequently Asked Questions
Can I run vinegar through my humidifier to clean it?
Running vinegar through your humidifier is not recommended. While vinegar is excellent for cleaning, running it through the system can leave residue in the nebulizer or other internal components that’s difficult to remove. Instead, use vinegar for soaking and swishing, then rinse thoroughly. The vinegar method works by descaling through contact, not by running through the unit. Always rinse multiple times after vinegar cleaning to remove all traces before running the humidifier with clean water.
Should I use a humidifier if I have COPD?
People with COPD should consult their doctor before using a humidifier. While humidified air can help some respiratory conditions, it can worsen others depending on the specific condition and humidity levels. If you have COPD and use a humidifier, meticulous cleaning is even more critical because your lungs may be more sensitive to mold and bacteria. Consider a humidistat to monitor humidity levels, aiming for 30-50% relative humidity. Never exceed 50% as higher humidity can encourage dust mites and mold growth, which can trigger COPD symptoms.
Can I use Dawn to clean my humidifier?
Yes, you can use Dawn dish soap to clean your humidifier as part of the regular cleaning process. A mild dish soap like Dawn is effective for removing surface grime and some organic buildup. However, soap alone won’t descale mineral deposits or thoroughly disinfect. Use soap as a first step for general cleaning, then follow with vinegar for descaling and bleach for disinfecting. Always rinse extremely thoroughly after using soap to prevent sudsy residue from being dispersed into the air when the humidifier runs.
How often should I clean my humidifier?
Clean your humidifier daily by emptying, rinsing, and drying all parts—this takes 2-3 minutes. Perform a deep clean with vinegar weekly to remove mineral buildup. Disinfect with bleach monthly to kill bacteria and mold. If you have hard water, notice visible scale, or detect any odors, increase the cleaning frequency. Some users in hard water areas descale weekly and disinfect bi-weekly. The key is consistency—regular light cleaning prevents the need for difficult deep cleaning later.
Why does my humidifier smell bad?
Bad odors usually indicate mold or bacterial growth in the unit. This happens when water is left standing or cleaning is neglected. A musty smell means it’s time for immediate cleaning. Empty the unit and perform a full bleach disinfection, letting the solution sit for 30 minutes. Rinse thoroughly 5-6 times to remove all bleach residue. Check for mold in hidden areas like the cap or narrow tubes. After cleaning, run the unit in a well-ventilated area for 30 minutes before regular use. Prevent future odors by maintaining daily emptying and rinsing habits.
Conclusion
Learning how to clean a humidifier is one of the most important maintenance tasks for a healthy home. The daily routine of emptying, rinsing, and drying takes just minutes but prevents most serious problems.
Weekly vinegar cleaning removes the mineral buildup that affects performance and releases white dust. Monthly bleach disinfecting protects your family from harmful mold and bacteria that can thrive in moist environments.
By following this cleaning schedule, you’ll enjoy all the benefits of humidified air—softer skin, fewer respiratory issues, less static electricity—without the health risks of a neglected unit.
Your humidifier works hard to improve your indoor air quality. Return the favor with regular cleaning, and it will provide years of safe, effective service. Here’s to breathing easier in 2026.
Leave a Reply