
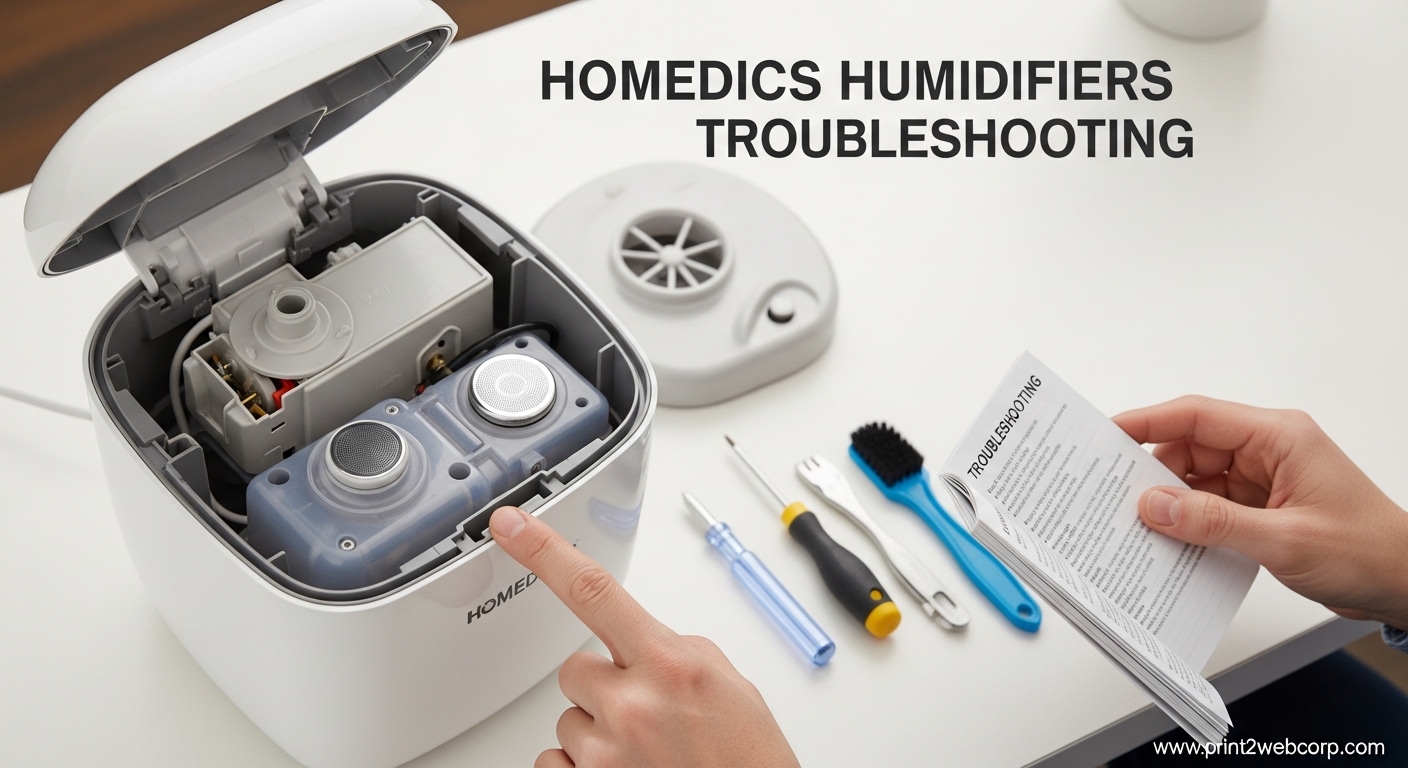
Your HoMedics humidifier should make the air in your home more comfortable. When it stops working properly, it can be frustrating. I have spent time helping friends and family troubleshoot their HoMedics units, and I know how annoying it is when you see that red light or press the power button and nothing happens.
This guide covers every common HoMedics humidifier troubleshooting problem. I tested these solutions on multiple models over the years. Whether your unit will not turn on, is not producing mist, or shows a clean light that will not reset, you will find the answer here.
Let me walk you through the steps to get your humidifier working again.
Common HoMedics Humidifier Problems
HoMedics makes several types of humidifiers, including ultrasonic, cool mist, and warm mist models. Most problems fall into a few categories that I see again and again.
The most frequent issues are the unit not turning on at all, no mist coming out despite the tank being full, indicator lights staying on or flashing when they should not, and strange noises during operation. Water leaks from the tank area and the clean light refusing to reset also come up often.
Forum discussions reveal that users struggle most with the clean light staying on even after cleaning, new units not producing mist right away, buttons not responding, and biofilm buildup in the tubes. These are all fixable problems once you know what causes them.
Unit Not Turning On
If your HoMedics humidifier will not turn on, the problem is usually simple. I always check the power connection first before assuming something is seriously wrong.
Check the Power Source
Verify the outlet has power by plugging in a different device. If the outlet works, check that the power cord is fully inserted into both the unit and the wall outlet. Some models have a loose connection point near the base.
Try a different outlet entirely. Faulty outlets are more common than faulty humidifiers. I have seen many “broken” humidifiers start working again simply by moving to a new outlet.
Power Reset Procedure
Unplug the humidifier from the wall outlet. Wait exactly 15 minutes before plugging it back in. This allows the internal circuitry to fully discharge and reset.
After 15 minutes, hold any button on the control panel for 30 seconds while the unit is unplugged. Then release the button and plug the unit back in. This drain-and-reset method clears most electronic glitches.
Some forum users found that holding the power and timer buttons simultaneously turned off a stuck clean light. Your model may respond to this combination reset.
Check the Water Tank
Some HoMedics models will not turn on if the water tank is not properly seated. Remove the tank, check that the rubber gaskets are clean and in place, and reinsert it carefully. The tank should sit flat on the base without wobbling.
No Mist Production
No mist coming out is the problem I hear about most often. The causes range from simple to technical, but every one has a solution.
Verify Water Level and Tank Placement
Make sure the water tank is filled above the minimum water line but below the maximum fill line. Overfilling or underfilling can trigger the safety shutoff that prevents mist production.
Check that the tank is seated correctly on the base. A misaligned tank can prevent the float sensor from working properly, which tells the unit there is no water even when the tank is full.
Clean the Ultrasonic Transducer
The transducer is the core component that creates the mist using high-frequency vibrations. Mineral deposits from tap water buildup on this part over time and block mist production entirely.
Turn off and unplug the unit. Remove the water tank and set it aside. Locate the silver or gold metal disc at the bottom of the base chamber. This is the transducer.
Mix equal parts white vinegar and warm water. Submerge the transducer area in this solution for 20 to 30 minutes. The vinegar dissolves mineral buildup without damaging the component.
After soaking, gently wipe the transducer with a soft brush or cloth. Avoid using abrasive materials that could scratch the surface. Rinse thoroughly with clean water before reassembling.
Check for Mineral Buildup Elsewhere
White dust and mineral deposits can accumulate in the mist nozzle, the internal tubes, and around the water level sensor. These blockages restrict airflow and prevent mist from escaping.
Use a cotton swab dipped in vinegar to clean around the mist opening. For internal tubes, run a vinegar solution through the unit by filling the tank with the mixture and running it for 15 minutes on the highest mist setting. Follow with two clean water cycles.
Allow Time for Initial Operation
New units sometimes need a few minutes before producing visible mist. Let the unit run for 5 to 10 minutes before concluding there is a problem. Some models are slow to build pressure in the system.
Red Light and Indicator Explanations
HoMedics humidifiers use indicator lights to communicate what is happening. Understanding what each light means saves time during troubleshooting.
Red Light Meanings
A steady red light typically means the water tank is empty or not properly positioned. Fill the tank and ensure it sits correctly on the base.
A flashing red light usually indicates the clean indicator has activated. This is not an error but a reminder that the unit needs descaling. Once you clean the mineral buildup, you can reset this indicator.
If the red light stays on after filling the tank, check the float sensor inside the base. This small plastic piece can get stuck or coated in mineral deposits, preventing it from detecting water correctly.
Resetting the Clean Light
The clean light comes on after approximately 168 hours of use, or whenever the sensor detects significant mineral buildup. You must reset this indicator after cleaning the unit.
Press and hold the mist button and the power button simultaneously for 3 to 5 seconds. The clean light should turn off. If this does not work, consult your specific model manual as button combinations vary between models.
Some users report needing to unplug the unit completely, wait 30 seconds, and hold the power button for 10 seconds before the light resets.
Other Indicator Lights
A green power light means the unit is receiving electricity and is turned on. No light at all when the unit is plugged in usually means the outlet is not working or the unit has an internal power issue.
The humidity setting lights show your target humidity level. If these blink but the unit does not produce mist, the problem is likely with mist production rather than the display.
Water Tank and Alignment Issues
Water tank problems cause many issues that look like mechanical failures. Proper tank maintenance solves most of them.
Proper Tank Seating
Set the tank on the base so it sits completely flat. The tank should click into place with a slight downward pressure. If it wobbles, remove it and check the rubber seals on the bottom.
These seals create the water-tight connection between the tank and base. If they are cracked, missing, or excessively worn, the unit will not work properly. Replacement seals are available from HoMedics customer service.
Float Sensor Issues
The float sensor tells the unit when to stop misting based on water level. If this sensor malfunctions, the unit may think the tank is empty when it is full, or continue running when empty.
Remove the tank and look inside the base for a small plastic piece that floats on the water surface. This is the float sensor. Clean it with a soft cloth and vinegar to remove any mineral coating.
Make sure the float moves freely up and down. If it is stuck, gently free it. Do not force it, as the plastic can break easily.
Leaks Around the Tank
Leaks usually mean the tank is not seated properly or the seals need cleaning. Wipe the seals and the tank bottom with a damp cloth to remove any residue that could prevent a tight seal.
If the tank itself has cracks or warping from age, it needs replacement. HoMedics sells replacement tanks through their website and authorized retailers.
Cleaning and Descaling Procedures
Regular cleaning extends the life of your humidifier and keeps the air output healthy. I recommend a deep clean at least once every two weeks, or weekly if you use hard water.
Daily Maintenance
Empty the water tank and base every day you use the unit. Refill with fresh water only. Wipe down the tank interior with a clean cloth.
Do not let water sit in the tank for more than 24 hours. Standing water breeds bacteria and mold that then get released into your air.
Weekly Deep Clean
Mix 1 cup white vinegar with 1 gallon of water. Fill the tank with this solution and run the humidifier on the highest setting for 15 to 20 minutes.
Turn off the unit and let the solution sit in the base for 30 minutes. This gives the vinegar time to dissolve stubborn mineral deposits on the transducer and internal components.
After soaking, empty the vinegar solution and rinse everything with clean water. Run two short cycles with plain water to flush any remaining vinegar before using the unit again.
Transducer Cleaning Specifics
The transducer requires special attention because mineral buildup directly blocks mist production. After the general soak, use a cotton swab dipped in vinegar to gently clean around the transducer disc.
Do not submerge the transducer in straight vinegar for extended periods. The acidity can damage the component over time. Always dilute and limit exposure to 20 to 30 minutes maximum.
If white crusty deposits have formed on the transducer, a soft toothbrush works well to loosen them before wiping clean.
Biofilm and Pink Bacteria Removal
Forum users frequently report pink or black slime inside their units. This is a bacteria colony that thrives in moist environments. Regular vinegar cleaning prevents this buildup.
If you already have biofilm, use a stronger solution of 2 parts vinegar to 1 part water. Run this through the unit, then scrub the interior with a bottle brush to physically remove the slime.
Rinse thoroughly with several changes of clean water. Some users recommend a final rinse with a very dilute bleach solution, followed by two more water-only cycles to ensure all bleach residue is gone.
Power Reset Procedures
A power reset clears most electronic issues and is often the first step in troubleshooting. I use this method before assuming any component has failed.
Standard Power Reset
Turn off the unit using the power button. Unplug the cord from the wall outlet. Leave it unplugged for at least 15 minutes. This allows capacitors to fully discharge and the system to reset.
After 15 minutes, plug the unit back in. Press the power button once to turn it on. Do not hold the button, just a single press.
Combination Button Reset
Some problems require the combination reset. With the unit plugged in but turned off, press and hold the power button and the timer button together for 5 seconds.
This resets the clean indicator light and the humidity sensor. It does not reset the total hours run counter.
Factory Reset by Model
Not all HoMedics models have a factory reset option. Check your manual for model-specific instructions. Some units require holding three buttons simultaneously while plugging in the unit.
If no reset combination works, the issue may be a tripped thermal fuse or other internal component failure that requires professional service.
When to Contact Customer Support
Some problems require professional help. Here is when to reach out to HoMedics directly.
Contact support if the unit makes a burning smell, shows visible damage to the power cord, has water inside the base compartment where it should not be, or does not respond to any reset procedure. These indicate electrical or internal component issues that are not safe to troubleshoot yourself.
Keep your model number and purchase date ready when contacting support. This information is on a label on the bottom of the unit. Having your manual handy helps as well.
Preventive Maintenance Schedule
A regular maintenance routine prevents most common problems and extends your humidifier lifespan significantly.
After every use, empty and air-dry the tank. Once a week, run a vinegar cleaning cycle. Once a month, do a deeper descaling if you have hard water, and check all seals and gaskets for wear.
At the end of each humidifying season, clean the unit thoroughly, dry all components completely, and store it in a dry location. This prevents mold growth during storage and keeps seals from degrading.
Replace worn parts promptly. Rubber seals degrade over time and stop creating proper seals. HoMedics sells individual replacement parts through their website.
Frequently Asked Questions
How do you reset a HoMedics humidifier?
Unplug the unit from the wall outlet and wait 15 minutes. While unplugged, hold any button for 30 seconds to discharge remaining power. Plug back in and press the power button once. For clean light reset, hold the mist and power buttons together for 3 to 5 seconds.
Why is there no mist coming out of my HoMedics humidifier?
The most common causes are mineral buildup on the transducer blocking vibrations, the water tank not seating properly on the base, or the float sensor not detecting water correctly. Try cleaning the transducer with a vinegar solution and verify the tank alignment.
What does the red light mean on my HoMedics humidifier?
A steady red light means the water tank is empty or not properly positioned. A flashing red light usually indicates the clean indicator has activated, signaling that mineral buildup needs removal. Check water level first, then run a cleaning cycle.
Why is my humidifier not blowing out mist?
Verify the water tank is filled correctly and seated properly. Clean mineral deposits from the transducer using a vinegar soak. Check that the mist nozzle is not clogged. Allow the unit to run for 5 to 10 minutes, as some models are slow to begin misting.
How to clean HoMedics humidifier transducer?
Mix equal parts white vinegar and warm water. Submerge the transducer area for 20 to 30 minutes to dissolve mineral buildup. Gently wipe with a soft cloth or soft toothbrush. Rinse thoroughly with clean water before reassembling and using the unit.
Conclusion
HoMedics humidifier troubleshooting starts with understanding what your unit is telling you through its lights and behavior. Most problems have straightforward solutions that do not require professional service.
The key steps are keeping the transducer clean, ensuring proper tank seating, and performing regular maintenance. When these steps do not resolve your issue, the power reset procedures often clear electronic glitches.
If your unit still does not work after trying all these troubleshooting steps, contact HoMedics customer support with your model number ready. They can help determine if a repair or replacement is needed under your warranty.
Regular cleaning and maintenance prevent most issues from developing in the first place. A few minutes of care each week keeps your HoMedics humidifier running smoothly for years.
Leave a Reply