
When your air conditioner stops working on a 95-degree day, every minute without cool air feels like an hour. I’ve been there, and I know that sinking feeling when you realize something’s wrong with your AC. Before you panic and call an expensive emergency service call, there’s good news: most air conditioner problems have simple fixes you can handle yourself.
Air conditioner troubleshooting isn’t as complicated as it sounds. HVAC professionals will tell you that nine times out of ten, AC issues boil down to a handful of common causes. A dirty filter here, a tripped breaker there, maybe a thermostat that needs fresh batteries. I’ve spent years researching HVAC systems and talking to technicians, and I’m going to walk you through exactly how to diagnose and fix the most common AC problems.
In this comprehensive air conditioner troubleshooting guide, you’ll learn what’s actually happening when your AC acts up, which problems are safe to fix yourself, and when it’s time to call in a professional. We’ll cover everything from units that won’t turn on to strange noises, water leaks, and that dreaded warm air blowing when you need cold air the most. Let’s get your home comfortable again.
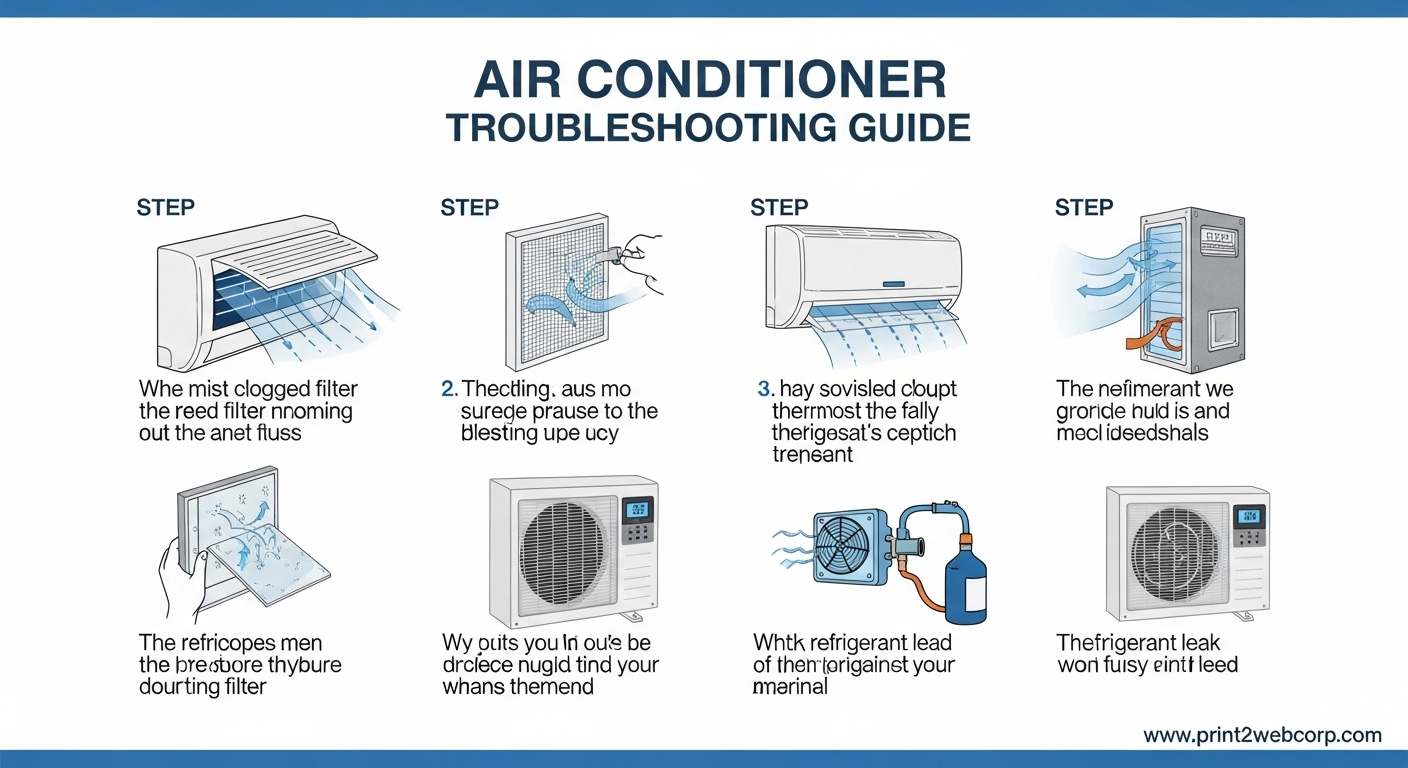
5 Things to Check First (Quick Diagnosis)
Before diving into complex troubleshooting, start with these five quick checks. HVAC technicians tell me they’ve made countless service calls only to find one of these simple issues. These take less than five minutes total and could save you a $100+ service fee.
First, check your thermostat. Is it set to “cool” mode? Is the temperature set lower than the current room temperature? I know this sounds obvious, but you’d be surprised how many people accidentally bump their thermostat or forget to switch from heat to cool when seasons change. If your thermostat uses batteries, check those too. Dead thermostat batteries are a sneaky common cause of AC problems.
Second, inspect your air filter. A dirty or clogged air filter is the number one cause of AC problems. Pull it out and hold it up to a light source. If you can’t see light through it, it’s restricting airflow and needs replacement. This simple $15 fix solves a surprising number of AC issues. I recommend checking your filter monthly and changing it at least every 90 days.
Third, head to your electrical panel and look for a tripped breaker. Your AC has its own dedicated circuit, and if it’s overloaded, the breaker will trip. Look for a breaker that’s in the middle position or switched to “off.” Flip it fully off, wait 30 seconds, then flip it back on. If it trips again immediately, you have an electrical issue that needs professional attention.
Fourth, check your outdoor unit. Is it covered in debris like leaves, grass clippings, or dirt? The condenser unit needs clear airflow to work properly. Clear away any debris on or around the unit. Also make sure plants are at least two feet away from the unit. I’ve seen many AC struggles caused simply by overgrown shrubs blocking airflow.
Fifth, verify your air vents are open and unobstructed. Walk through your home and check each vent register. I’ve seen cases where furniture, curtains, or rugs were blocking vents, reducing cooling efficiency. Make sure all supply and return vents are fully open and not blocked by anything.
Air Conditioner Troubleshooting: AC Not Turning On
Nothing’s more frustrating than an AC that won’t power on at all. You adjust the thermostat, set it to cool, and… nothing. No compressor hum, no fan blowing, just silence. Let’s systematically diagnose why your AC won’t turn on.
Start with your thermostat again, but this time go deeper. Check if the display is lit. If it’s blank, you might have dead batteries or a power supply issue to the thermostat itself. Try replacing the batteries first. If that doesn’t work, remove the thermostat from its wall plate and check for loose wiring. If you’re comfortable doing this safely, ensure wires are securely connected. If not, skip to the next step.
Check your circuit breaker again, but this time look at both the indoor and outdoor unit breakers. Some homes have separate breakers for the furnace/air handler and the outdoor condenser unit. Both need to be on for your AC to work. If either breaker is tripped, reset it and monitor. Frequent tripping indicates an electrical problem that requires professional diagnosis.
Locate your AC’s disconnect switch, usually mounted on the wall near your outdoor unit. This is a safety feature that allows technicians to cut power to the outdoor unit. Sometimes these switches get turned off accidentally or by someone who didn’t know what it was. Make sure the disconnect is properly engaged and the power is flowing to your outdoor unit.
Now let’s talk about capacitors. The start capacitor gives your AC compressor and fan motors the electrical jolt they need to start running. When capacitors fail, which is very common in AC units over 5 years old, your motors can’t start. This is why sometimes you’ll hear a faint humming sound but the fans won’t actually spin. Capacitor replacement is a relatively inexpensive repair ($100-200) but does require working with electrical components. If you’re not comfortable with this, it’s time to call a professional.
Your compressor itself might have failed, which is a more serious issue. Compressor failure typically happens in older units and costs $1,500-3,000 to replace. If your AC is over 10-12 years old and the compressor fails, you might want to consider replacement rather than repair. Many HVAC professionals recommend replacing the entire system when the compressor fails in an aging unit.
AC Running But Not Cooling
This is arguably the most common and frustrating AC problem: your unit is running, fans are spinning, but warm air is coming out of your vents instead of cool. I’ve dealt with this personally, and it’s miserable. The good news is that the causes are usually straightforward to identify.
A severely clogged air filter is often the culprit. When your filter is dirty, your AC struggles to pull air through the system. This causes multiple problems: reduced cooling efficiency, increased energy consumption, and can even cause your evaporator coil to freeze. I’ve seen filters so clogged they were literally sucked into the ductwork. Change that filter first, then run your AC for a few hours to see if cooling improves.
Low refrigerant is another major cause. Your AC doesn’t “use up” refrigerant like a car uses oil. It’s supposed to stay in the system indefinitely. If your refrigerant is low, you have a leak somewhere. Low refrigerant means your AC can’t absorb heat effectively, so you get weak cooling. Warning signs of low refrigerant include ice buildup on your refrigerant lines or outdoor unit, and hissing sounds. Refrigerant leaks require professional repair—handling refrigerant requires EPA certification and specialized equipment.
A frozen evaporator coil will also prevent cooling. When airflow is restricted (usually from a dirty filter) or refrigerant is low, the evaporator coil gets too cold and ice forms on it. Once ice builds up, air can’t flow through the coil at all. If you see ice on your indoor unit or refrigerant lines, turn off your AC immediately and let it thaw completely. Running it with a frozen coil can damage the compressor. After thawing, check your filter and call a professional if the problem recurs.
Dirty condenser coils on your outdoor unit can cause poor cooling too. These coils release the heat your AC has removed from your home. When they’re coated in dirt, grass, or debris, they can’t release heat efficiently. Clean your condenser coils annually using a garden hose and coil cleaner spray. Turn off power to the unit first, spray the coils with cleaner, let it sit 10-15 minutes, then gently rinse with the hose. Avoid using a pressure washer, which can damage the delicate fins.
Your ductwork might be the issue if you have central air. Leaky ducts can lose 20-30% of your cooled air before it ever reaches your living spaces. If some rooms cool well while others don’t, or if you notice uneven cooling throughout your home, duct issues might be to blame. Professional duct sealing and insulation can significantly improve cooling performance.
Air Conditioner Not Blowing Air
Your AC is running, but no air is coming out of the vents. This is different from not cooling—there’s literally no airflow at all. This typically points to issues with your air handler or blower system.
The blower fan motor might have failed or be overheating. If you hear your AC running but feel no air at any of your vents, your blower isn’t spinning. This could be a bad motor (replacement cost $300-600) or a bad run capacitor. Capacitors are inexpensive parts that commonly fail and cause motors not to start. A HVAC technician can test and replace a capacitor in under an hour.
A frozen evaporator coil can completely block airflow. As I mentioned earlier, when ice builds up on the coil, air can’t pass through. If your indoor unit looks like it has frost or ice on the copper lines or coil, turn off the AC and let it thaw. Check your air filter—a clogged filter is the most common cause of frozen coils. If the problem continues after replacing the filter, you may have low refrigerant or airflow issues that require professional diagnosis.
Sometimes the issue is as simple as a blocked return air vent. Your AC needs both supply air (blowing out) and return air (pulling in) to work properly. If all your return vents are blocked by furniture or closed off, the system can’t circulate air. Make sure nothing is blocking your return vents and that they’re fully open.
AC Leaking Water Inside
Water leaking from your AC can cause serious water damage to your home. I’ve seen ceilings collapsed from long-term AC leaks. The good news is that most AC water leaks have simple causes you can fix yourself.
A clogged condensate drain line is the most common cause. As your AC cools your home, it also removes humidity from the air. This moisture condenses on your evaporator coil and drips into a drain pan, then flows out through a drain line. Over time, algae, mold, and debris can clog this line, causing water to back up and overflow. To clear it, locate the drain line (usually a PVC pipe near your outdoor unit) and use a wet/dry vacuum to suck out the clog. You can also flush it with a mixture of bleach and water to kill algae.
A dirty air filter can cause water leaks too. When your filter is clogged, reduced airflow causes the evaporator coil to get too cold and freeze. When the AC eventually turns off, that ice melts and can overflow the drain pan. This is a vicious cycle: clogged filter causes freezing, which causes leaking when it thaws. Replace your filter and ensure the coil is completely thawed before running the AC again.
Your condensate pump might be failing if your AC unit is located in a basement. These pumps pump the water from your drain pan up and out of your home. When the pump fails, water backs up and overflows. Test your pump by pouring water into the drain pan—if it doesn’t pump out, the pump needs replacement.
For more detailed information on window air conditioner leaking water issues, which have some unique causes compared to central AC systems, check out our dedicated guide on that topic.
Strange AC Noises and What They Mean
Your AC should run relatively quietly—a gentle whoosh of air and a low hum from the outdoor unit. Strange sounds are your AC trying to tell you something’s wrong. Let me decode the most common AC noises and what they indicate.
Clicking sounds when your AC starts and stops are normal—that’s the relay switches engaging. But continuous clicking usually indicates a failing thermostat, a failing control board, or a bad capacitor. Capacitors often click when they’re trying to start a motor but failing. If you hear constant clicking, call a technician before complete failure leaves you without cooling.
Buzzing sounds typically indicate electrical issues. A loud buzz from your outdoor unit often means the compressor is trying to start but can’t. This could be a bad start capacitor or a failing compressor. A buzzing sound from your indoor unit might indicate a loose wire connection or a failing blower motor. Electrical issues can be fire hazards, so don’t ignore buzzing sounds.
Squealing or screeching usually points to belt or bearing problems. Many older AC units use belt-driven blower motors, and these belts can wear out and slip, causing squealing. Newer units with direct-drive motors have bearings that can fail and squeal. A failing motor bearing will get progressively louder over time. These repairs cost $200-500 depending on whether you need a belt replacement or motor replacement.
Grinding sounds are serious. A grinding noise usually means metal-on-metal contact in your blower motor or compressor. This indicates severe wear and imminent failure. If you hear grinding, turn off your AC immediately to prevent further damage and call a professional. Continued operation can destroy the motor or compressor, turning a repairable issue into a complete system failure.
Hissing sounds often indicate a refrigerant leak. Refrigerant is under high pressure, and a leak creates a hissing sound. Small leaks might be barely audible, while larger leaks hiss loudly. Refrigerant leaks require professional repair. Using a AC surge protector can help protect your AC’s electrical components from power surges that contribute to premature component failure.
AC Smells – Musty, Burning, or Chemical Odors
Your nose can tell you a lot about your AC’s health. Different smells indicate different problems, some minor and some serious. Let me break down what common AC smells mean and what you should do about them.
Musty or moldy smells are the most common AC odor complaint. This usually indicates mold or mildew growth in your system, often on the evaporator coil or in your ductwork. When your AC cools, it removes moisture from the air. If that moisture isn’t draining properly or if there’s organic matter on your coil, mold thrives. To fix this, clean your evaporator coil with a coil cleaner, check that your condensate drain is flowing freely, and consider having your ducts professionally cleaned. Changing your air filter regularly also helps prevent mold growth.
Burning smells are always concerning and require immediate action. An electrical burning smell often indicates wiring problems, overheating motors, or failing components. This is a fire hazard—turn off your AC immediately and call a professional. A dusty burning smell when you first turn on your AC for the season is usually normal as dust burns off the heating elements. But if the burning smell persists or is electrical in nature, shut it down.
Chemical or refrigerant smells indicate a refrigerant leak. Refrigerant has a distinct sweet, chemical odor. This is both an environmental concern and a health risk. Large refrigerant leaks can displace oxygen in enclosed spaces. If you suspect a refrigerant leak, ventilate your home, turn off the AC, and call a professional immediately. Refrigerant handling requires EPA certification and specialized equipment.
Rotten egg or sulfur smells are extremely serious. This indicates a natural gas leak. If you have a gas furnace integrated with your AC system and smell rotten eggs, evacuate your home immediately and call your gas company or emergency services from outside. Do not turn any electrical switches on or off, and do not use your phone inside the house. Natural gas is added with mercaptan (which smells like rotten eggs) specifically so leaks can be detected.
When to Call a Professional HVAC Technician
DIY air conditioner troubleshooting can save you money, but it’s important to know your limits. Some problems are simply beyond what a homeowner should tackle themselves. Let me be clear about what requires professional service and why.
Refrigerant leaks and recharging always require professional service. Handling refrigerant requires EPA Section 608 certification—it’s illegal for non-certified individuals to handle most refrigerants. Plus, refrigerant is under high pressure and can cause frostbite if released improperly. If you suspect low refrigerant or a leak, call a licensed HVAC technician. They’ll use specialized equipment to locate and repair the leak, then properly recharge your system.
Electrical component replacement beyond simple capacitors should be left to professionals. While replacing a capacitor is relatively straightforward for an experienced DIYer, working with high-voltage components in your AC unit can be dangerous. Contactors, relays, circuit boards, and wiring repairs carry real shock hazards. If you’re not completely comfortable working with electricity, don’t risk it. An HVAC service call costs much less than an emergency room visit.
Compressor and major component replacement are professional jobs. Your compressor is the heart of your AC system, and replacing it requires specialized tools, refrigerant handling, and technical knowledge. Similarly, replacing a blower motor, evaporator coil, or condenser coil is beyond typical DIY scope. These repairs typically cost $1,500-4,000 depending on the component, but they require professional expertise to do correctly.
Here are some typical repair costs in 2026 to help you budget: capacitor replacement $100-200, contactor replacement $150-250, blower motor replacement $300-600, refrigerant leak repair and recharge $300-800, compressor replacement $1,500-3,000. Complete system replacement ranges from $5,000-12,000 depending on size and efficiency. Always get multiple quotes for expensive repairs—prices can vary significantly between contractors.
When choosing an HVAC technician, look for licensed, insured contractors with good reviews. Check their standing with the Better Business Bureau and verify their licenses with your state’s licensing board. Get written estimates that detail the problem diagnosis, proposed solution, parts and labor costs, and warranty information. Don’t automatically choose the cheapest option—sometimes the lowest bid indicates cutting corners or using inferior parts.
Temporary Cooling Solutions While Waiting for Repair
What do you do while you’re waiting for your AC to be fixed? I’ve been there, and waiting days for a repair appointment in a sweltering house is miserable. Here are practical ways to stay cool while you wait.
Use fans strategically to create cooling breezes. Box fans in windows can pull in cooler evening air. Ceiling fans should rotate counterclockwise in summer to create a wind-chill effect. Even though fans don’t lower air temperature, the moving air evaporates moisture from your skin, making you feel cooler. Place a bowl of ice in front of a fan for an improvised DIY cooling effect.
Close blinds and curtains on sun-facing windows during the day. Sunlight through windows accounts for up to 30% of unwanted heat gain. Blackout curtains or reflective window film can significantly reduce solar heat gain. At night, open windows if outdoor temperatures drop to let cooler air in.
Avoid heat-generating activities during the hottest parts of the day. Skip using the oven—cook with microwave, slow cooker, or outdoor grill instead. Turn off lights and electronics when not in use, as they generate heat. Delay laundry and dishwasher runs until evening when it’s cooler.
Use cool showers and cold compresses to lower your body temperature. A cool shower before bed can help you sleep in a warm house. Cold, wet towels on pulse points like wrists and neck provide quick cooling relief. Stay hydrated—your body regulates temperature better when properly hydrated.
Move to the lowest level of your home. Heat rises, so basements or ground floors are naturally cooler. Set up temporary sleeping arrangements in cooler areas of your home during heat waves. If your home becomes dangerously hot (over 90°F indoors), consider staying with friends or family, visiting a cooling center, or spending time in air-conditioned public spaces like malls or libraries.
Preventive Maintenance to Avoid Future Problems
The best air conditioner troubleshooting is preventing problems before they start. Regular maintenance can prevent most common AC issues and extend your system’s lifespan by years. Here’s what I recommend doing annually to keep your AC running smoothly.
Change your air filter every 1-3 months. This is the single most important maintenance task. A clean filter prevents frozen coils, maintains efficiency, and improves indoor air quality. Set a reminder on your phone to check your filter monthly. Homes with pets or allergies may need monthly changes, while others can go 2-3 months between changes.
Schedule annual professional maintenance before cooling season starts. A technician will clean coils, check refrigerant levels, inspect electrical connections, lubricate moving parts, and identify potential problems before they become failures. This $100-150 annual service can prevent $1,000+ repairs and keeps your system running at peak efficiency.
Keep your outdoor unit clear of debris. Trim plants back at least two feet from the unit. Clear leaves, grass clippings, and other debris from around the unit. Gently clean the condenser coils annually using a garden hose—avoid pressure washers which can damage the fins. Make sure the unit sits level and the concrete pad hasn’t settled.
Clear your condensate drain line annually. Flush it with a mixture of bleach and water to kill algae and prevent clogs. You can also use specialized drain line treatments designed for AC systems. A clogged drain line is one of the most common causes of water leaks and water damage.
Check your thermostat batteries annually and replace as needed. Consider upgrading to a programmable or smart thermostat for better efficiency and temperature control. Smart thermostats can also alert you to problems like temperature extremes that might indicate AC issues.
For more HVAC guides and tips, check out our complete collection of heating and cooling articles. Proper maintenance and prompt troubleshooting will keep your AC running efficiently for years to come.
Frequently Asked Questions
What are the common problems of air conditioners?
The most common AC problems include dirty or clogged air filters, thermostat issues and dead batteries, refrigerant leaks, frozen evaporator coils, dirty condenser coils, electrical problems and tripped breakers, clogged condensate drain lines causing water leaks, and capacitor or compressor failure. These issues account for over 90% of all AC service calls and many can be prevented with regular maintenance.
What is the 3 minute rule for air conditioners?
The 3 minute rule means waiting 3-5 minutes after turning off your AC before restarting it. This allows pressure in the refrigerant lines to equalize and protects the compressor from damage. Restarting too quickly can cause compressor overload and failure. Most modern thermostats have built-in delays that enforce this rule automatically.
How do I reset my air conditioner?
To reset your AC, turn off the thermostat and switch it to ‘off’. Then turn off the AC circuit breaker in your electrical panel. Wait 5-10 minutes for the system to fully power down and pressures to equalize. Turn the breaker back on, wait another minute, then reset your thermostat to your desired cooling setting. This reset procedure can resolve many minor electrical issues.
Why is my AC running but not cooling?
An AC running but not cooling is usually caused by a dirty air filter restricting airflow, low refrigerant due to a leak, a frozen evaporator coil blocking air passage, dirty condenser coils preventing heat release, incorrect thermostat settings, or ductwork problems leaking cooled air. Start by changing your air filter, then check for ice on refrigerant lines, which indicates a frozen coil requiring professional service.
How much does AC repair typically cost?
AC repair costs in 2026 typically range from $100 for minor fixes like capacitor replacement to $3,000+ for major repairs like compressor replacement. Common repairs include: capacitor replacement $100-200, contactor replacement $150-250, blower motor $300-600, refrigerant leak repair $300-800, and compressor replacement $1,500-3,000. Complete system replacement costs $5,000-12,000. Always get multiple quotes for expensive repairs.
Conclusion
Proper air conditioner troubleshooting can save you hundreds of dollars in unnecessary service calls and prevent minor issues from becoming major repairs. The vast majority of AC problems—dirty filters, thermostat issues, tripped breakers, clogged drain lines—can be resolved by homeowners with basic tools and safety awareness. Start with the simple checks first, work systematically through the troubleshooting steps, and don’t be afraid to call a professional when a problem is beyond your DIY comfort level.
Remember that preventive maintenance is your best defense against AC problems. Change those filters regularly, keep your outdoor unit clear, and schedule annual professional maintenance. A well-maintained AC system can last 15-20 years, while neglected systems often fail in half that time. The small investment in maintenance pays off in lower energy bills, fewer repairs, and reliable comfort when you need it most.
When DIY troubleshooting isn’t enough or you’re dealing with refrigerant issues, electrical problems, or major component failures, don’t hesitate to call a licensed HVAC technician. There’s no shame in recognizing when a job requires professional expertise. Your AC is a complex system with high-voltage components and pressurized refrigerant—sometimes the smartest troubleshooting move is knowing when to call for backup. Stay cool, stay safe, and keep your home comfortable all season long.
Leave a Reply