

You bring home a new hoodie or pair of pants from Target, pull it out of the bag, and there it is — a red Target security tag still clamped onto the fabric. The cashier forgot to remove it during self-checkout, or maybe your online order shipped straight from the warehouse with the tag still attached. It happens more often than you’d think, and forum threads on Reddit’s r/Target fill up weekly with shoppers dealing with the exact same headache.
The fastest way to remove a Target security tag is to take the item and your receipt back to any Target store — the service desk removes it in seconds using a professional detacher, at no cost and with zero risk to your clothing. If a return trip genuinely is not possible, a strong neodymium magnet rated between 10,000 and 12,000 gauss can release the internal ball-bearing clutch on most magnetic hard tags, while a rubber band pressed into the pin gap or a flathead screwdriver leveraged under the clutch can work on non-ink tags. Before trying any at-home method, you need to identify whether the tag contains an ink vial, because cracking an ink tag permanently stains the garment.
I have spent years testing and documenting DIY removal methods across retail security devices, and this guide breaks down every safe approach ranked by effectiveness and risk. Whether the self-checkout left a red security tag on your clothing or an online order arrived tagged, you will find clear, step-by-step instructions below — along with the methods you should avoid entirely because they destroy fabric or trigger injury.
What you will gain from this guide:
Tag identification basics — learn to tell an ink tag from a magnetic hard tag before you start prying
Six removal methods ranked by safety, starting with the store-return option that costs nothing
Magnet specifications including exact gauss ratings and which household magnets actually work
Ink spill cleanup steps using isopropyl alcohol if a vial bursts
Methods to avoid — the dangerous techniques that ruin clothing or cause injury
Legal clarity on when removing a tag is fine and when it crosses into shoplifting
Try This First: Return to Target With Your Receipt
Every top-ranked guide on this topic — and every Target employee I have spoken with — agrees on one point: the service desk at any Target store will remove a security tag for free if you bring the item and your receipt. This is by far the safest option, and it works whether the tag was left on at the register, during self-checkout, or on an online order returned to a store location.
The process takes under a minute. Walk up to the Guest Services counter, hand over the tagged item, and show your receipt. The employee places the tag face-down into a heavy magnetic detacher bolted under the counter, and the pin releases with a click. No appointment is needed, no fee is charged, and there is zero risk of ink spillage or fabric damage. Reddit users on r/Target consistently confirm that this is the path store staff themselves recommend.
If you paid with a card or used the Target app, the purchase is traceable even without a paper receipt. Most stores can look up the transaction using the card on file or your Circle account. For online orders, the packing slip or order confirmation email serves as proof of purchase. When the store is too far away to justify the drive, the rest of this guide covers at-home methods ranked from lowest risk to highest.
What Are Target Security Tags?
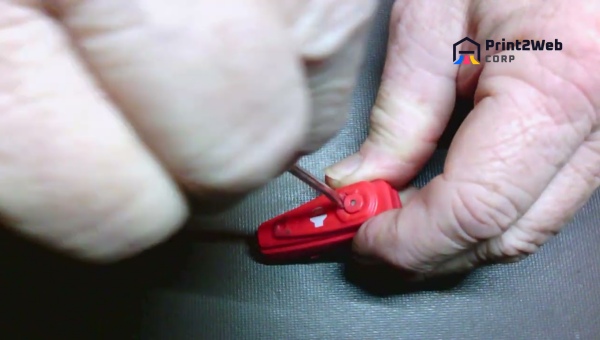
Target security tags are anti-theft devices attached to merchandise to deter shoplifting and reduce what the retail industry calls “shrink” — inventory lost to theft, damage, or error. They are part of a broader electronic article surveillance (EAS) system that includes the sensor gates you walk through at store exits. When an active tag passes through those gates, the system detects the tag’s radio frequency and triggers an alarm.
The Purpose of the Target Security Tag
These tags exist to make sure every item is paid for before it leaves the store. A locked tag physically prevents someone from simply walking out with merchandise, and the EAS gate alarm adds a second layer of detection. Together, these two systems — physical lock plus electronic alarm — form the backbone of Target’s loss prevention strategy.
Target uses tags from major manufacturers like Sensormatic, one of the most widely deployed brands in retail security. The type of tag applied depends on the merchandise: clothing typically receives a pin-style hard tag, electronics may get a spider wrap or cable lanyard, and small items sometimes carry a soft adhesive label that gets deactivated at checkout. Understanding which type is on your item determines which removal method is safe.
How Security Tags Work: The EAS System Explained
Most Target hard tags operate on an EAS system using RF technology at a frequency of 8.2 MHz. Inside each tag is a small resonant circuit — a coil and capacitor tuned to that exact frequency. When the tag passes through the EAS gates at the store exit, the gates broadcast a 8.2 MHz signal, the circuit inside the tag resonates, and the system detects that resonance, triggering the alarm. Some retailers use an alternative called acousto-magnetic (AM) technology, which operates at 58 kHz, but Target predominantly uses the RF 8.2 MHz standard.
At checkout, the cashier runs the tag over a deactivation pad built into the counter. For soft labels, this pad burns out the resonant circuit so it no longer triggers the gate. For hard tags, the cashier uses a magnetic detacher to mechanically release the pin from the clutch mechanism inside the tag. When the cashier forgets this step — which happens frequently at busy self-checkout stations — the tag stays active and armed, which is exactly how most people end up with one still attached at home.
Different Types of Target Security Tags: Comparison Table
Before attempting any removal, you need to know what kind of tag you are dealing with. The table below breaks down the three main types Target uses, their internal mechanisms, and the risk level of at-home removal. This single identification step prevents most clothing damage incidents.
Tag Type Comparison:
Ink Tag (Sensormatic-style): A two-piece dome tag, usually white or cream, containing one or two glass vials of permanent indelible ink. When forced open incorrectly, the vials shatter and the ink stains the garment beyond recovery. At-home removal risk: VERY HIGH. Always return to the store.
Magnetic Hard Tag (Target’s red tag): The familiar round red tag with a steel pin. Inside is a spring-loaded clutch held shut by ball bearings. A strong neodymium magnet pulls the bearings inward, releasing the pin. At-home removal risk: LOW TO MODERATE if you have the right magnet. No ink inside.
EAS Soft Tag (RFID / adhesive label): A flat sticker-style label with an embedded resonant circuit. Usually deactivated at checkout. If still active, it triggers gate alarms but does not physically lock onto the item. At-home removal risk: NONE — just peel it off.
Quick identification tip: Target’s signature red tag is almost always a magnetic hard tag without ink. If your tag is white, beige, or cream-colored and visibly larger or squarer, treat it as a potential ink tag and do not attempt mechanical removal at home. When in doubt, the store-return method costs nothing and eliminates all guesswork.
Related read: Amazon Pricing Strategy Secrets to Crush the Competition
New Target Security Tag Designs
Target has been gradually updating its tag inventory since 2024, and shoppers in 2026 may encounter redesigned versions. The most visible change is a shift toward slimmer, lighter magnetic hard tags that use the same ball-bearing clutch mechanism but in a more compact housing. These updated tags function identically to the classic red dome — a neodymium magnet of sufficient strength releases them the same way.
Some Target locations have also piloted RFID-enabled hard tags that combine the physical pin lock with an RFID chip for real-time inventory tracking. From a removal standpoint, the RFID component does not change the mechanical process — the clutch still releases with a magnet. The RFID circuit is what interacts with the EAS gates, so even after you remove the tag mechanically, the detached tag itself can still trigger a gate alarm if carried through the sensors.
Ink tags have not disappeared from Target’s lineup. While the chain relies primarily on non-ink magnetic hard tags for apparel, certain higher-value items and some third-party brands within Target still use ink deterrent tags. This is why identification matters: a tag that looks similar to the standard red one may still contain an ink vial. When a tag is unfamiliar, white, or unusually heavy for its size, default to the store-return method.
How To Remove a Target Security Tag (Ranked by Safety)
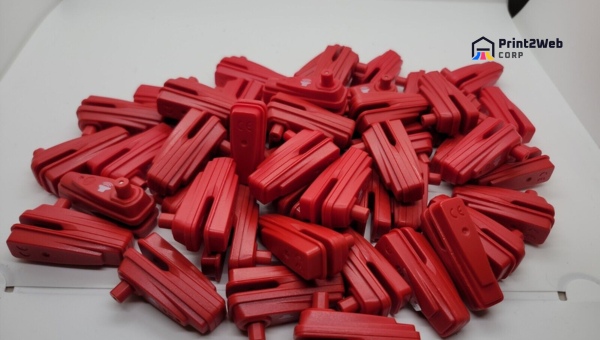
Below are six removal methods, ordered from safest to riskiest. The first method — returning to the store — should always be your default. Each subsequent method increases the chance of damaging your item, so only move down the list when the previous option is unavailable. Every method includes an ink-tag warning because the single most common mistake is treating an ink tag like a standard magnetic hard tag.
Ink tag warning (read first): If your tag is white, beige, or cream-colored, or if you see a clear cartridge with visible liquid inside, stop immediately. Ink tags contain glass vials of permanent dye that shatter under force. No at-home method can safely remove an ink tag. Return to Target with your receipt — the service desk uses a detacher that releases the clutch without disturbing the vials.
Method 1: Return to Target (Safest, Zero Risk)
Already covered in detail above, this remains the number-one recommendation. Bring the item and receipt to any Target Guest Services desk. The employee uses a professional-grade magnetic detacher that releases the ball-bearing clutch without force. It works on ink tags and non-ink tags alike, takes seconds, and costs nothing. This method has zero reported incidents of garment damage across thousands of forum accounts.
Method 2: The Rubber Band Trick
If you cannot get back to the store and you have confirmed the tag is a non-ink magnetic hard tag, the rubber band method is the lowest-risk at-home option. Take a wide, sturdy rubber band — the kind used for produce or office bundling — and slide it between the pin head and the tag body, wedging it into the gap where the pin enters the clutch.
The rubber band creates friction against the spring-loaded mechanism inside. As you press the band deeper and apply leverage, the band can push the clutch plate back far enough for the ball bearings to release the pin. This method works because it applies gradual, even pressure without any sudden force that could crack an ink vial. It does not work every time — success depends on the tag model and how tight the clutch sits — but it carries minimal risk of fabric damage.
Method 3: Using a Fork
A standard kitchen fork can function as a lever against the clutch. Slide one tine of the fork between the pin head and the tag body, positioning it where the pin enters the housing. Twist the fork gently, as if turning a key in a lock. The tine presses against the internal spring plate, and with enough steady pressure, the ball bearings retract and the pin pops free.
Use a fork with thick, sturdy tines — a flimsy dessert fork may bend before the clutch releases. Keep your free hand braced against the tag body but away from the pin exit point, since the pin can release suddenly. Do not use this method on ink tags; the concentrated force on one side can crack the vial housing.
Method 4: Using Scissors
Scissors work similarly to the fork but offer broader leverage. Open the scissors and slide one blade into the gap between the pin head and the tag body. Gently lever the blade upward, pressing against the clutch plate. You will typically feel resistance followed by a click as the bearings disengage and the pin releases.
Use scissors with a strong, thick blade — small craft scissors will bend. Position the blade carefully so it does not contact the fabric underneath. As with all lever methods, apply slow, steady pressure rather than a sharp jerk. Ink tag warning: lever-style methods concentrate force on one side of the tag, which can crack an ink cartridge. Only use this approach on confirmed non-ink magnetic hard tags.
Method 5: Using a Car Key or Flathead Screwdriver
A car key or flathead screwdriver provides more reach and leverage than a fork or scissors. Wedge the tip into the gap between the pin head and tag body — the same insertion point as the other lever methods. Twist slowly, applying upward pressure against the clutch plate. The broader, flatter tip of a screwdriver distributes force more evenly than a fork tine, which reduces the chance of cracking the housing.
Some Target tags include a small recessed hole on the back of the clutch housing, designed for a store-side reset tool. You can sometimes trigger the release by inserting a straightened paperclip into this hole and pressing firmly — it contacts the internal release directly. This trick works on a subset of older tag models and is worth trying since it applies no external leverage force at all.
Method 6: Using a Powerful Magnet
The magnet method is the most reliable at-home approach for Target’s red magnetic hard tags because it replicates exactly how the store’s detacher works. The clutch inside the tag holds the pin using ball bearings pressed outward by a spring. A sufficiently strong magnetic field pulls those steel bearings inward, compressing the spring and freeing the pin.
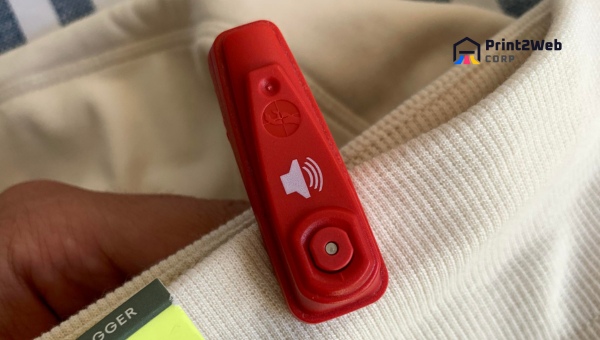
What magnet strength do you need? The clutch mechanism requires a neodymium magnet rated at approximately 10,000 to 12,000 gauss. Standard refrigerator magnets (around 50 to 100 gauss) are nowhere near strong enough. Even many “strong” magnets sold as tool holders fall short. The household item most commonly cited as strong enough is a hard drive magnet — the rare-earth neodymium magnets pulled from inside old computer hard drives typically rate in the 10,000+ gauss range and have successfully released Target tags in dozens of documented forum attempts.
How to do it: Place the tag face-down on a flat surface with the pin pointing up. Hold the magnet firmly against the back of the tag — the flat, slightly domed side opposite the pin. You should feel the magnetic pull engage the internal mechanism. Hold steady for several seconds, then gently lift the tag away from the pin. The pin should slide free. If it does not release, try rotating the magnet a quarter turn and holding again. You will hear or feel a subtle click when the bearings retract.
Safety precautions for the magnet method:
Keep electronics far away. A 12,000 gauss magnet will wipe credit card strips, damage phone screens, corrupt hard drives, and interfere with pacemakers. Maintain at least three feet of clearance.
Mind your fingers. Neodymium magnets of this strength can pinch skin hard enough to draw blood if your hand gets between the magnet and a steel surface.
Do not use on ink tags. While the magnet itself does not shatter ink vials, attempting to pull the tag apart by hand after magnet release can crack the cartridge if you slip.
Work over a table, not your lap. The pin releases suddenly, and you do not want it falling into upholstery or scratching a surface.
Reddit users on r/Target have repeatedly confirmed the magnet method works on Target’s red tags. One widely cited comment reads: “They are removed with a very strong magnet from the bottom of the red tag.” Another user noted success with a hard drive magnet specifically, which lines up with the gauss requirement. The method fails when people use magnets that are too weak — a common mistake — or when they try to yank the tag off instead of letting the magnet quietly release the clutch.
Related read: Sell Pokemon Cards – Unlock Top Value for Your Collection!
Using Wire Cutters and Bolt Cutters for Removing Target Security Tags
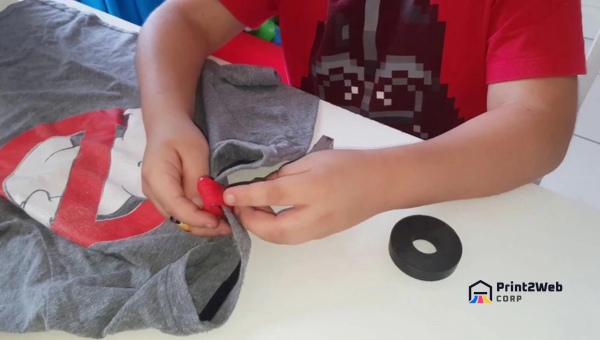
Cutting tools are a last-resort option when lever and magnet methods have both failed. The idea is to cut through the steel pin itself rather than releasing the clutch. This works in theory, but there is a major caveat: household wire cutters frequently fail on security tag pins, because those pins are made from hardened steel designed to resist exactly this kind of attack. Standard wire cutters from a home tool kit will often dent the pin without severing it, or worse, the jaws will slip and snap shut on fabric.
When Wire Cutters Work — and When They Do Not
Wire cutters can work on thinner, older security tag pins if the cutters have hardened jaws and you position them precisely at the base of the pin where it meets the tag body. Squeeze slowly and steadily rather than jerking the handles. If the pin shows no sign of cutting after firm pressure, stop — continuing will only damage the cutter jaws.
For pins that resist wire cutters, a small bolt cutter (12 to 14 inches) has the jaw strength and leverage to shear through hardened steel. Position the bolt cutter jaws around the pin shaft, not the tag housing, and squeeze firmly. The pin will snap cleanly. Warning: bolt cutters can leave a burr on the cut pin end that catches and snags fabric. Inspect the cut edge and file down any sharp burr with a metal file or sandpaper before removing the pin from the garment.
Ink tag warning: Never use cutting tools on an ink tag. The vibration and shock from cutting the pin can shatter the glass ink vials inside the tag housing, and there is no way to clean permanent dye out of fabric once it spreads. If there is any chance the tag contains ink — if it is white, cream-colored, or you can see liquid through a clear window — abandon cutting entirely and return to the store.
Methods to Avoid: Dangerous Approaches That Ruin Clothing
Several “tricks” circulate online that consistently result in damaged clothing, broken tags, or personal injury. Competing guides and forum consensus are clear: the methods below should never be attempted.
Burning or melting the tag: Heating the plastic housing releases toxic fumes and will melt the tag directly into the fabric beneath it. The synthetic fibers in most modern clothing fuse with molten plastic, permanently ruining the garment.
Slamming the tag against a hard surface: Striking the tag with a hammer or slamming it on a table counter shatters the internal mechanism — and if there is an ink vial inside, the impact sprays dye across the garment and surrounding surfaces.
Freezing the tag: A persistent internet myth claims freezing makes ink vials brittle enough to avoid rupture. In reality, freezing does not weaken the clutch mechanism, and the temperature shock can crack the ink cartridge housing, causing a slow leak that stains fabric before you notice.
Cutting into the ink cartridge: Some guides suggest slicing open the tag body to access the clutch. This almost always punctures the ink vial. There is no safe way to open an ink tag housing at home.
Using pliers to crush the tag: Locking pliers or vise grips crush the plastic housing unevenly, which cracks ink vials and warps the clutch into a position where the pin cannot release at all — leaving the tag permanently fused to the garment.
What to Do If Ink Leaks
If an ink vial breaks during a removal attempt, act immediately. The dye used in security ink tags is designed to be permanent, but fast treatment with the right solvent can reduce or even prevent staining on some fabrics.
Ink Spill Cleanup Steps
Step 1: Remove the tag from the garment as quickly as possible, even if the pin is still partially engaged — every second the tag sits against wet fabric, more ink wicks into the fibers. Use scissors or a magnet to detach the tag body.
Step 2: Blot the stained area with a dry paper towel. Do not rub — rubbing pushes the dye deeper into the fiber weave and spreads the stain across a larger area. Press firmly to absorb as much liquid dye as possible.
Step 3: Apply 70 to 90 percent isopropyl alcohol (rubbing alcohol) directly to the stain using a clean cloth or cotton pad. Dab the alcohol into the fabric, working from the outside of the stain inward to prevent spreading. The alcohol helps break down the dye compounds. Reapply several times, blotting between applications.
Step 4: Rinse the treated area under cold running water, then launder the garment separately on the hottest cycle the fabric care label allows. Air dry — do not put the garment in the dryer until you are certain the stain is gone, because heat sets the dye permanently.
Reality check: Security tag ink is formulated to be extremely difficult to remove. The alcohol method can lighten or fully remove the stain on lighter fabrics and synthetic blends, but it may not fully work on cotton, denim, or dark fabrics. If the stain persists after two alcohol treatments, professional dry cleaning with stain-specific solvents is the last option before the garment is considered a loss. This is precisely why identifying ink tags before removal is so important.
Will the Alarm Still Go Off?
A common concern after removing a tag at home is whether walking back into Target carrying the now-separated tag or the tagged item will trigger the EAS gate alarm. The answer depends on the tag’s internal circuit and how the removal affected it.
If you removed a magnetic hard tag mechanically — via magnet, fork, or lever — the EAS circuit inside the tag housing remains intact and active. The tag will still trigger an RF 8.2 MHz gate alarm if carried through the sensors. This means if you walk back into Target carrying the removed tag in your pocket or bag, the gate will sound. The pin by itself, however, does not contain a circuit and will not trigger anything.
If you are bringing the item back for a return or exchange and the tag is still attached, the alarm will likely sound as you enter the store. This is expected and not a problem — simply explain to the door greeter or nearby employee that you are bringing back an item where the tag was left on. Showing your receipt resolves the situation immediately. Store staff see this daily.
For online orders, the EAS circuit is typically deactivated before shipping, which is why most online-ordered items do not trigger alarms even with the tag attached. However, this deactivation is not always performed, which is another reason some online orders arrive with active, armed tags. The safest approach when re-entering any store with a tagged item is to carry your receipt visibly and head straight to Guest Services.
Is It Legal to Remove a Security Tag Yourself?
Removing a security tag from merchandise you legitimately purchased and own is legal. You bought the item, the tag was left on by mistake, and removing it from your own property does not constitute theft. This applies whether the cashier forgot at the register, the self-checkout missed it, or an online order shipped tagged.
Removing a security tag from merchandise you have not purchased is shoplifting, regardless of the method used. Detaching a tag inside a store, concealing the item, and walking out constitutes retail theft under the laws of every U.S. state. Tampering with EAS equipment, deactivation pads, or security gates also carries separate legal penalties.
The legal line is straightforward: ownership. If you have a receipt or proof of purchase, the item is yours, and removing the tag is simply correcting a store error. If you do not own the item, removing the tag is a step in committing theft. This guide addresses only the first scenario — removing tags from items you have purchased, where the store failed to complete the removal at checkout.
Related read: Navigating Negative Amazon Customer Reviews: Expert Tips
FAQs
Will the alarm still go off if I walk out of Target with the tag on?
Yes. The EAS circuit inside the tag remains active until professionally deactivated at the register. If you walk through Target’s exit gates with an armed tag, the RF 8.2 MHz system will detect it and sound the alarm. This is true even if you have already paid — the alarm responds to the tag circuit, not your receipt. If the alarm sounds, simply show your receipt to the employee at the door.
Is removing a security tag illegal?
Removing a security tag from merchandise you purchased and own is legal. You have proof of ownership via your receipt. Removing a tag from merchandise you have not paid for is shoplifting. The legal distinction is ownership, not the act of removal itself.
Do Target security tags have ink?
Target’s standard red magnetic hard tags do not contain ink. However, Target does use ink deterrent tags on certain higher-value items and some third-party brand merchandise. Ink tags are typically white, cream, or beige and may show a visible liquid cartridge. If your tag is not the standard red dome, treat it as a potential ink tag and return to the store for removal.
What kind of magnet do I need for Target security tags?
You need a neodymium magnet rated at approximately 10,000 to 12,000 gauss. A hard drive magnet pulled from an old computer is the most common household source that meets this rating. Standard refrigerator magnets and most tool-holder magnets are too weak. Place the magnet against the flat back of the red tag (opposite the pin) and hold for several seconds until the internal ball-bearing clutch releases.
What if I can’t get the Target security tag off?
Take your receipt and the tagged item back to any Target Guest Services desk. They will remove it in seconds using a professional magnetic detacher at no charge. If you paid with a card or the Target app, they can look up your purchase without a paper receipt.
Is it okay to cut the Target security tag with scissors?
Scissors can work as a lever on non-ink magnetic hard tags, but they should never be used to cut ink tag cartridges. Slide one blade between the pin head and tag body and lever gently. If the tag is white, cream-colored, or contains visible liquid, do not attempt any cutting — return to the store instead.
Can a magnet really remove a security tag?
Yes. Target’s red hard tags use a ball-bearing clutch held shut by a spring. A neodymium magnet rated at 10,000 to 12,000 gauss pulls the steel bearings inward, compressing the spring and releasing the pin. This is the same mechanism the store’s detacher uses. Hard drive magnets commonly meet this gauss rating.
Are there any risks in removing Target security tags at home?
Yes. The main risks are ink spillage from cracking an ink tag cartridge, fabric damage from sharp tools, pinching your fingers with strong magnets, and damaging electronics with high-gauss magnetic fields. Always identify the tag type first, keep magnets away from phones and cards, and default to the store-return method when unsure.
Conclusion
Dealing with a Target security tag left on your purchase is frustrating but entirely solvable. The single best piece of advice I can give: keep your receipt and return to any Target store. The Guest Services desk removes the tag in seconds at no cost, with zero risk to your clothing, and no appointment required. Make this your first move every time.
When a store visit genuinely is not an option, identify your tag type before attempting anything. Target’s standard red magnetic hard tag releases cleanly with a neodymium magnet rated at 10,000 to 12,000 gauss — a hard drive magnet is the most accessible source. Lever methods using a fork, screwdriver, or scissors work on non-ink tags with patience and steady pressure. Wire cutters and bolt cutters are a last resort because household cutters often fail on hardened steel pins. And if the tag is white, cream-colored, or shows a visible ink cartridge, do not attempt at-home removal under any circumstances — return to the store.
The methods to skip entirely — burning, freezing, slamming, crushing, and cutting into the cartridge — exist only to ruin clothing and cause injury. Skip them. Bookmark this guide for the next time self-checkout leaves a tag behind, and remember that Target security tag removal does not have to be complicated when you start with the safest option and work down the list only when necessary.
Leave a Reply