
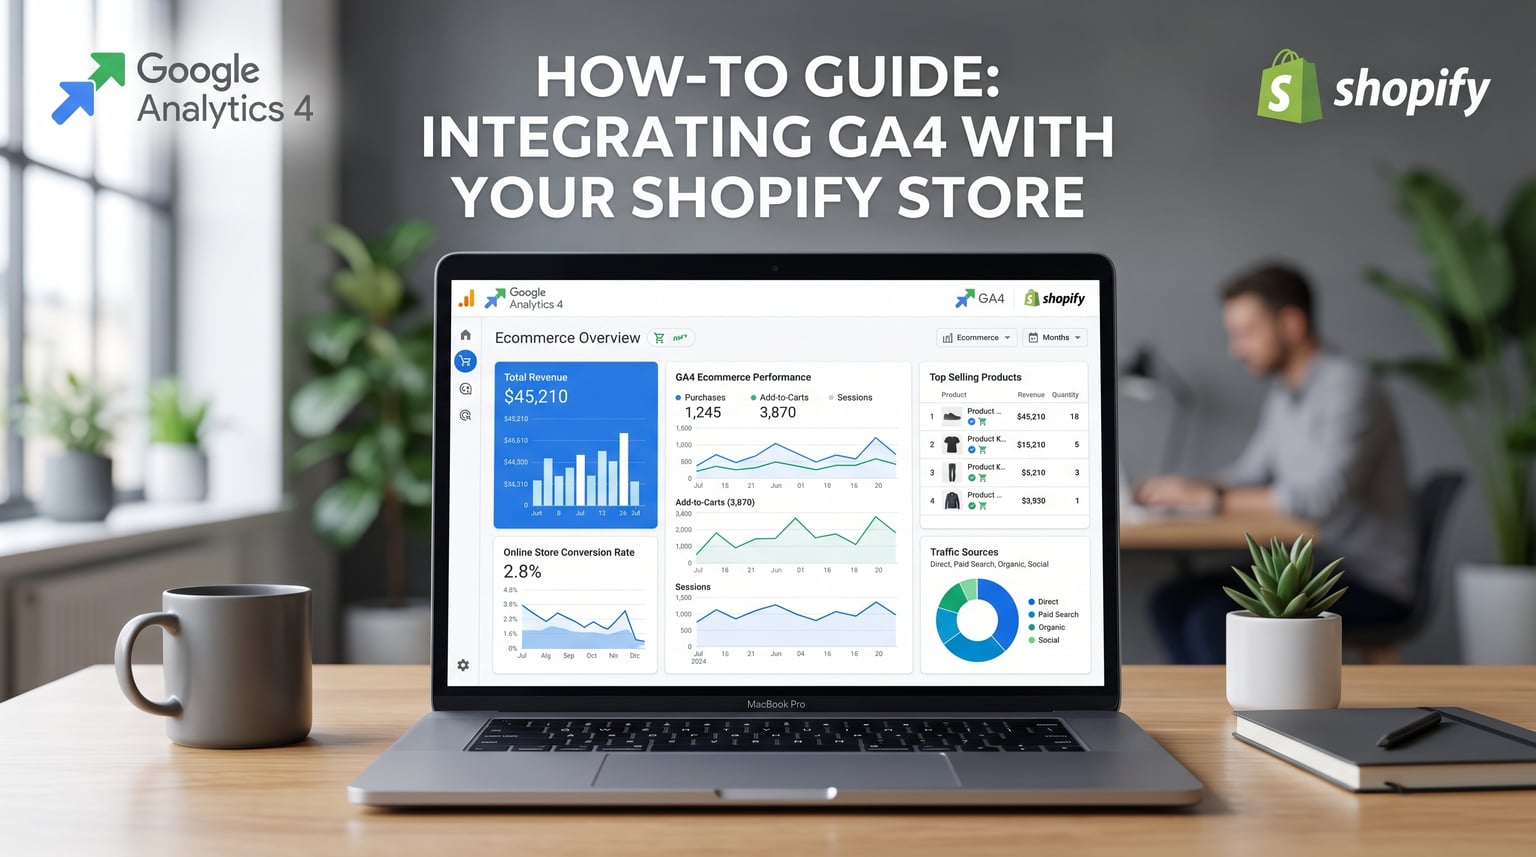
Understanding how visitors interact with your store is the single biggest advantage you can build in ecommerce today. If you want to Add Google Analytics to Your Shopify store in 2026, the process has changed significantly from what older guides describe. Google retired Universal Analytics back in July 2023, and the current standard is Google Analytics 4, commonly called GA4. This updated guide walks you through every step of setting up GA4 on Shopify using the methods that actually work right now.
I have spent countless hours configuring GA4 properties across multiple Shopify stores, testing different installation methods, and debugging the inevitable tracking issues that come up. The good news is that Shopify now supports GA4 through its native Google and YouTube channel app, making the setup far more approachable than it used to be. You no longer need to paste raw code into your theme files for a standard installation.
Here is what you will learn in this guide: what GA4 actually is and why it differs from the old Universal Analytics, the specific benefits GA4 brings to your Shopify store, a prerequisites checklist to gather before starting, two complete setup methods with step-by-step instructions, how to test your installation, recommended settings for ecommerce tracking, and a troubleshooting section covering the most common problems store owners report on Reddit and the Shopify community forums.
What this guide covers:
- How to install GA4 using the Google and YouTube channel app (recommended method)
- How to set up Google Tag Manager on Shopify for advanced tracking
- How to test your GA4 setup with DebugView and Realtime reports
- How to troubleshoot data mismatches between Shopify and GA4
Does Shopify Really Need Google Analytics?
Shopify ships with its own built-in analytics dashboard, and for a brand new store, that dashboard covers the basics reasonably well. You get sales totals, session counts, and some basic traffic source information. But once your store starts growing and you begin running paid ad campaigns, the built-in dashboard quickly runs out of depth. That is where GA4 becomes a near necessity rather than a nice-to-have.
GA4 gives you the ability to track the full customer journey from the first touchpoint all the way through to purchase. You can see which traffic sources drive the highest-value customers, not just the most clicks. You can build custom audiences based on specific behaviors, link your Google Ads account to import conversions automatically, and analyze funnel data across multiple sessions and devices. None of these capabilities are available in Shopify’s native analytics.
Forum discussions on Reddit consistently show that merchants who rely solely on Shopify’s dashboard miss critical insights about cart abandonment patterns, marketing campaign return on investment, and traffic source attribution. GA4 fills those gaps. The trade-off is that GA4 has a steeper learning curve, which is exactly why this guide exists to make the setup as straightforward as possible.
What Is Google Analytics 4 (GA4)?
Google Analytics 4, or GA4, is the current generation of Google’s free web analytics platform. It replaced Universal Analytics, which Google officially shut down in July 2023. If you see any tutorial referencing Universal Analytics, a Tracking ID that starts with UA-, or a property type called Universal Analytics, that information is outdated and will not work. GA4 is the only active version.
The biggest difference between GA4 and Universal Analytics is the underlying data model. Universal Analytics used a session-based model where everything was organized around pageviews within a session. GA4 uses an event-based model where every user interaction is tracked as an event. A page view is an event, a scroll is an event, a purchase is an event. This event-based approach is far more flexible and aligns with how modern analytics works across websites and mobile apps alike.
For Shopify store owners, GA4 introduces several specific improvements over the old platform. Enhanced measurement events are collected automatically once the base tag is installed, meaning you get page_view, scroll, click, and video engagement data without any extra configuration. GA4 also tracks ecommerce events like view_item, add_to_cart, begin_checkout, and purchase when connected through the Google and YouTube channel app. Cross-device tracking is built in, so you can see how a customer who first visits on mobile and later returns on desktop moves through your funnel.
Instead of the old Tracking ID (UA-XXXXXXXX), GA4 uses a Measurement ID formatted as G-XXXXXXXXXX. You will need this Measurement ID when connecting your Shopify store. I will show you exactly where to find it in the setup steps below.
Benefits of Integrating GA4 Google Analytics with Shopify
Connecting GA4 to your Shopify store unlocks a layer of data analysis that goes well beyond what the native Shopify dashboard provides. Here is a breakdown of the specific advantages GA4 brings to your ecommerce operation.
- Automatic Ecommerce Event Tracking: When you install GA4 through the Google and YouTube channel app, Shopify automatically sends key ecommerce events to GA4. These include page_view, view_item, add_to_cart, view_cart, begin_checkout, and purchase. You do not need to configure these manually.
- Real-Time Visitor Data: GA4 Realtime reports show you who is on your store right now, what pages they are viewing, and where they came from. This is invaluable during product launches, flash sales, or promotional campaigns.
- Audience Insights and Demographics: GA4 provides reports on user age, gender, interests, geographic location, language, and the devices used to access your store. You can use this data to tailor your product descriptions, ad targeting, and content strategy.
- Traffic Source Attribution: GA4 tracks exactly where your visitors come from, whether that is organic search, paid social, email campaigns, referral links, or direct visits. This lets you measure which marketing channels actually drive revenue, not just traffic.
- Conversion Tracking and Google Ads Linking: You can mark specific events as conversions (key events in GA4 terminology) and link your Google Ads account so those conversions flow into your ad campaigns automatically. This enables smart bidding strategies and better ad performance measurement.
- Behavior Flow Analysis: GA4’s exploration reports let you trace the exact path visitors take through your store. You can see where they enter, what they look at, and where they drop off, helping you identify friction points in your funnel.
- Cross-Device and Cross-Platform Tracking: The event-based model and Google’s identity spaces allow GA4 to stitch together user journeys across mobile, desktop, and even mobile apps if you have them. This gives you a more complete picture of the customer journey.
Together, these capabilities mean you can stop guessing about what drives sales and start making decisions backed by data. Store owners on the Shopify community forums consistently report that adding GA4 helps them identify underperforming landing pages, eliminate wasted ad spend, and recover revenue lost to cart abandonment.
Prerequisites: What You Need Before Setup
Before diving into the installation steps, gather the following items. Having everything ready will save you from having to stop midway through the process.
- A Google account: You need a Google account to access Google Analytics. If you use Gmail, Google Workspace, or YouTube, you already have one.
- Admin access to your Shopify store: You need permission to install apps and access the admin dashboard.
- A live Shopify store: Your store should be publicly accessible, not password-protected, for data to start flowing. You can set up GA4 while password-protected, but events will only fire on the password page until the store goes live.
- Your domain verified (optional but recommended): Verifying your domain in Google Search Console helps with attribution and can improve data accuracy.
- A chosen installation method: Decide whether you will use the Google and YouTube channel app (recommended for most stores) or Google Tag Manager (for advanced users needing custom tracking). The comparison table below will help you decide.
How to Add Google Analytics to Your Shopify Account (GA4 Setup Methods)
There are two primary methods for adding GA4 to your Shopify store. Method 1 uses the Google and YouTube channel app, which Shopify officially recommends and which handles ecommerce event tracking automatically. Method 2 uses Google Tag Manager for more granular control over what gets tracked. Let’s walk through each one.

Quick Comparison: Which GA4 Installation Method Should You Use?
- Google and YouTube channel app: Easiest to set up, handles ecommerce events automatically, requires no coding. Best for the vast majority of Shopify stores. Potential downside is slightly lower data accuracy compared to a fully custom GTM setup.
- Google Tag Manager (GTM): More complex setup requiring a custom pixel and data layer configuration. Gives you full control over event tracking and is ideal for Shopify Plus merchants or stores running multiple analytics tools. Requires technical knowledge or a developer.
- Third-party analytics apps (Elevar, Littledata, Analyzely): These apps sit on top of GA4 and handle the technical implementation for you while improving data accuracy. Good middle ground if you want better accuracy than the native app provides but do not want to manage GTM yourself.
- Direct gtag.js code in theme.liquid: A legacy method that involves pasting the GA4 snippet directly into your theme files. Not recommended for most stores because it does not handle ecommerce events well and requires manual maintenance when you update your theme.
For the majority of store owners reading this guide, Method 1 (Google and YouTube channel app) is the right choice. It is the method Shopify officially documents and supports, and it covers all the essential ecommerce events out of the box.
Step 1: Create a GA4 Property and Web Data Stream
Both installation methods start with creating a GA4 property in your Google Analytics account. If you already have a GA4 property set up, skip to the relevant installation steps below. If you are starting from scratch, follow these steps.
- Go to Google Analytics: Visit analytics.google.com and sign in with your Google account. If this is your first time, you will be prompted to set up an account.
- Create a new account (if needed): Enter an account name (this can be your business name), choose your country, and accept the terms of service.
- Create a GA4 property: Click the gear icon to open Admin settings. Under the Property column, click Create Property. Choose Web as your platform. Enter your property name (your store name works well), set your reporting time zone and currency, and click Next.
- Enter your business details: Select your industry category (Shopping if ecommerce is your primary focus), business size, and how you intend to use GA4. These selections influence which default reports appear in your account.
- Set up a web data stream: Enter your Shopify store URL (for example, mystore.com), give your stream a name like Shopify Store, and enable enhanced measurement (this is on by default). Enhanced measurement automatically tracks page_view, scroll, outbound clicks, site search, video engagement, and file downloads.
- Copy your Measurement ID: After creating the data stream, you will see a Measurement ID formatted as G-XXXXXXXXXX. Write this down or keep this browser tab open. You will need this ID in the next steps.
At this point, your GA4 property exists and is ready to receive data. But it will not collect anything until you connect it to your Shopify store. That is what the next steps handle.
Step 2: Install GA4 Using the Google and YouTube Channel App (Recommended Method)
The Google and YouTube channel app is Shopify’s officially recommended way to connect GA4. It installs the GA4 tag on your storefront, configures ecommerce event tracking, and manages consent signals automatically. Here is how to set it up.
- Open your Shopify admin dashboard. Go to the Sales channels section in the left sidebar.
- Find or install the Google and YouTube channel. If you do not see it listed, click the plus icon next to Sales channels, search for Google and YouTube, and click Add app. Follow the prompts to install it.
- Connect your Google account. Open the Google and YouTube channel and click Sign in or Get started. Authorize Shopify to access your Google account. Make sure you sign in with the same Google account that owns your GA4 property.
- Select your GA4 property. In the Google and YouTube channel settings, look for the Google Analytics section. You should see your GA4 properties listed. Select the property you created in Step 1 and click Connect.
- Confirm the connection. Click Confirm to link your GA4 property to your Shopify store. The app will automatically place the GA4 tag on all your storefront pages and configure ecommerce event tracking.
- Verify the setup. Within a few minutes, open your GA4 account and check the Realtime report. Visit your store in a separate browser tab and perform some actions like viewing a product and adding it to your cart. You should see events appearing in Realtime.
That is it for the recommended method. The Google and YouTube channel app handles the technical details, including placing the gtag.js snippet, configuring enhanced measurement, and sending ecommerce events like add_to_cart and purchase. For most stores, this method provides everything you need.
One important note: do not also paste a GA4 snippet into your theme.liquid file if you are using the Google and YouTube app. Having both will cause duplicate page_view events and inflated metrics. Use one method only.
Also Read: How to Delete a Shopify Account & Cancel a Subscription?
Step 3: Install GA4 Using Google Tag Manager (Advanced Method)
Google Tag Manager, or GTM, is a tag management system that gives you more control over what gets tracked and how. It is the preferred method for Shopify Plus merchants, stores that need custom event tracking, or anyone running multiple analytics and advertising pixels from a single container. The setup is more involved, so only choose this path if the Google and YouTube app does not meet your needs.
- Create a GTM account and container. Go to tagmanager.google.com, create an account for your business, and set up a Web container. Copy the GTM container ID (formatted as GTM-XXXXXXX).
- Install the GTM container on Shopify. In your Shopify admin, go to Online Store then Themes. Click Actions then Edit code. Find the theme.liquid file in the Layout section. Paste the GTM head snippet right after the opening head tag, and the body snippet right after the opening body tag. Save your changes.
- Add the GA4 configuration tag in GTM. In your GTM container, click Tags then New. Choose the tag type Google Analytics GA4 Configuration. Enter your GA4 Measurement ID (G-XXXXXXXXXX). Set the trigger to All Pages. Save and publish the container.
- Set up ecommerce tracking with a custom pixel. Because Shopify’s checkout uses a sandboxed environment (checkout extensibility), standard GTM triggers will not fire on checkout pages. You need to create a custom pixel using Shopify’s Web Pixels API and use analytics.subscribe to push ecommerce events into the GTM data layer. This requires developer-level code.
- Configure data layer events. Set up data layer pushes for view_item, add_to_cart, begin_checkout, and purchase events. Create corresponding tags in GTM that fire GA4 events when these data layer events occur.
- Publish and test. Publish your GTM container, then use GTM Preview mode and GA4 DebugView to verify that events fire correctly on every page type including checkout.
The GTM method provides maximum flexibility and typically delivers better data accuracy than the native app. However, it requires ongoing maintenance. Every time you want to track a new event or add a new advertising pixel, you will need to update your GTM container and possibly your custom pixel code.
Shopify Analytics Apps: Elevar, Littledata, and Analyzely
If neither the native Google and YouTube app nor a custom GTM setup feels right, third-party Shopify apps offer a middle ground. These apps manage the technical implementation for you while generally providing better data accuracy than the native integration.
- Elevar: A popular choice among Shopify Plus merchants. Elevar handles server-side tracking, which improves data accuracy and supports cookie-less measurement. It manages GTM containers for you and includes pre-built data layer templates for Shopify.
- Littledata: Known for identifying and fixing data accuracy issues in Shopify’s native GA4 tracking. Littledata provides a tracking app that corrects common problems like missing ecommerce events and duplicate tracking. They have documented that the native Google and YouTube app can have data accuracy as low as 50 to 80 percent compared to actual Shopify orders.
- Analyzely: A newer option focused on making GA4 setup simple. Good for smaller stores that want a guided setup without the complexity of managing GTM directly.
Forum discussions on Reddit show that many merchants who start with the native Google and YouTube app eventually switch to Elevar or Littledata when they need more reliable data for ad optimization and revenue reporting.
GA4 Ecommerce Events Automatically Tracked on Shopify
When you install GA4 through the Google and YouTube channel app, Shopify automatically sends the following ecommerce events to your GA4 property. Understanding what each event represents will help you interpret your reports and set up conversions correctly.
- page_view: Fires when a user views any page on your store. This is the baseline metric for all traffic analysis.
- view_item: Fires when a user views a specific product page. Use this to measure which products get the most attention.
- view_item_list: Fires when a user views a collection or product listing page.
- add_to_cart: Fires when a user adds a product to their cart. Track this to measure product appeal and cart abandonment rates.
- view_cart: Fires when a user views their shopping cart.
- begin_checkout: Fires when a user starts the checkout process. This is a critical funnel step to monitor.
- purchase: Fires when a user completes a transaction. This is the most important event to mark as a conversion (key event) in GA4.
Non-Shopify Plus stores should be aware that certain intermediate checkout steps may not be tracked due to Shopify’s checkout restrictions. This is a platform limitation, not a GA4 configuration issue.
How to Test Your GA4 Setup
Once you have completed the installation, you need to verify that GA4 is actually receiving data. Testing before you start relying on reports will save you from weeks of invisible data loss. GA4 provides two main tools for testing: Realtime reports and DebugView.
Using Realtime Reports
Realtime reports show events as they happen, usually within a few seconds of occurring. Open your GA4 property, go to Reports, then Realtime. In a separate browser tab, visit your Shopify store and perform several actions: view a product page, add an item to your cart, and start the checkout process. Check back in the Realtime report and confirm that you see page_view, view_item, and add_to_cart events appearing with your user location listed.
Using DebugView for Detailed Testing
DebugView is the more precise testing tool and is the one recommended by experienced Shopify merchants on Reddit. It shows every single event fired by a specific debug session, including all parameters attached to each event. To use it, enable debug mode in your browser by installing the GA Debug browser extension or adding a debug parameter to your URL. Then go to GA4 Admin, DebugView, and perform actions on your store. You will see each event appear with a timestamp, which makes it easy to spot missing or duplicate events.
If DebugView shows events firing correctly for page_view, view_item, add_to_cart, begin_checkout, and purchase, your setup is working. If events are missing or firing twice, refer to the troubleshooting section below.
Recommended GA4 Settings for Shopify Stores
Installing the GA4 tag is only the beginning. To get the most value out of your analytics setup, configure the following settings after installation. These recommendations come from Shopify’s official documentation and from experienced analytics professionals in the community.
Mark Key Events (Conversions)
By default, GA4 does not treat any event as a conversion. You need to explicitly mark events as key events. The most important one for ecommerce is purchase. Go to GA4 Admin, Events, find the purchase event, and toggle Mark as key event. You may also want to mark add_to_cart and begin_checkout as key events if you want to track them as conversion goals in Google Ads.
Set Up Referral Exclusions
Without referral exclusions, GA4 attributes your sales to whichever domain the customer was on right before purchasing. For Shopify stores, this often means your checkout domain (checkout.shopify.com or your custom checkout domain) appears as a traffic source, which is misleading. Go to GA4 Admin, Data Streams, click your web stream, then Configure tag settings, then Show more under Settings, and add your checkout domain and Shopify domain to the list of unwanted referrals or internal traffic filters. This ensures your conversion credit goes to the actual marketing channel that drove the sale.
Configure Data Retention
By default, GA4 only retains user-level and event-level data for two months. This means if you look back more than two months, you will lose detail in many reports. Go to GA4 Admin, Data Collection and Modification, Data Retention, and change it from 2 months to 14 months. This is one of the most commonly missed settings and it has a significant impact on your ability to do year-over-year comparisons.
Link Google Ads
If you run Google Ads campaigns, linking your GA4 property to your Google Ads account is essential. This connection allows conversion data (like purchases tracked by the purchase event) to flow into Google Ads so you can measure ad performance and use smart bidding strategies. Go to GA4 Admin, Product Links, Google Ads Links, and follow the prompts to connect your accounts.
Enable Google Signals
Google Signals improves cross-device tracking and enables demographic reports. Go to GA4 Admin, Data Collection and Modification, Data Streams, click your web stream, then turn on Google Signals under the user-provided data settings. This requires you to accept the Google Signals terms and may take up to 24 hours to activate.
Checkout Extensibility and Custom Pixels
Shopify introduced checkout extensibility to replace the old checkout.liquid template, giving merchants more control over the checkout experience. This change has significant implications for GA4 tracking. The old method of injecting tracking code directly into checkout pages no longer works on stores that have migrated to checkout extensibility.
If you are on Shopify Plus and using checkout extensibility, you will need to use Shopify’s custom pixel feature to track checkout events. Custom pixels run in a sandboxed environment and use the Web Pixels API with analytics.subscribe to capture events like checkout_started, checkout_completed, and payment_info_submitted. You then push these events to your data layer for GTM to pick up, or send them directly to GA4 if you are using gtag.js.
The Google and YouTube channel app handles checkout extensibility automatically for basic tracking. But if you are using GTM, you must configure a custom pixel manually. Note that GTM Preview mode does not work inside the checkout sandboxed environment, which makes debugging checkout events more challenging. Use GA4 DebugView instead.
Troubleshooting Common GA4 Problems on Shopify
Even with a correct setup, you may encounter issues. The following problems are the most frequently reported by Shopify store owners on Reddit and in the Shopify community forums. Each one has a known cause and solution.
Problem 1: No Data Appearing in GA4
If your GA4 Realtime report shows zero users after completing setup, check three things. First, confirm your store is not password-protected, since events only fire on the password page while the lock screen is active. Second, verify that you selected the correct GA4 property in the Google and YouTube channel settings. Third, check that you connected the right web data stream and that your Measurement ID matches. Wait at least 24 to 48 hours for standard reports to populate, as Realtime is the only immediate data source.
Problem 2: Shopify and GA4 Numbers Do Not Match
This is the single most common complaint. Your Shopify dashboard shows 100 orders but GA4 only shows 75 purchase events. The difference comes from several factors. GA4 relies on browser cookies, which can be blocked by ad blockers or browser privacy settings. GA4 also does not count transactions from customers who have not consented to tracking if you have implemented Consent Mode. Additionally, some checkout events may not fire if the customer closes the browser tab before the thank-you page loads. Forum data suggests the native Google and YouTube app has an accuracy rate of roughly 50 to 80 percent compared to actual Shopify orders. If you need closer numbers, consider switching to a server-side tracking solution like Elevar or Littledata.
Problem 3: Duplicate Page Views or Events
Duplicate events almost always mean you have two GA4 tags running simultaneously. The most common cause is having both the Google and YouTube channel app connected AND a manual gtag.js snippet pasted into theme.liquid. Check your theme.liquid file in Online Store then Themes then Edit code for any leftover GA4 code snippets. Remove any duplicates so only one tracking method is active. Use DebugView to confirm each event fires exactly once.
Problem 4: Missing Ecommerce Events (add_to_cart, begin_checkout)
If page_view events appear but ecommerce events like add_to_cart or begin_checkout are missing, the enhanced measurement configuration may be incomplete. Verify that enhanced measurement is enabled in your web data stream settings. If you are using GTM, check that your data layer push events and corresponding GTM tags are correctly configured. Non-Shopify Plus stores may also see limitations on certain checkout-step events due to platform restrictions on the checkout process.
Problem 5: High Percentage of Unassigned Traffic
If a large chunk of your traffic appears as unassigned or direct in GA4, the issue is often related to referral exclusions not being set up. Without proper exclusions, traffic from PayPal, your checkout domain, and other third-party payment processors gets attributed as direct traffic. Configure referral exclusions as described in the recommended settings section above.
Frequently Asked Questions About GA4 on Shopify
What is GA4 and why should I add it to my Shopify store?
GA4 (Google Analytics 4) is the current version of Google Analytics, replacing the deprecated Universal Analytics. Adding GA4 to Shopify gives you access to in-depth insights including traffic sources, ecommerce events like add_to_cart and purchase, customer journey tracking across devices, and conversion data you can link to Google Ads.
How do I set up GA4 for my Shopify store?
The recommended method is to install the Google and YouTube channel app from your Shopify admin. Go to Sales channels, add the Google and YouTube channel, connect your Google account, select your GA4 property, and confirm the connection. The app automatically places the GA4 tag and configures ecommerce event tracking.
Where do I find my GA4 Measurement ID?
Sign in to Google Analytics at analytics.google.com. Go to Admin, then click Data Streams under the Property column. Click on your web data stream. Your Measurement ID appears at the top right, formatted as G-XXXXXXXXXX. You need this ID if you are setting up GA4 manually or through Google Tag Manager.
Can I use my existing Google Analytics account for my Shopify store?
Yes. If you already have a GA4 property, you can connect it to Shopify using the Google and YouTube channel app. Simply select your existing property during setup. If you only have an old Universal Analytics property, you will need to create a new GA4 property since Universal Analytics has been deprecated since July 2023.
Why don’t my Shopify and GA4 numbers match?
GA4 relies on browser cookies and JavaScript, which can be blocked by ad blockers, browser privacy settings, and consent mode restrictions. Shopify counts orders server-side. This typically results in GA4 showing 50 to 80 percent of the orders Shopify records. For closer accuracy, consider a server-side tracking solution like Elevar or Littledata.
Is Universal Analytics still available on Shopify?
No. Universal Analytics was deprecated by Google in July 2023. All references to Tracking IDs (UA-XXXXXXXX), Global Site Tag, and Online Store Preferences for Google Analytics are outdated. You must use GA4 with a Measurement ID (G-XXXXXXXXXX) installed through the Google and YouTube channel app or Google Tag Manager.
Also Read: How to Freelance as a Student? – Insider Tips for Success
Conclusion
Adding Google Analytics 4 to your Shopify store is one of the highest-impact steps you can take for data-driven growth in 2026. Install the Google and YouTube channel app, mark purchase as a key event, set your data retention to 14 months, configure referral exclusions, and test with DebugView. Your GA4 setup will be ready to deliver the insights you need to grow.
Leave a Reply