
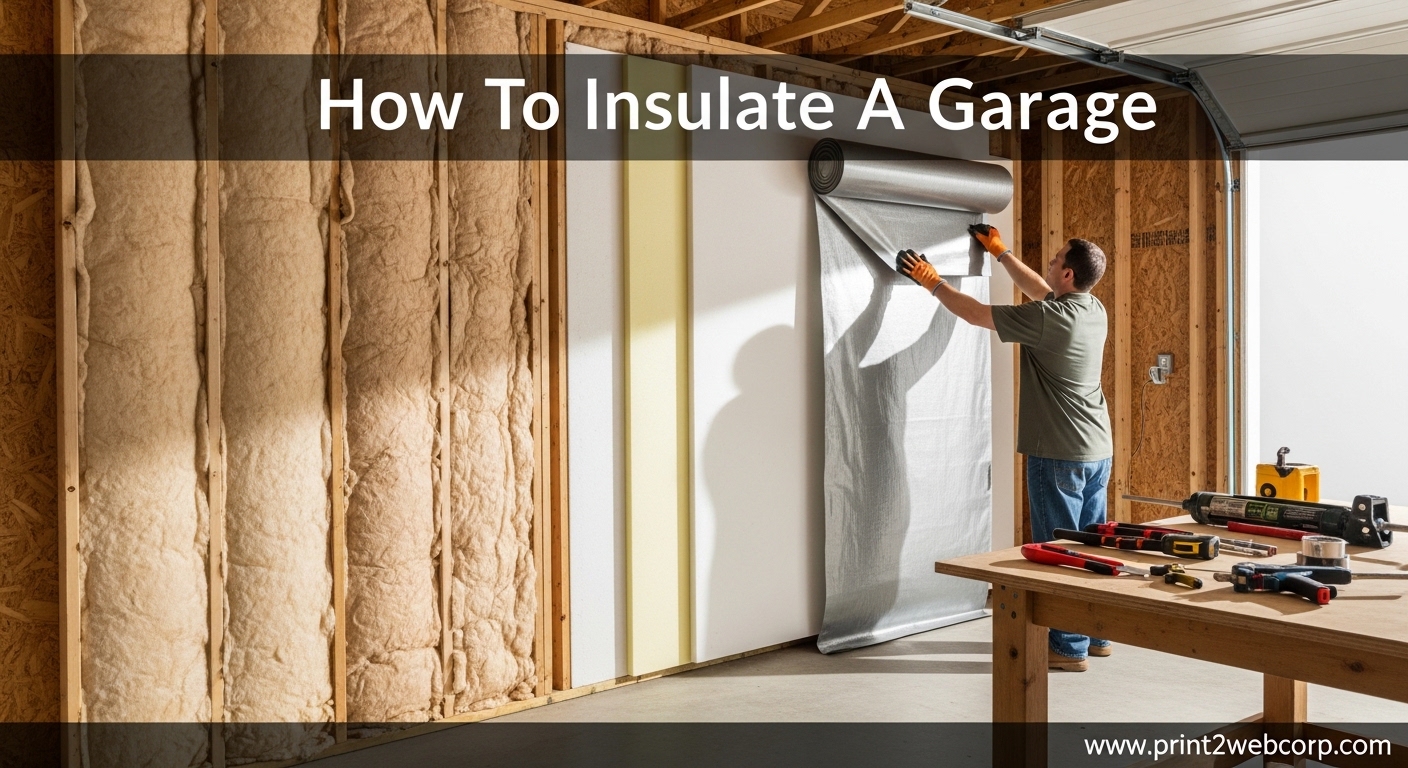
If your garage feels like an icebox in winter or an oven in summer, learning how to insulate a garage can transform the space. A properly insulated garage maintains comfortable temperatures year-round, protects your belongings from extreme temperature swings, and can even reduce energy costs in adjacent living areas.
I’ve insulated three different garages over the years, and the difference is remarkable. My workshop stays usable in January without a space heater running constantly, and my home office above the garage no longer needs extra air conditioning in summer. The project is entirely doable as a weekend DIY with the right materials and techniques.
This guide covers everything you need to know about how to insulate a garage, from choosing the right materials to step-by-step installation for walls, ceiling, and garage door. I’ll walk you through R-values, vapor barriers, and climate-specific considerations based on real project experience.
Why Insulate Your Garage
Garage insulation delivers tangible benefits beyond just comfort. An attached garage acts as a thermal buffer between your home and the outside world. When uninsulated, that space becomes a massive energy sink, drawing heat away from your house in winter and radiating heat inward during summer.
I measured a 12-degree temperature difference in the room above my garage after adding insulation. That’s the difference between running your HVAC constantly and letting it cycle normally. The insulation paid for itself within two heating seasons just through reduced energy bills.
Beyond energy efficiency, insulation protects stored items. Tools stay rust-free, paints and chemicals remain stable, and your car isn’t subjected to extreme temperature cycling that accelerates wear. If you use your garage as a workshop, home gym, or hobby space, insulation makes it usable year-round instead of just three seasons.
Detached garages benefit too, especially if you heat them for work or storage. A well-insulated detached garage requires far less energy to maintain temperature, making projects like woodworking or auto work more comfortable and affordable.
Types of Garage Insulation
Choosing the right insulation material is the first decision in your garage insulation project. Each type has strengths and weaknesses depending on your garage construction, climate, and budget. Let me break down the four main options based on hands-on experience with each.
Fiberglass Batts
Fiberglass batts are the most common choice for DIY garage insulation, and for good reason. These pre-cut insulation panels fit between standard wall studs and ceiling joists, making installation straightforward for homeowners. I used R-13 fiberglass batts in my first garage project, and the process was beginner-friendly.
Fiberglass offers R-values ranging from R-11 to R-15 for 2×4 walls, and R-19 to R-21 for 2×6 walls. The material is relatively inexpensive at $0.50 to $1.50 per square foot, making it budget-friendly for larger garages. Most home improvement stores carry it, and you can return unused batts.
The downsides? Fiberglass can be itchy to work with (wear protective gear), and it requires a vapor barrier in most climates. It also loses effectiveness if compressed, so proper installation is crucial. Covering with drywall is mandatory for fire safety, which adds to the project scope.
Spray Foam Insulation
Spray foam delivers the highest R-value per inch and provides superior air sealing. Closed-cell foam offers R-6 to R-7 per inch, while open-cell provides R-3.5 to R-4. I used closed-cell spray foam in a workshop renovation, and the air sealing benefits were immediately noticeable—no more drafts around electrical outlets.
The material expands to fill gaps and cracks, creating an airtight thermal envelope. This makes it ideal for garages with irregular framing, lots of penetrations, or metal construction where air leakage is a major concern. Spray foam also acts as its own vapor barrier when applied at sufficient thickness.
The catch? Professional spray foam costs $2 to $6 per square foot, making it the most expensive option. DIY spray foam kits exist but require careful handling. The material also requires professional installation in many areas due to off-gassing concerns during application. For most garage projects, the cost is hard to justify unless you have specific needs like extreme climate conditions.
Rigid Foam Board
Rigid foam boards offer high R-values per inch and excel at moisture resistance. Expanded polystyrene (EPS) provides R-3.6 to R-4 per inch, extruded polystyrene (XPS) offers R-5 per inch, and polyisocyanurate delivers R-6 to R-6.5 per inch. I’ve used XPS foam board on garage ceilings with excellent results.
Rigid foam cuts easily with a utility knife and can be friction-fit between studs or layered over existing insulation. It’s moisture-resistant, making it ideal for damp garages or metal buildings where condensation is a concern. The material doesn’t absorb water, so it maintains R-value even in humid conditions.
Rigid foam costs $1 to $3 per square foot depending on type and thickness. It requires covering with drywall for fire safety (except in certain attic applications). The material can be more challenging to install around obstacles like electrical boxes and piping compared to batt insulation.
Cellulose and Rock Wool
Cellulose insulation consists of recycled paper treated with fire retardant, while rock wool is made from spun volcanic rock. Both are loose-fill materials typically blown into wall cavities and ceilings. Cellulose offers R-3.2 to R-3.8 per inch, while rock wool provides R-3 to R-3.3 per inch.
These materials excel at filling irregular spaces and provide better soundproofing than fiberglass. Rock wool is fire-resistant and moisture-resistant, making it ideal for workshops where fire safety is a concern. Cellulose is one of the most eco-friendly options available.
Loose-fill insulation typically requires professional equipment for installation, though DIY blower rentals are available. Expect costs of $1 to $2 per square foot installed. The material can settle over time, reducing effectiveness, and it’s not ideal for vertical wall applications without specialized equipment.
Garage Insulation Cost Guide
Understanding the costs helps you budget appropriately and choose the right insulation type for your situation. I’ve broken down expenses by material and garage size based on current market pricing and multiple projects.
Cost by Insulation Type
Fiberglass batts remain the most budget-friendly option at $0.50 to $1.50 per square foot for materials. A typical two-car garage with 800 square feet of wall area would cost approximately $400 to $1,200 for wall insulation alone. Adding ceiling insulation (another 400-600 square feet) brings the total to $600 to $1,800.
Rigid foam board costs $1 to $3 per square foot depending on type and thickness. That same two-car garage would run $800 to $2,400 for walls and $1,200 to $3,600 including ceiling. The higher end of this range covers premium polyisocyanurate board with superior R-values.
Spray foam insulation is the premium option at $2 to $6 per square foot professionally installed. Expect to spend $1,600 to $4,800 for walls in a standard two-car garage, or $2,400 to $7,200 including ceiling. DIY spray foam kits reduce this to approximately $1 to $2 per square foot but require significant learning curve and safety precautions.
Don’t forget additional materials: vapor barrier ($0.15 to $0.30 per square foot), drywall for covering ($0.50 to $1 per square foot), tape and joint compound, fasteners, and safety equipment. These add-ons typically total $300 to $800 for a standard garage project.
Cost by Garage Size
A single-car garage (approximately 12×20 feet) has about 400-500 square feet of wall area. Budget $300 to $1,500 for materials using fiberglass, or $800 to $2,500 for spray foam. These smaller garages are perfect starter projects if you’re new to insulation work.
The standard two-car garage (approximately 22×24 feet) contains 800-1,000 square feet of wall area. Material costs run $600 to $2,500 for fiberglass batts, or $1,600 to $5,000 for professional spray foam installation. This is the most common garage size and offers the best return on investment given the usable space gained.
Three-car and oversized garages (approximately 30×30 feet or larger) can exceed 1,500 square feet of wall area. Budget $1,000 to $4,000 for fiberglass materials, or $3,000 to $9,000 for spray foam. These larger spaces benefit most from insulation because the absolute energy savings are substantial.
Tools and Materials Needed
Gather these supplies before starting your garage insulation project. Working with the right tools makes the difference between a frustrating weekend and a smooth installation.
Essential Tools
You’ll need a utility knife with spare blades for cutting insulation to size. A straightedge or T-square helps ensure straight cuts. Wear long sleeves, long pants, gloves, safety glasses, and a dust mask—fiberglass particles are irritating to skin and lungs.
A staple gun (hand-powered or electric) secures the vapor barrier. Have a tape measure, pencil for marking cuts, and a step ladder for reaching upper walls and ceiling. A putty knife helps tuck insulation into awkward corners around electrical boxes and plumbing.
For spray foam projects, you’ll need the spray foam kit, appropriate respirator, and protective clothing you can dispose of afterward. Rigid foam installations require a fine-tooth saw or specialized foam cutting tool for clean edges.
Materials Checklist
Calculate your insulation needs by measuring wall length times height, subtracting for doors and windows. Add 10% for waste and odd spaces. For ceiling insulation, measure the area between joists and multiply by the total ceiling area.
You’ll need vapor barrier material (polyethylene sheeting, typically 4-6 mil thickness) for fiberglass installations in most climates. Vapor barrier tape seals seams and penetrations. If covering with drywall, purchase the appropriate amount of drywall sheets, joint compound, tape, and screws.
For garage door insulation kits, measure your door panel dimensions. Most standard residential doors use 16×48 inch panels. Consider adding weatherstripping to door frames and seals between door panels for additional air sealing.
How To Insulate A Garage Walls
Wall insulation provides the biggest temperature improvement for most garages. This process works for both wood-frame and metal garages, though metal buildings require additional preparation for moisture control. I’ll walk you through the complete installation process.
Step 1: Clear and Inspect the Walls
Remove everything stored against the walls you’ll be insulating. You need clear access to every stud bay. This is also the perfect time to declutter—anything you haven’t used in two years probably doesn’t need to stay in your garage.
Inspect the wall framing for damage, rot, or pest issues. Address any problems before adding insulation. Look for existing wiring, plumbing, or ductwork that might affect your installation plan. Take photos of the wall condition before proceeding—you’ll appreciate having a reference later.
For metal garages, check for rust or corrosion around the base plates. Clean any loose debris and consider applying a rust inhibitor if needed. Metal buildings require special attention to condensation management—more on that in the vapor barrier section.
Step 2: Seal Gaps and Air Leaks
Before adding insulation, seal all air leaks with expanding spray foam or caulk. Focus on areas where different materials meet: sill plates at the floor, top plates at the ceiling, around windows and doors, and where pipes or wires penetrate the wall.
I use a combination of canned spray foam for larger gaps (1/4 inch and larger) and silicone caulk for smaller cracks. Pay special attention to the band joist area in attached garages—this is a major source of air leakage between the garage and your home.
For exterior walls, seal the rim joist area where the framing sits on the foundation. This cavity often connects directly to the outside and is a significant source of drafts. Rigid foam board cut to fit and sealed with spray foam works exceptionally well here.
Step 3: Install Insulation in Stud Bays
Cut fiberglass batts to fit snugly between studs. Measure each bay individually—walls are rarely perfectly square. Cut batts about 1 inch wider than the space for a friction fit that stays in place without fasteners.
Slide the insulation into the stud bay with the vapor barrier facing the appropriate direction (see the vapor barrier section below for climate-specific guidance). The facing should be toward the conditioned space in most cases. Fluff the insulation gently to fill the entire cavity from front to back.
For areas around electrical boxes, cut carefully around the box or split the batt and work it around the obstruction. Don’t compress the insulation behind wires or pipes—compressed insulation loses R-value. Use small pieces of insulation to fill completely around obstructions.
In metal garages, you may need to use wire strapping or mechanical fasteners to hold insulation in place since metal studs don’t provide friction. Alternatively, rigid foam board friction-fits well between metal studs and can be sealed with spray foam for a complete seal.
Step 4: Install Vapor Barrier (If Required)
After insulation is in place, install the vapor barrier according to your climate zone. In cold climates (Zones 5 and colder), the vapor barrier goes on the warm-in-winter side (typically the interior). In hot-humid climates (Zones 1-3), it may go on the exterior side or be omitted entirely depending on local codes.
Staple the plastic sheeting to the studs, starting at one corner and working across the wall. Overlap seams by at least 6 inches and seal them with vapor barrier tape. Cut around electrical boxes and seal tightly to the box edges with tape or acoustical sealant.
The goal is to create a continuous air and moisture barrier. Any gaps or penetrations compromise the effectiveness. Pay special attention to the bottom edge—seal it to the floor plate or foundation, but leave it open to termite inspection zones if required by local code.
Step 5: Cover with Drywall
Building codes require covering insulation with a thermal barrier—typically 1/2-inch drywall. This isn’t optional; exposed fiberglass and foam present fire hazards. Drywall also protects the insulation from damage and provides a finished surface.
Hang drywall vertically, staggering joints between rows for strength. Use appropriate screws for your framing type (coarse-thread for wood studs, fine-thread for metal). Cut holes for electrical boxes and outlets before hanging the sheets whenever possible.
Mud and tape joints, sand smooth, and paint with a primer. For garage applications, consider a more durable paint finish that can withstand bumps and scuffs. If moisture is a concern, use mold-resistant drywall (green board) in problem areas.
How To Insulate A Garage Ceiling
Ceiling insulation is crucial if there’s living space above the garage, or if you want to maximize temperature control. The process differs depending on your garage structure—attached vs. detached, and whether the ceiling is finished or open.
Open Ceiling with Exposed Joists
For garages with exposed ceiling joists (no finished ceiling), the installation is straightforward. Lay fiberglass batts between the joists, with the vapor barrier facing the heated space below. Use the appropriate thickness—R-30 to R-49 is recommended for most climates, which equals 10 to 16 inches of insulation.
Make sure insulation extends to the exterior walls but doesn’t block roof ventilation. For flat roofs, maintain ventilation channels as specified by the roof manufacturer. In cathedral-style ceilings, use baffles to maintain an air gap between the insulation and roof deck.
For metal garages with exposed roof structure, rigid foam board works exceptionally well. Friction-fit the foam between roof purlins, seal edges with spray foam, and tape all seams. This provides both insulation and a condensation barrier in one step.
Finished Ceilings
If your garage already has a finished drywall ceiling, you have two options. The first is to remove the drywall, add insulation, and reinstall. This gives the best results but requires more work. The second option is blown-in insulation through small holes cut in the ceiling.
For blown-in insulation, hire a professional or rent a blower machine. Cellulose or fiberglass loose-fill is blown through holes drilled in the ceiling, filling the joist cavities completely. This works well for irregular spaces and around obstacles, but requires professional equipment and technique.
Alternatively, you can add rigid foam board to the underside of the ceiling. This reduces headroom but provides excellent R-value without demolition. Insulate the rim joist area at the perimeter regardless of which method you choose—this is a major source of energy loss.
Garages with Living Space Above
For garages with rooms above, insulation is critical for comfort and energy efficiency. The ceiling acts as the floor for the space above, and inadequate insulation makes that room uncomfortable and expensive to heat and cool.
Aim for R-30 to R-49 between the joists. If space is limited, use high-R-value materials like rigid foam or spray foam. Pay special attention to the band joist area where the floor framing meets the foundation walls—this area requires thorough air sealing.
Consider adding radiant barrier foil on the underside of the joists in hot climates. This reflects radiant heat and can significantly reduce cooling costs. In cold climates, ensure the vapor barrier is on the warm side (toward the living space above).
How To Insulate A Garage Door
The garage door is often the weakest link in your thermal envelope. Even well-insulated walls lose effectiveness if the door conducts heat freely. Insulating your garage door is one of the highest-ROI projects you can tackle.
Garage Door Insulation Kits
Manufactured insulation kits make this project simple. These typically include panels sized for standard door sections, fastening tape, and installation hardware. I’ve used several brands over the years, and the process takes about two hours from start to finish.
Most kits use either polystyrene foam panels or reflective foil insulation. Polystyrene provides R-3 to R-5 per panel, while reflective foil offers R-3 to R-6 depending on the product. Both options significantly reduce heat transfer through the door.
Clean the door panels thoroughly before starting. Measure each door section and cut the insulation panels to fit. Peel the backing from the adhesive strips and press the panels into place. Some kits use retainer clips that slide into the door frame for a more secure installation.
DIY Garage Door Insulation
For a budget approach, rigid foam board works well. Measure your door panels and cut foam to size. Use construction adhesive to secure the foam to the door sections. For additional retention, you can add tape or mechanical fasteners at the edges.
Another DIY option is reflective foil bubble wrap. This material cuts easily with scissors and attaches with spray adhesive. It’s lightweight, so it won’t strain the door mechanism, and it provides both insulation and a radiant barrier.
Whatever material you choose, ensure it doesn’t interfere with the door operation. Test the door through several open-close cycles to confirm nothing binds or catches. The insulation should fit snugly but not so tight that it prevents the door from moving freely.
Weatherstripping and Seals
While you’re working on the door, replace worn weatherstripping. The bottom seal, side seals, and top seal all prevent air infiltration. New weatherstripping costs less than $50 and makes a noticeable difference in drafts and air leakage.
Check the seal between door sections if you have a sectional door. Rubber or vinyl seals between sections degrade over time. Replace any damaged seals to prevent heat transfer between sections.
For extreme climates, consider an insulated garage door as a replacement. These doors have built-in insulation (typically R-9 to R-16) and provide much better thermal performance than adding insulation to an uninsulated door. The investment pays back in energy savings and comfort.
Vapor Barrier Placement by Climate
Correct vapor barrier installation is critical for preventing moisture problems. Get this wrong, and you risk mold, rot, and reduced insulation effectiveness. The proper placement depends on your climate zone and heating patterns.
Cold Climates (Zones 5-8)
In heating-dominated climates, install the vapor barrier on the warm-in-winter side of the assembly. For most garages, this means the interior side of exterior walls. The barrier prevents indoor moisture from migrating into the wall cavity during winter, where it would condense on cold surfaces.
Use 4-6 mil polyethylene sheeting stapled to the studs, with all seams taped. The barrier should be continuous—no gaps around electrical boxes, pipes, or other penetrations. Seal these carefully with tape or acoustical sealant.
For ceilings under unconditioned space, place the vapor barrier on the warm side (toward the garage interior if you heat the garage, or toward the living space if rooms are above). In mixed situations, consult local code requirements as specific applications vary.
Mixed Climates (Zones 3-4)
Mixed climates present a challenge because moisture drives change direction with the seasons. Here, the vapor barrier placement depends on whether you heat or cool the garage more, and on local code requirements.
Many building scientists recommend “smart” vapor retarders in these zones—materials that allow moisture to pass through in one direction but not the other. These products adapt to seasonal changes and reduce the risk of moisture accumulation.
When in doubt, consult your local building code. Some mixed-climate areas require specific vapor barrier approaches based on regional conditions. A call to your local building department can clarify requirements for your specific location.
Hot-Humid Climates (Zones 1-2)
In cooling-dominated climates, the vapor barrier may be placed on the exterior side of the assembly or omitted entirely in some cases. The goal is to prevent humid outdoor air from reaching cooler interior surfaces where condensation would form.
Many experts recommend using vapor-permeable insulation (like unfaced fiberglass) and focusing on air sealing rather than a continuous vapor barrier. This allows any moisture that does enter to escape toward the interior. Exterior rigid foam with taped seams can serve as both insulation and drainage plane.
Metal buildings in hot-humid climates require special attention. The metal exterior creates a condensing surface, so a vapor barrier on the interior combined with proper ventilation is essential. Some applications use a double vapor barrier system with ventilation between the layers.
Signs of Moisture Problems
Watch for these indicators that your vapor barrier installation isn’t working correctly: musty odors, visible mold or mildew, damp insulation, water stains on drywall, or excessive condensation on windows. These signs indicate moisture is accumulating where it shouldn’t be.
If you notice problems, assess the situation before taking action. Adding another vapor barrier on the “wrong” side can trap moisture and make the problem worse. In some cases, removing or modifying the existing vapor barrier is the correct solution.
When in doubt, consult a professional. Building science problems get worse over time, and the cost of professional assessment is far less than dealing with structural damage or mold remediation later.
Frequently Asked Questions
What’s the cheapest way to insulate my garage?
Fiberglass batts offer the lowest upfront cost at $0.50 to $1.50 per square foot. A typical two-car garage can be insulated for $600 to $1,800 in materials. For even less, watch for sales or buy in bulk. While spray foam and rigid foam offer higher R-values, fiberglass provides the best balance of cost and effectiveness for most DIY garage projects.
What is the proper way to insulate a garage?
Proper garage insulation starts with air sealing all gaps and penetrations, then installing friction-fit insulation between studs and joists. Add a vapor barrier on the warm-in-winter side (for cold climates), and cover everything with fire-rated drywall. Use R-13 to R-21 for walls and R-30 to R-49 for ceilings. Don’t forget the garage door—it accounts for significant heat loss.
Does it make sense to insulate an unheated garage?
Yes, especially for attached garages. Even without active heating, insulation moderates temperature extremes and creates a thermal buffer between your home and the outdoors. This reduces energy loss through the walls and ceiling shared with your house. For detached garages, insulation still protects stored items and makes the space more usable for work or hobbies year-round.
How to keep a garage warm in winter?
Insulation is the foundation—add R-13 to R-21 in walls and R-30 to R-49 in the ceiling. Insulate the garage door with a kit or rigid foam. Seal all air leaks around the door frame, windows, and wall penetrations. For active heating, consider an electric forced-air heater, natural gas unit heater, or mini-split system. Start with insulation and sealing first—the heating system will work much more efficiently.
Conclusion
Learning how to insulate a garage transforms an uncomfortable space into a usable part of your home. The project requires careful planning and some physical work, but the results are immediate and lasting. From my experience, a properly insulated garage is the difference between a storage area you avoid and a workshop, gym, or hobby space you actually use.
Start with the basics: seal air leaks, install appropriate insulation for your climate, add the vapor barrier on the correct side, and cover with drywall. Don’t overlook the garage door—it’s a major source of heat loss that’s easy and inexpensive to address.
The investment pays back in energy savings, especially for attached garages affecting your home’s heating and cooling costs. Beyond the financial benefit, you’ll gain usable square footage and protect your belongings from temperature damage. If you’ve been putting off this project, there’s no better time than 2026 to create a more comfortable, efficient garage.
Leave a Reply