
Living with rooms that never seem to reach the right temperature? Your HVAC system might be starving for return air. I’ve seen this issue countless times – bedrooms that stay freezing while the living room roasts, or stuffy spaces that never feel comfortable no matter where you set the thermostat.
The problem often comes down to inadequate return air ducts. Without proper air return pathways, your forced-air system struggles to circulate conditioned air efficiently. After helping friends tackle this project over several weekends, I’ve learned that how to install return air duct is a manageable DIY project that makes a massive difference in home comfort.
This guide walks you through everything you need to know about adding a return air duct to improve your home’s airflow, energy efficiency, and overall comfort in 2026.
What Is a Return Air Duct?
A return air duct is the pathway that carries air from your living spaces back to your furnace or air handler. Think of it as the exhaust system for your HVAC – while supply vents push conditioned air into rooms, return ducts pull stale air back for reheating, cooling, and filtration.
Your HVAC system relies on this continuous circulation loop. Air gets sucked through return vents, travels through ductwork to the air handler, passes through filters, gets conditioned, and then pushes back out through supply vents. Without adequate return air pathways, your system can’t maintain proper airflow or pressure balance.
Most homes have at least one central return, but this often isn’t enough for modern layouts. Bedrooms with doors that close, finished basements, and home additions frequently need dedicated return ducts to function properly.
Why Return Air Ducts Matter
Proper return air ducting delivers five major benefits that transform how your HVAC system performs:
Improved Airflow and Comfort
Rooms with dedicated returns stay consistent with the rest of your home. No more hot or cold spots where air gets trapped. The continuous circulation prevents that stuffy feeling you get in closed-off spaces.
Better Energy Efficiency
When your HVAC system can breathe properly, it runs less often and for shorter cycles. This directly translates to lower utility bills – some homeowners report 15-20% savings after adding return ducts to problem rooms.
Enhanced Indoor Air Quality
Return ducts pull air through filters continuously, removing dust, allergens, and pollutants. More return pathways mean more air passes through filtration, keeping your home’s air cleaner and healthier.
Balanced Air Pressure
Without proper returns, rooms become pressurized when doors close. This makes it hard for supply air to enter and creates weird pressure imbalances throughout your home. Return ducts equalize pressure naturally.
Extended Equipment Life
Your HVAC system lasts longer when it’s not struggling against airflow restrictions. Reduced strain on the blower motor and fewer on/off cycles mean fewer repairs and a longer system lifespan.
Tools and Materials Needed
Before starting how to install return air duct project, gather these supplies:
Essential Tools:
- Stud finder
- Drywall saw or jab saw
- Cordless drill with various bits
- Tin snips (for cutting ductwork)
- Tape measure
- Level
- Screwdriver set
- Utility knife
- Safety glasses and dust mask
- Work light
Materials:
- Register boot or starting collar (6-inch or 8-inch)
- Flex duct or sheet metal ductwork
- Duct tape (quality grade)
- Mastic sealant
- Register grill/vent cover
- 2×4 lumber for framing (if needed)
- Duct insulation wrap (for unconditioned spaces)
- Sheet metal screws
- Drywall repair supplies
Cost Estimate:
Budget $200-$750 per return vent depending on complexity, materials chosen, and whether you need professional help for any portion. Flex duct runs cost less than rigid sheet metal but require careful installation to avoid airflow restrictions.
Where to Place Your Return Air Duct
Location matters significantly when adding return air ducts. Follow these guidelines for optimal performance:
Ideal Placement:
- On an interior wall opposite supply vents
- At least 6-8 feet from supply registers
- In each enclosed bedroom
- In large open areas (family rooms, living rooms)
- Near the ceiling for cooling climates
- Near the floor for heating climates
Avoid These Locations:
- In bathrooms (moisture and code issues)
- In kitchens (grease and odors)
- Directly next to supply vents
- In exterior walls (if possible – harder to run ductwork)
- Near noise sources you don’t want amplified
Building Code Considerations:
Most areas require at least one return per 250-400 square feet of living space. Check your local codes before starting. Some jurisdictions require permits for ductwork modifications, especially if altering the main return plenum.
How to Install Return Air Duct – Step by Step
This installation process typically takes 4-8 hours depending on complexity. I’ll break it into manageable steps with time estimates for each phase.
Step 1: Plan Your Route (30-60 minutes)
Map the path from your chosen vent location to the main return plenum or trunk line. Consider obstacles like electrical wires, plumbing pipes, and structural elements. Use your stud finder to identify framing along the planned route.
Locate your main return plenum – it’s the large duct connected to your air handler or furnace return side. This is where you’ll connect your new duct run. If accessing the plenum isn’t feasible, you can tap into an existing main trunk line using a takeoff collar.
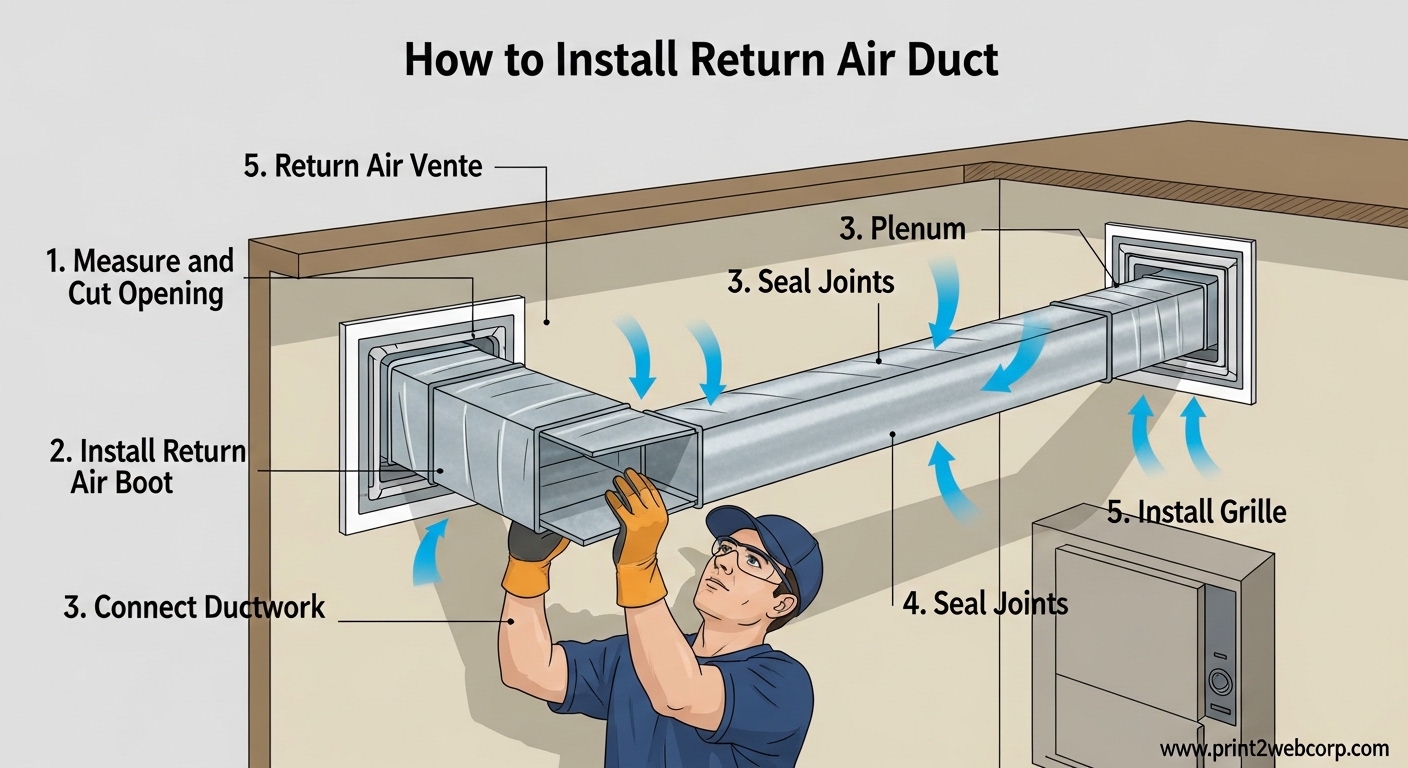
Step 2: Install the Register Boot (1-2 hours)
Mark your vent location on the wall or ceiling. Standard returns are typically 16×24 inches or 20×30 inches. Cut the opening using your drywall saw, being careful not to cut through any hidden wiring or pipes.
Insert the register boot into the opening and secure it with screws to the surrounding framing. If no framing exists, you’ll need to build a simple frame using 2×4 lumber to support the boot. Ensure the damper on the boot operates freely.
Step 3: Run the Ductwork (2-4 hours)
Connect your flex duct or sheet metal to the register boot’s starting collar. Secure with sheet metal screws and seal with mastic – never rely on duct tape alone for long-term connections. Run the duct toward your connection point, keeping the path as straight as possible.
For flex duct, avoid sharp bends or kinks that restrict airflow. Support the duct every 4-5 feet with hangers or straps. Don’t let it sag or compress. If using rigid sheet metal, assemble sections with screws and seal all joints with mastic.
Step 4: Connect to Main Duct (1-2 hours)
At the connection point, install a takeoff collar or starter tee. Cut an appropriately sized hole in the main duct using your tin snips. Insert the takeoff collar and secure with sheet metal screws.
Connect your new duct run to this collar and seal the connection thoroughly with mastic. This connection is critical – any leaks here significantly reduce system efficiency. For best results, cover all seams with mastic and reinforce with fiberglass mesh tape where needed.
Step 5: Insulate Unconditioned Runs (30-60 minutes)
If your duct passes through unconditioned spaces like attics, crawl spaces, or garages, wrap it with duct insulation. This prevents condensation and heat gain or loss. Use R-6 or higher rated insulation and secure with tape or strapping.
Step 6: Install the Register Grill (30 minutes)
Attach your decorative register grill to the boot opening. Most simply screw into place or use friction-fit tabs. Choose a grill with adequate free area – avoid decorative grills that restrict airflow more than 20-30%.
Step 7: Test the System (15-30 minutes)
Turn on your HVAC system and check airflow at the new vent. You should feel strong suction. Check all connections for air leaks using a smoke pencil or incense stick – any smoke getting pulled away from joints indicates leaks that need resealing.
Listen for whistling or excessive noise, which signals airflow restrictions. Adjust dampers as needed to balance airflow between rooms. Your system should run more quietly and efficiently with the new return pathway.
Common Mistakes to Avoid
I’ve seen homeowners make these errors repeatedly when adding return air ducts. Avoid them for better results:
Undersized Ductwork
Using duct that’s too small restricts airflow and creates noise. Follow the 150 square inches per ton rule – for every ton of HVAC capacity, you need at least 150 square inches of combined return duct area. A 6-inch round duct provides about 28 square inches, while an 8-inch provides about 50.
Poor Sealing
Duct tape alone isn’t enough for long-term connections. Use mastic sealant on all joints and seams. It dries to a hard, permanent seal that won’t degrade over time like tape. Pay special attention to the connection at the main duct – this is where most leaks occur.
Kinked Flex Duct
Flex duct needs to be pulled straight, not coiled or sharply bent. Each kink or sharp bend reduces airflow significantly. Support the duct properly so it maintains a smooth path from register to main connection.
Wrong Placement
Installing returns too close to supply vents creates short-circuiting where air just circulates between the two without properly conditioning the room. Place returns as far from supplies as practical for optimal air mixing.
Forgotten Insulation
Uninsulated ducts in unconditioned spaces waste energy and can cause condensation problems. Always insulate ducts passing through attics, crawl spaces, or garages regardless of your climate.
Understanding the 2 Foot Rule for Ductwork
The 2 foot rule is an important guideline for takeoff placement on trunk lines. When connecting your new return duct to a main trunk, position the takeoff collar at least 2 feet away from any elbows, fittings, or other takeoffs.
This distance allows airflow to stabilize before being diverted. Connecting too close to fittings creates turbulence that reduces efficiency and can increase noise. For best results, maintain even more distance if possible – 3-4 feet is ideal when space allows.
The rule also applies to the connection at your register boot. Keep the duct straight for at least 2 feet before making any bends or turns. This smooths airflow and reduces resistance throughout the system.
When to Call a Professional
While adding a return air duct is manageable for most DIYers, certain situations require professional expertise:
Call a Pro If:
- You need to modify the main return plenum
- Your home has limited access to ductwork routes
- The installation requires cutting structural elements
- You’re unsure about proper duct sizing for your system
- Your HVAC system is still under warranty (verify DIY modifications won’t void it)
- Your local codes require licensed installation
Professional HVAC technicians charge $75-$150 per hour for ductwork modifications. Complex installations might cost $500-$1500 including materials, but they ensure proper sizing, sealing, and code compliance.
Flex Duct vs Sheet Metal: Which to Choose?
Both materials work well for return air ducts, but each has advantages depending on your situation:
Flex Duct Pros:
- Easier to install in tight spaces
- Quieter operation
- Lower material cost
- Faster installation for DIYers
Flex Duct Cons:
- More susceptible to damage and kinking
- Higher airflow resistance if not installed properly
- Shorter lifespan in harsh conditions
- Requires careful support and strapping
Sheet Metal Pros:
- More durable and longer lasting
- Better airflow characteristics
- Resistant to damage
- Ideal for exposed installations
Sheet Metal Cons:
- Harder to work with for DIYers
- Can be noisier without proper insulation
- Higher material cost
- Requires more tools and skills
For most DIY installations, flex duct offers the best balance of ease and performance. Just take care to install it correctly without kinks or compression.
Troubleshooting Post-Installation Issues
After completing your installation, you might encounter these common issues. Here’s how to address them:
Weak Airflow at New Vent
Check for kinks in flex duct or obstructions at the register. Ensure the damper is fully open. Verify your duct size is adequate for the distance run. Longer runs require larger ducts to maintain proper airflow.
Whistling or Hissing Noises
This indicates airflow restriction or leaks. Check all connections and reseal with mastic as needed. Ensure the duct isn’t compressed or kinked. The noise should disappear once airflow flows freely.
Increased System Noise
Your system might run differently with the added return. This is normal if the noise level increased only slightly. However, loud whistling or banging indicates problems that need addressing – usually improper sizing or installation.
Limited Temperature Improvement
Give it a few days to evaluate properly. If issues persist, you might need additional returns or adjustments to your overall system. Consider having a professional evaluate your home’s airflow balance.
Maintenance Tips for Your New Return Duct
Keep your new return air duct functioning properly with simple maintenance:
Regular Filter Changes
Change your HVAC filter every 1-3 months depending on usage and air quality. The added return increases airflow through your system, which means more air passes through the filter. Keep it clean for optimal performance.
Annual Inspection
Once a year, remove the register grill and inspect inside the duct. Look for dust buildup, debris, or any signs of damage. Clean gently with a vacuum if needed. Check that all connections remain tight and sealed.
Monitor Airflow
Periodically check that airflow at the vent remains strong. Any reduction in suction indicates potential problems like leaks, obstructions, or filter issues that need addressing.
FAQ’s
How should return vents be installed?
Return vents should be installed on interior walls opposite supply vents, at least 6-8 feet away from supply registers. In bedrooms, place them near the door or on a wall opposite the bed. For cooling climates, install near the ceiling; for heating climates, near the floor. Always ensure proper duct sizing and seal all connections with mastic.
What are the rules for return air ducts?
Key rules include: maintain 150 square inches of duct area per ton of HVAC capacity, place returns at least 6-8 feet from supply vents, avoid returns in bathrooms or kitchens, install one return per 250-400 square feet, and ensure proper sealing with mastic not duct tape. Always check local building codes before installation.
What is a common mistake in ductwork installation?
The most common mistake is undersizing ductwork, which restricts airflow and creates noise. Other frequent errors include using only duct tape instead of mastic for sealing, kinking flex duct during installation, placing returns too close to supply vents, and forgetting to insulate ducts in unconditioned spaces. Always size ducts correctly and seal all joints properly.
What is the 2 foot rule for ductwork?
The 2 foot rule states that takeoff collars should be placed at least 2 feet away from any elbows, fittings, or other takeoffs on trunk lines. This distance allows airflow to stabilize before being diverted, reducing turbulence and improving efficiency. The rule also applies to keeping duct straight for 2 feet before any bends from the register boot.
How hard is it to install a return air vent?
Installing a return air vent is moderately difficult for DIYers with basic tools and skills. Simple installations take 4-8 hours. Complex runs through finished spaces or requiring plenum modifications are much harder. Most homeowners can handle basic flex duct installations in accessible areas, but difficult situations warrant professional help.
Conclusion
Learning how to install return air duct is a valuable skill that pays dividends in home comfort and energy savings. The $200-$750 investment per vent typically recoups through lower utility bills and extended equipment life within 2-3 years.
Remember the critical elements: proper duct sizing using the 150 square inches per ton rule, sealing all connections with mastic (not just duct tape), maintaining the 2 foot rule for takeoff placement, and insulating any ducts in unconditioned spaces. These details separate professional-quality installations from amateur attempts that cause problems.
Start with one problem room and evaluate the results before tackling additional returns. Many homeowners find that adding just 1-2 strategic returns dramatically improves their home’s comfort in 2026. Your HVAC system will thank you with better performance, lower energy use, and quieter operation.
Take your time, plan carefully, and don’t hesitate to call a professional for complex situations. Proper return air ducting is one of the most impactful upgrades you can make to your home’s comfort system.
Leave a Reply