
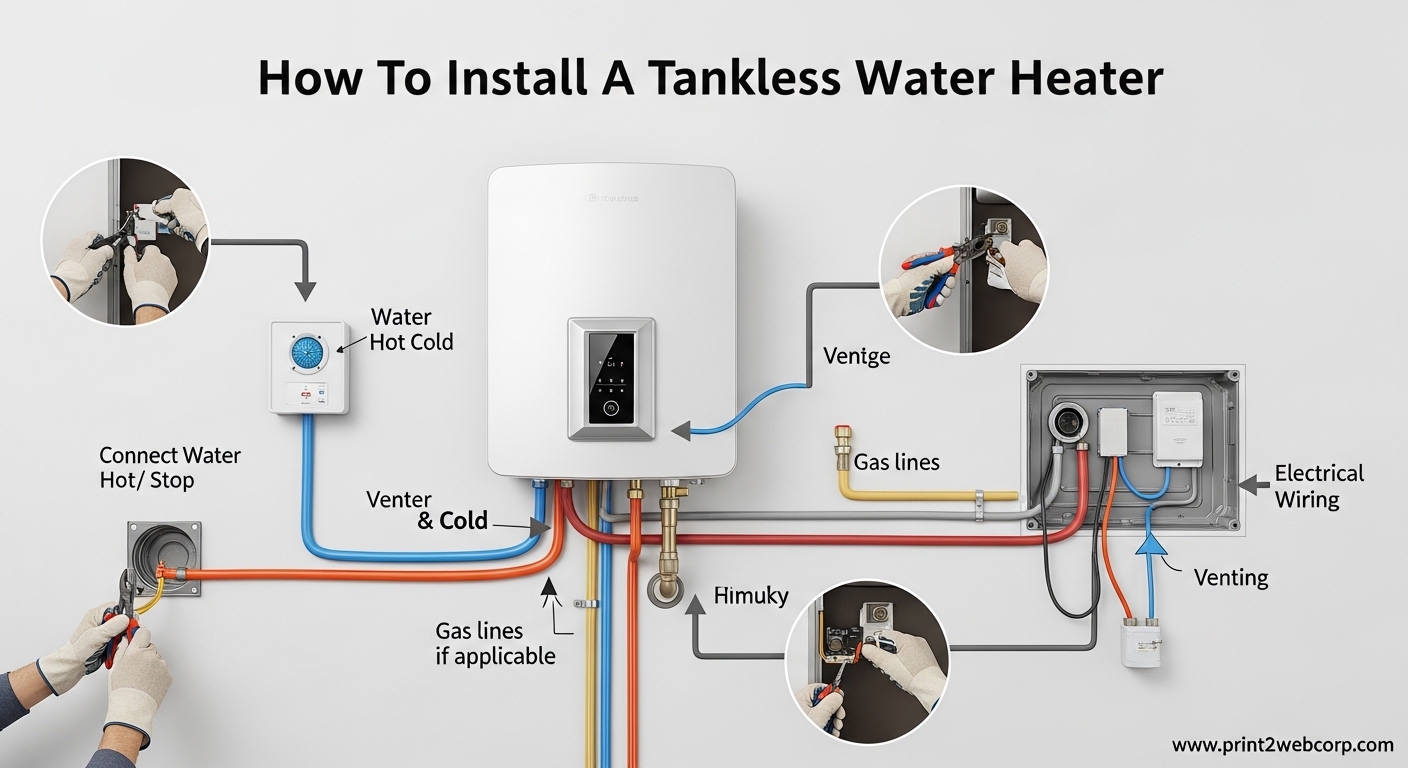
Switching to a tankless water heater can transform your home’s hot water experience while cutting energy costs by 24-34%. These on-demand water heaters last up to 20 years and provide endless hot water without the bulky tank taking up space in your utility room. After helping three neighbors plan their installations, I’ve learned that proper planning makes the difference between a smooth weekend project and a costly mistake.
This guide covers everything you need to know about how to install a tankless water heater, whether you’re upgrading from an old tank unit or installing one in new construction. I’ll walk you through the complete process for both gas and electric models, plus the real costs, permit requirements, and safety considerations you need to understand before starting.
Gas vs Electric Tankless Water Heaters
Choosing between gas and electric is your first major decision. Gas tankless water heaters typically handle higher flow rates, making them better for larger households that need to run multiple showers simultaneously. Electric models work well for smaller homes, point-of-use applications, or in warmer climates where the incoming water temperature isn’t extremely cold.
Gas units require venting to exhaust combustion gases, which adds complexity to the installation. Electric models need sufficient electrical capacity, often requiring a dedicated 240V circuit and substantial amperage. Many homeowners I’ve spoken with report spending $1,500-2,500 more upfront for gas installations due to venting requirements and gas line upgrades.
Here’s the reality: if you already have natural gas service, a gas tankless water heater will usually cost less to operate long-term. If your home runs on electricity or lacks gas service, electric models are simpler to install and have lower upfront costs. Consider your climate too, northern regions with colder groundwater need more heating capacity regardless of fuel type.
Before You Begin: What You Need to Know
Yes, you can replace your 40-gallon water heater with a tankless unit. However, it’s not always a direct swap. Tankless water heaters have different clearance requirements, venting needs, and utility connections than traditional tanks. Many homeowners discover their existing gas line is undersized, or their electrical panel needs an upgrade after purchasing their unit.
Most municipalities require permits for tankless water heater installation. Plan for $80-100 in permit fees and schedule an inspection before starting work. Installing without permits can create insurance issues and resale problems. Plus, inspections catch safety issues before they become dangerous.
Realistically assess your skills. Gas line work requires brazing or threading pipes correctly and leak testing every connection. Electrical work demands understanding load calculations, proper wire sizing, and safe breaker installation. If you’re uncomfortable with these tasks, there’s no shame in hiring a professional. Many plumbers I know report fixing DIY installations that leaked gas or had undersized wiring.
Tools and Materials Checklist
Essential Tools
For gas installations, you’ll need pipe wrenches, a tubing cutter for copper lines, a gas-rated pipe thread sealant, and a leak detection solution. Venting installation requires tin snips, sheet metal screws, and a hole saw for exterior walls. Electric installations need a multimeter, wire strippers, and proper screwdrivers for breaker panel work.
Both types need basic plumbing tools: a pipe cutter or hacksaw, soldering equipment for copper pipes, or PEX crimp tools if using PEX. A good level is essential for proper mounting, and a drill with masonry bits handles concrete walls. Don’t forget safety equipment, including safety glasses, work gloves, and a fire extinguisher for gas work.
Materials You’ll Need
Beyond the water heater itself, budget for mounting brackets or a mounting board, pressure relief valve, and appropriate venting materials. Gas units require vent pipe rated for Category III appliances, plus rain caps and termination points. Electric units need the correct gauge wire, a dedicated breaker, and possibly a subpanel upgrade.
Plan on shutoff valves for both hot and cold water lines, plus flexible water connectors to ease installation. Many professionals recommend installing a sediment trap and isolation valves for easier maintenance. Don’t forget Teflon tape or pipe sealant rated for your pipe material, and have extra fittings on hand, mistakes happen.
How to Install a Gas Tankless Water Heater
Step 1: Choose Your Location
Indoor installations require proper venting to the exterior, plus clearance for service access. Outdoor units eliminate venting complexity but need freeze protection in cold climates. Most gas tankless water heaters mount on exterior walls for simpler venting, though indoor installation is possible with proper planning.
Consider the distance to your most-used fixtures. The farther the unit, the longer you wait for hot water. Some homeowners install recirculation pumps to reduce this delay. Mount the unit at a comfortable working height, typically 4-5 feet off the ground, with adequate space above and below for vent connections.
Step 2: Upgrade Your Gas Line
This is where many DIY projects fail. Tankless units demand more gas volume than tank water heaters, often requiring 3/4-inch or larger lines. Your existing 1/2-inch line to your old water heater won’t suffice. Undersized gas lines cause the unit to starve for fuel, resulting in cold showers or error codes.
Run new gas line from your main gas line to the installation location, sizing it according to the manufacturer’s specifications and local codes. Install a sediment trap and a shutoff valve within reach of the unit. Pressure test all connections with a manometer or bubble test solution before proceeding.
Step 3: Mount the Unit
Use the mounting bracket provided with your unit. For exterior walls, lag into studs or use masonry anchors for concrete. For interior installations, you may need to build a mounting board. The unit must be level, so use a good level and shim as needed. Remember, these units are heavy, especially with water and venting attached, so secure mounting is critical.
Step 4: Install the Venting
Gas tankless water heaters produce hot exhaust that requires Category III vent pipe rated for high temperatures and acidic condensate. Follow the manufacturer’s venting layout precisely, using the specified vent diameter and maintaining required clearances. Improper venting can cause carbon monoxide buildup or unit failure.
Install the vent through the wall or roof, maintaining proper slope for condensate drainage. Use the specified roof flashing or wall thimble, and install the rain cap at the exterior termination. Every joint must be sealed with high-temperature silicone and secured with sheet metal screws. Never reduce vent size or use venting materials not rated for condensing appliances.
Step 5: Connect the Water Lines
Install shutoff valves on both cold inlet and hot outlet lines. Many manufacturers recommend installing a pressure relief valve on the hot side. Use flexible connectors to ease installation and allow for thermal expansion. Support the pipes properly to prevent stress on the unit’s connections.
Connect your cold water supply to the inlet marked “C” or with a blue ring, and the hot water outlet to the “H” or red ring outlet. Reversing these connections prevents the unit from functioning properly. Purge air from the lines by opening faucets before fully pressurizing the system.
Step 6: Electrical Connections
Even gas tankless water heaters need electricity for controls and ignition. Most require a standard 120V outlet. Install a GFCI-protected outlet near the unit if one doesn’t exist. This is not optional for safety, and many inspectors will flag missing GFCI protection.
Step 7: Test and Startup
Open the gas valve slowly and check all connections with leak detection solution. Pressurize the water lines and check for leaks. Follow the manufacturer’s startup procedure precisely, which usually involves purging air from the gas line and checking ignition. Test the unit by opening a hot water faucet and verifying proper ignition and temperature output.
How to Install an Electric Tankless Water Heater
Electrical Requirements Overview
Electric tankless water heaters draw substantial current. A typical whole-home unit requires 120-200 amps at 240V. This often exceeds the capacity of existing electrical panels, meaning you may need a panel upgrade or a dedicated subpanel. Calculate your total household electrical load and verify capacity before purchasing.
Wire sizing is critical and varies by amperage and distance from the panel. Most installations require 6-gauge or larger copper wire, with appropriate conduit protection. Undersized wiring causes voltage drop, overheating, and potential fire hazards. If you’re unsure about electrical work, this is the phase where most homeowners call a professional.
Step 1: Mount the Unit
Electric units are typically lighter than gas models but still require secure mounting. Choose a location close to your electrical panel to minimize wire length and voltage drop. Indoor installations require proper clearance for service access, while outdoor rated units can be mounted exteriorly with appropriate weatherproof connections.
Step 2: Run Electrical Wiring
Install the appropriately sized wire from your panel to the unit location, following manufacturer specifications and NEC requirements. Use conduit where required, and secure the wiring properly. This work may require a permit, so check local codes before beginning.
Step 3: Install the Breaker
Install the specified breaker in your panel, sized according to the unit’s amperage draw. Most electric tankless water heaters require multiple breakers or a high-amperage breaker, depending on the model. Turn off all power before working in the panel, and verify it’s off with a multimeter.
Step 4: Connect Water Lines
Water connections follow the same principles as gas units: cold inlet to the cold inlet, hot outlet to hot outlet, with shutoff valves on both lines. Electric units don’t require venting, which simplifies installation significantly. However, they do require proper grounding of the unit and all metallic water lines per NEC requirements.
Step 5: Final Connections and Testing
Connect the wiring according to the manufacturer’s diagram, verifying proper wire colors and terminal connections. Ground the unit properly. Pressurize the water lines and check for leaks. Turn on the breaker and test the unit by opening a hot water faucet. Verify proper operation and temperature output before completing the installation.
Installation Cost Breakdown
DIY tankless water heater installation typically costs $3,500-5,000 for the unit and materials. Gas installations run higher due to venting materials and gas line work. Forum members report spending around $3,600 for complete DIY gas installations before rebates. Electric installations are generally less expensive, usually $2,500-4,000 for whole-home units.
Professional installation averages $4,000-6,000, including the unit. Many homeowners quote paying $3,900-4,200 for complete professional installation. This typically includes permit handling, proper sizing, and warranty coverage. Professional installation often pays for itself through rebates, proper sizing, and avoided mistakes.
Don’t forget available incentives. Many gas companies offer $350-550 in rebates for efficient tankless units. Federal tax credits for energy-efficient water heaters can reach 30% of the unit cost. These incentives can significantly reduce your effective cost, making professional installation more attractive.
Safety Requirements and Code Compliance
Clearance requirements vary by location and fuel type. Indoor gas units require clearance to combustible materials, typically 6-12 inches on sides and 24-36 inches above the unit. Electric units generally have fewer clearance requirements but still need space for service access. Never install a gas unit in a bedroom or bathroom due to combustion air requirements.
Gas line safety is non-negotiable. Pressure test all new gas lines before use, and check connections regularly. Install carbon monoxide detectors near sleeping areas if installing a gas unit. Venting must terminate properly, with clearance from windows, doors, and intake vents.
Electrical safety requires proper grounding, GFCI protection where required, and appropriate breaker sizing. Never replace a breaker with a larger size to solve tripping problems, this is a fire hazard. If your installation trips breakers, you likely have a wiring or capacity issue that needs professional diagnosis.
Common Installation Mistakes to Avoid
Undersized gas lines cause poor performance and error codes. Always follow manufacturer specifications for gas line sizing. Undersized electrical wiring causes voltage drop and premature element failure. Use the wire size specified for your amperage and distance.
Improper venting causes condensate leaks, corrosion, and carbon monoxide hazards. Never use venting materials not rated for Category III appliances, and never reduce vent diameter. Incorrect water line connections, reversing hot and cold, prevent proper operation and can damage the unit.
Ignoring permit requirements creates legal and insurance problems. Most municipalities require permits and inspections for water heater replacement. Skipping this step may void your homeowner’s insurance and create issues when selling your home.
Frequently Asked Questions
Can I install a tankless water heater on my own?
Yes, you can install a tankless water heater yourself if you have experience with plumbing and electrical or gas work. However, it requires proper tools, knowledge of local codes, and often permits. Gas installations involve gas line work and venting, while electric units require significant electrical capacity. Many homeowners choose professional installation for warranty protection and peace of mind, especially for gas models.
Can I replace my 40 gallon water heater with a tankless water heater?
Yes, you can replace your 40-gallon tank water heater with a tankless unit, but it’s not always a direct swap. Tankless units have different clearance requirements, venting needs for gas models, and utility connection requirements. You may need to upgrade your gas line or electrical panel. The physical space required differs, and you’ll need to properly size the unit based on your peak hot water demand rather than storage capacity.
What is required to install an electric tankless water heater?
Installing an electric tankless water heater requires sufficient electrical capacity, typically 120-200 amps at 240V for whole-home units. You’ll need properly sized wiring, appropriate breakers, and possibly an electrical panel upgrade. The installation needs a mounting location with proper clearance, cold and hot water lines with shutoff valves, and proper grounding. Most municipalities require permits and inspections. Electric units don’t require venting, which simplifies installation compared to gas models.
What is the downside of an electric tankless water heater?
The main downside of electric tankless water heaters is high electrical demand, which often requires panel upgrades and can increase electricity bills significantly. They’re also affected by incoming water temperature, performing less effectively in cold climates where groundwater is very cold. Electric models typically have lower flow rates than gas models, meaning they may struggle to supply multiple fixtures simultaneously. However, they’re simpler to install, have lower upfront costs, and don’t require venting or gas lines.
Conclusion
Learning how to install a tankless water heater is a rewarding project that can provide endless hot water and energy savings for years to come. Whether you choose gas or electric, proper planning, correct sizing, and attention to safety requirements are essential for success. Take time to assess your skills honestly, obtain necessary permits, and don’t hesitate to call professionals for gas line or electrical work beyond your experience level.
The investment in proper installation pays dividends through reliable operation, lower energy bills, and peace of mind. With the right preparation and attention to detail, your tankless water heater will provide hot water on demand for 20 years or more. If you’re unsure about any aspect of the installation, consult a licensed professional, it’s cheaper than fixing mistakes later.
Leave a Reply