
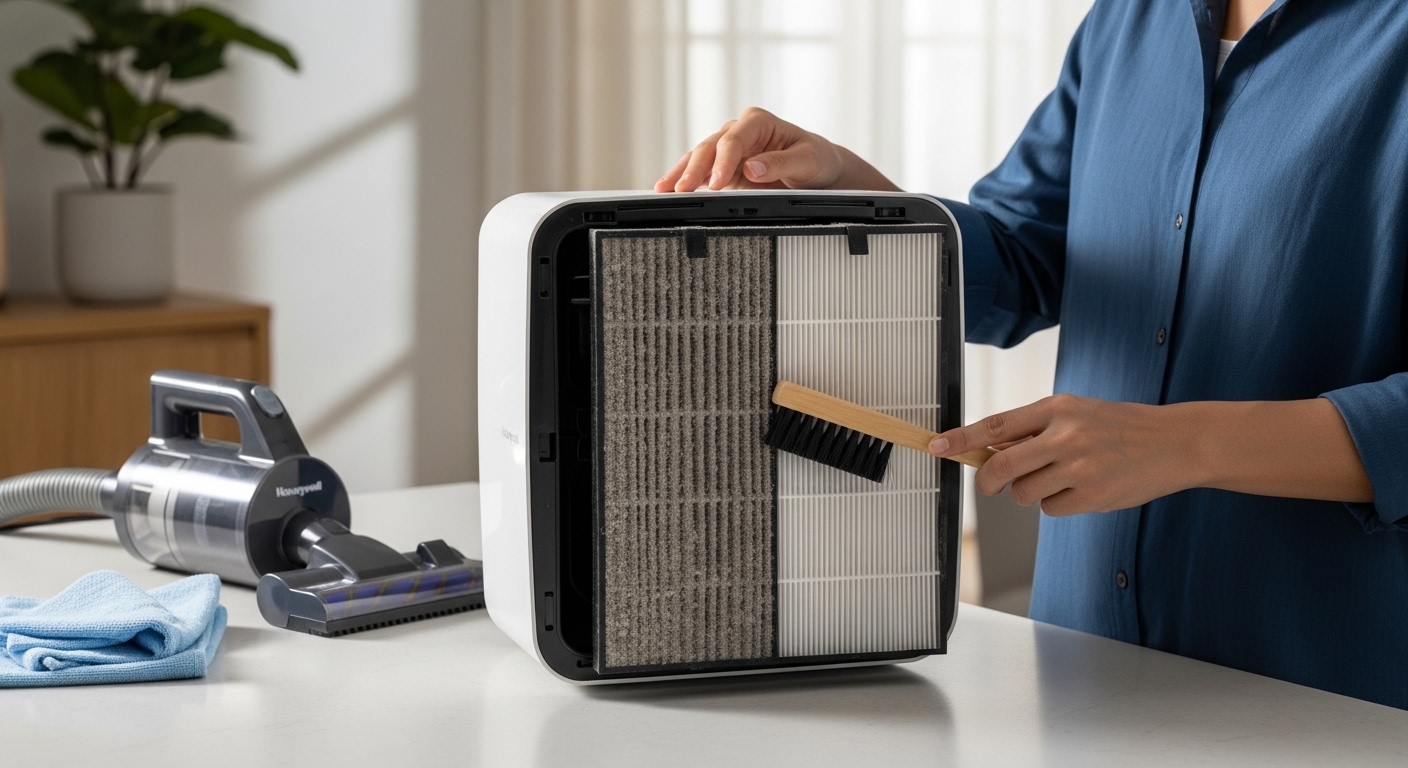
I’ve spent years maintaining air purifiers, and one question comes up constantly: “How do I clean my Honeywell air purifier filter?” It’s a great question because clean filters are the difference between an air purifier that actually works and one that just circulates dirty air while driving up your energy bill.
Here’s the thing that trips most people up: not all Honeywell filters can be cleaned. Some are meant to be washed and reused, while others must be replaced. Get this wrong and you could ruin a filter or worse, put mold back into your air.
I’m going to walk you through exactly how to identify your filter type and clean it properly. Whether you have an HPA series, an Air Genius model, or one of the QuietClean units, I’ve got you covered. Let’s dive into How To Clean Honeywell Air Purifier Filter the right way.
Why Filter Cleaning Matters for Your Air Quality?
A dirty filter forces your air purifier to work 40% harder while pushing 30% less air through the system. I’ve seen units that sounded like jet engines just because the filters were clogged with dust and pet hair. The motor strains, energy consumption spikes, and trapped pollutants start getting blown back into your room.
Regular filter maintenance isn’t just about performance. It’s about health. A saturated filter can’t capture new particles, meaning allergens, mold spores, and pet dander stay in the air you breathe. For anyone with allergies, asthma, or respiratory concerns, this is a serious issue.
The good news? Proper cleaning takes just minutes and extends filter life by months. Some Honeywell filters are designed to last years with the right care. Let me show you which ones you can clean and how to do it safely.
Identify Your Filter Type Before Cleaning
This is the most critical step, and it’s where most people make mistakes. Honeywell uses four main filter types across their product lines, and each requires different care. Cleaning the wrong filter can destroy it or create mold problems.
Washable Pre-Filters: These are the outermost filters that catch large particles like dust, pet hair, and lint. They’re typically made of foam or mesh and can be washed with lukewarm water and mild dish soap. Almost all Honeywell models have some form of washable pre-filter.
Permanent ifD Filters: Found in Air Genius models (HFD series), these are permanent electrostatic filters that can be washed. They look like honeycomb panels and should never be replaced unless damaged. These are some of the most economical filters because they last for years.
True HEPA Filters: These cannot be cleaned. Never put water on a HEPA filter. The dense glass fiber material will be ruined, and you’ll lose that 99.97% capture efficiency. HEPA filters must be replaced every 6-12 months depending on use.
Carbon Filters: These contain activated carbon that absorbs odors and VOCs. They can be vacuumed gently to remove surface dust, but once saturated (usually every 3-6 months), they must be replaced. Water won’t restore their odor-fighting ability.
Check your owner’s manual or the filter label itself. Honeywell clearly labels washable filters and indicates which ones are permanent. When in doubt, assume it’s not washable and check the manual first.
How To Clean Honeywell Air Purifier Filter – Washable Pre-Filters
Pre-filters are your first line of defense, and they’re also the easiest to clean. I recommend checking them monthly and cleaning every 1-2 months depending on your air quality situation. Pet owners and anyone in dusty areas may need to clean more frequently.
Step 1: Remove the Pre-Filter
Turn off and unplug your air purifier first. For most models, the pre-filter is accessible from the front or back grille. On HPA series units, press the two hand symbols on the front grille and pull it toward you. The pre-filter usually sits right in front of the main HEPA filter.
Some models have the pre-filter as a thin foam sheet wrapped around the HEPA filter. Others use a separate mesh panel. Note how it comes out—you’ll need to reinstall it the same way, paying attention to any airflow direction arrows.
Step 2: Vacuum Loose Debris
Before using any water, take the filter outside and vacuum it thoroughly. Use a vacuum with a hose attachment and gently go over both sides. This removes the bulk of dust, pet hair, and debris without making a mess in your home.
I’ve found this step alone can restore a lot of airflow if the filter isn’t too dirty. It also prevents all that loose debris from turning into mud when you add water later. If you don’t have a vacuum, give it a gentle shake outside.
Step 3: Wash with Lukewarm Water
Fill a sink or basin with lukewarm water—never hot. Hot water can damage some filter materials and isn’t necessary for cleaning. Add a few drops of mild dish soap and swish to create suds. Avoid harsh detergents, bleach, or strong cleaners.
Gently submerge the pre-filter and swish it around for 2-3 minutes. For stubborn buildup, use a soft brush or your fingers to lightly scrub the surface. Don’t scrub too hard—you don’t want to damage the filter material. Rinse thoroughly with clean lukewarm water until the runoff is clear.
Step 4: Dry Completely
This is the step most people rush, and it’s also the most important. Never reinstall a damp filter. Shake off excess water and let the filter air dry in a well-ventilated area, preferably outside in the sun or near an open window.
Drying typically takes 24-48 hours depending on humidity. I recommend having a backup pre-filter if possible, so you can keep your air purifier running while one dries. Do not use a hair dryer or place the filter in direct sunlight to speed drying—this can warp or damage the material.
Step 5: Reinstall Properly
Once completely dry, reinstall the pre-filter following the airflow direction arrows. Most Honeywell filters have arrows indicating which way air should flow through them. Installing backwards restricts airflow and reduces efficiency.
Make sure the filter seats properly and any retention clips are secure. A loose filter can create gaps that allow unfiltered air to pass through. Close the grille or panel and plug the unit back in.
HEPA Filter Guidelines: Clean or Replace?
Let me be crystal clear: do NOT wash HEPA filters. I know countless forum posts claim they’ve done it successfully, but here’s what actually happens. Water damages the fragile glass fiber matrix that gives HEPA its 99.97% capture rate. Once wet, the fibers clump together, creating gaps large enough for particles to pass through.
Even if the filter appears dry after washing, microscopic moisture remains inside. This creates a breeding ground for mold and bacteria—the exact things you’re trying to remove from your air. A damp HEPA filter can actually make your air quality worse.
What You CAN Do:
You can gently vacuum the exterior of a HEPA filter to remove surface dust. Use a soft brush attachment and light pressure—don’t press hard enough to damage the filter material. Vacuum the intake side (where air enters) to pull dust away from the filter surface.
This maintenance can extend HEPA filter life by a month or two, but it’s not a substitute for replacement. Most HEPA filters last 6-12 months depending on air quality and usage. Homes with pets, smokers, or high pollen areas may need replacement every 3-4 months.
Signs Your HEPA Filter Needs Replacement:
Visible discoloration or damage to the filter material, reduced airflow even after pre-filter cleaning, unusual odors coming from the unit, or the filter indicator light staying on after resetting. If it’s been over a year, replace it regardless of appearance.
When shopping for replacements, stick with genuine Honeywell filters or certified compatible brands. Third-party filters vary widely in quality, and poor fit can allow unfiltered air to bypass the filter entirely. If you’re in the market for a new unit, check out our guide to the best air purifiers for models with economical filter options.
Cleaning Permanent ifD Filters (Air Genius Models)
Honeywell’s Air Genius series (HFD models) uses permanent ifD filters that are designed to be washed and reused for years. These electrostatic filters are a significant cost savings over replaceable HEPA filters, but they do require regular cleaning to maintain effectiveness.
Step 1: Access the ifD Filter
Turn off and unplug the unit. On most Air Genius models, the ifD filter slides out from the side or back of the unit. Some models have a front panel that releases with a button or latch. Consult your manual for model-specific access instructions.
The ifD filter is a large panel with a honeycomb pattern on one side. Note the orientation and which side faces which direction before removing it. The smooth side typically faces the front, while the honeycomb side faces the rear.
Step 2: Vacuum Surface Dust
Like with pre-filters, start by vacuuming loose debris from both sides of the ifD filter. Use a soft brush attachment and gentle pressure. Pay special attention to the honeycomb side, where dust tends to accumulate in the cells.
This vacuuming step is especially important for ifD filters because they’re designed to capture and hold particles via electrostatic charge. When they get too dusty, that charge can’t work effectively. Regular vacuuming restores performance and extends the time between deep cleanings.
Step 3: Wash with Lukewarm Soapy Water
Fill a sink or tub with lukewarm water and add mild dish soap. Submerge the ifD filter and gently agitate it for 2-3 minutes. For stubborn dirt, use a soft brush or cloth to lightly clean the honeycomb cells.
Do not scrub aggressively or use abrasive tools. The filter material is durable but can be damaged with rough handling. Avoid hot water, harsh detergents, bleach, or any cleaning chemicals—plain mild soap is all you need.
Rinse thoroughly with clean lukewarm water. Keep rinsing until the water runs clear and no soap residue remains. Soap left on the filter can reduce its electrostatic effectiveness and create odors when the unit runs.
Step 4: Dry Completely Before Reinstalling
Shake off excess water and allow the ifD filter to air dry completely. This typically takes 24-48 hours. I recommend placing it outdoors in a shaded area or near an open window with good airflow.
Do not speed-dry with heat. Sunlight, hair dryers, or heaters can warp the filter frame or damage the electrostatic coating. Patience here prevents problems later. If you need your air purifier running daily, consider buying a spare ifD filter to rotate between cleanings.
Step 5: Reinstall and Reset
Once completely dry, reinstall the ifD filter in the correct orientation. The honeycomb side should face the rear (intake) of the unit, and the smooth side faces the front. Make sure it seats properly in the tracks or mounting points.
Close any access panels and plug the unit back in. You’ll likely need to reset the filter indicator light—see the next section for model-specific reset instructions.
Carbon Filter and VOC Filter Maintenance
Carbon filters serve a different purpose than particle filters. They don’t trap dust and allergens—they absorb odors, VOCs (volatile organic compounds), and chemical fumes. This absorption capability is limited, and once the carbon is saturated, the filter stops working.
Can You Clean Carbon Filters?
Not really. You can vacuum the exterior to remove dust, which helps with airflow, but this doesn’t restore the carbon’s odor-absorbing ability. Once the carbon pores are full of absorbed molecules, they’re full. No amount of cleaning will change that.
Some people try to “reactivate” carbon by heating it in an oven. I strongly recommend against this. Carbon filters are made with materials that can release fumes when heated, and oven temperatures can damage the filter structure. It’s not worth the risk.
Replacement Schedule:
Carbon filters typically last 3-6 months depending on your environment. Kitchens with heavy cooking, homes with pets, or areas with chemical fumes will saturate carbon faster. The odor-reducing K pre-filters on some Honeywell models need replacement every 3 months.
Signs that carbon needs replacement include odors that the unit used to eliminate now returning, the filter indicator light turning on (if your model monitors carbon separately), or it being more than 6 months since last replacement.
UV-C Light Bulb Care:
Some Honeywell models include UV-C technology to help kill germs. The UV bulb itself doesn’t need cleaning, but it does need replacement every 10-12 months even if it still lights up. UV-C effectiveness diminishes over time, and the bulb won’t be killing germs at full capacity after a year.
When replacing the UV bulb, never touch the glass with bare hands. Oils from your skin can create hot spots that shorten bulb life. Use gloves or a cloth when handling replacement bulbs.
How to Reset the Filter Light by Model
After cleaning or replacing filters, you’ll need to reset the filter indicator light. Otherwise, it will continue blinking even though you’ve just performed maintenance. Reset procedures vary by model series.
HPA Series (HPA100, HPA200, HPA300):
With the unit plugged in and powered on, locate the filter reset button. It’s usually a small button near the filter indicator light. Press and hold the button for 3-5 seconds until the light turns off or blinks differently.
Some HPA models require you to press the button with the unit powered off. Try both methods if the first doesn’t work. The light should reset immediately, confirming the filter monitor has been cleared.
HFD Series (Air Genius Models):
Air Genius units have a “Check Filters” light that illuminates after approximately 1,000 hours of use. After cleaning your ifD filter, press and hold the “Check Filter” button for 3-5 seconds.
The light should blink and then turn off, confirming the reset. If the light won’t reset, make sure the filter is properly seated and that all access panels are closed. Some models have safety switches that prevent reset if everything isn’t closed correctly.
Honeywell QuietClean and Other Models:
Most QuietClean models use a similar procedure: press and hold the filter reset button for 3-5 seconds. The location varies by model, so consult your manual if you can’t find it.
For models with touchscreens rather than physical buttons, look in the settings menu for a filter reset option. Navigate to the filter section and select “reset” or “replace filter” to clear the indicator.
What If the Light Won’t Reset?
If you’ve tried resetting multiple times and the light stays on, check that the filter is properly seated. Remove it and reinstall, making sure it’s fully inserted and any retention clips are engaged. Some models have sensors that detect whether the filter is correctly installed.
Also check that you’re using the correct filter type for your model. Some HPA units won’t reset if a non-Honeywell filter is detected, or if the filter isn’t making proper contact with the sensor terminals. Wipe the filter contacts with a clean, dry cloth to ensure good electrical contact.
Troubleshooting Common Post-Cleaning Issues
Even when you follow all the steps correctly, sometimes things don’t go as planned. Here are the most common issues users encounter after cleaning their filters and how to fix them.
Filter Light Won’t Reset:
This is the most common complaint. First, verify the filter is completely dry. Some units have moisture sensors that prevent reset if any dampness is detected. Give it another 24 hours of drying time and try again.
Check that the filter is seated properly. Remove it and reinstall, making sure it clicks into place and any arrows point in the correct airflow direction. Wipe the filter contacts with isopropyl alcohol to remove any corrosion or dirt that might prevent good contact.
Unit Making Noise After Cleaning:
A noisy air purifier usually indicates the filter isn’t installed correctly. Remove the filter and check for any damage or warping from cleaning. Make sure it’s sitting flat and fully engaged in the tracks or mounting points.
Sometimes noise occurs because the filter was reinstalled backwards. Check the airflow arrows and reinstall in the correct orientation. If the noise persists, the filter may have been damaged during cleaning and needs replacement.
Reduced Airflow After Maintenance:
If airflow seems weaker after cleaning, check that the filter isn’t blocking the intake or exhaust vents. Make sure no packaging material or debris is obstructing the vents. Verify that all grilles and panels are properly closed and aligned.
For units with multiple filters, make sure each one is installed in the correct location. Some models have specific slots for pre-filters, HEPA filters, and carbon filters. Mixing them up can restrict airflow.
Unusual Odors After Cleaning:
A slight soapy smell right after cleaning is normal and should dissipate within a day. If the odor is strong or unpleasant, you may have used too much soap or didn’t rinse thoroughly. Remove the filter and rinse again with clean water.
Damp filters can develop a musty smell, which is a sign of mold growth. If you smell anything musty, remove the filter immediately and inspect for mold. If present, the filter must be replaced—moldy filters cannot be cleaned safely.
Recommended Maintenance Schedule
Consistent maintenance prevents most problems and extends the life of both filters and your air purifier. Here’s a schedule I recommend based on years of experience with Honeywell units.
Weekly Tasks:
Check the exterior vents for dust buildup and vacuum if needed. Inspect the pre-filter visually—most models allow you to see the pre-filter without removing it. If it looks dusty, it’s probably time for a cleaning.
Wipe down the exterior of the unit with a damp cloth. Dust accumulation on the outside can eventually make its way inside. Keep the area around the air purifier clear—don’t let clutter block airflow.
Monthly Tasks:
Perform a thorough pre-filter inspection. Remove it and check for damage, heavy buildup, or saturation. Clean the pre-filter following the steps above, even if it doesn’t look very dirty. Monthly cleaning prevents accumulation that’s harder to remove later.
Check the filter indicator light and reset if needed. Most Honeywell units track filter life based on run time, so resetting monthly keeps the monitor accurate.
Quarterly Tasks:
Every three months, perform a deep cleaning of all washable filters. This includes pre-filters and ifD filters if you have an Air Genius model. Even if they look clean, quarterly washing removes microscopic particles that affect performance.
Inspect carbon filters and replace if needed. Every 3 months is a good rule of thumb for K pre-filters and carbon odor filters. Mark your calendar so you don’t forget—carbon filters lose effectiveness gradually, so you might not notice when they stop working.
Annual Tasks:
Replace HEPA filters annually at minimum, or every 6 months for heavy use environments. Replace UV-C bulbs yearly even if they still light up—their germ-killing effectiveness diminishes before the bulb burns out.
Perform a thorough inspection of the entire unit. Check cords for damage, vents for obstructions, and fans for dust buildup. Some users use compressed air (carefully!) to blow dust out of the interior, but be gentle and avoid touching internal components.
Safety Precautions and Common Mistakes
Before I wrap up, let me cover some critical safety warnings and mistakes I see people make repeatedly. Following these guidelines protects both you and your air purifier.
Never Use Hot Water:
Lukewarm water only. Hot water can warp filter materials, damage electrostatic coatings, and shorten filter life. It’s simply not necessary for effective cleaning. If the water feels hot to your touch, it’s too hot for your filter.
Never Reinstall Damp Filters:
Mold growth is a serious risk with damp filters. Even slightly damp filters can develop mold within 24-48 hours, and once mold takes hold, the filter must be replaced. Always air dry completely—at least 24 hours, preferably 48.
Never Use Harsh Chemicals:
Bleach, ammonia, strong detergents, and cleaning chemicals can damage filter materials and leave residues that get circulated into your air when the unit runs. Mild dish soap is all you need for effective cleaning.
Always Unplug First:
Electrical safety should be obvious, but I’ve seen people try to clean filters while the unit is still plugged in. Always turn off and unplug before performing any maintenance. Wait for the unit to fully cool down if it’s been running.
Never Force Filters:
If a filter doesn’t fit easily, something is wrong. Forcing it can damage both the filter and the unit. Check that you have the correct filter for your model and that you’re installing it in the correct orientation.
Don’t Ignore the Indicator Light:
The filter indicator isn’t just a suggestion—it’s based on actual run time and filter capacity. Resetting without performing maintenance doesn’t extend filter life, it just disables a useful reminder. Clean or replace when prompted, then reset.
Frequently Asked Questions
Can I wash Honeywell air purifier filters?
It depends on the filter type. Washable pre-filters and permanent ifD filters (found in Air Genius models) can be cleaned with lukewarm water and mild dish soap. True HEPA filters should never be washed—water damages the glass fiber material and creates mold risk. HEPA filters must be replaced when dirty, not cleaned. Carbon filters can be vacuumed to remove surface dust but cannot be effectively cleaned once saturated.
How often should you change a Honeywell air purifier filter?
Washable pre-filters should be cleaned every 1-2 months. True HEPA filters need replacement every 6-12 months depending on air quality and usage. Carbon and VOC filters typically last 3-6 months before needing replacement. UV-C bulbs should be replaced annually even if they still illuminate. Permanent ifD filters can last for years with proper cleaning every 3 months. Pet owners and those in dusty areas may need to replace filters more frequently.
Can you clean air purifier filters instead of replacing them?
Only certain filter types can be cleaned. Washable pre-filters and permanent ifD filters are designed to be cleaned and reused. True HEPA filters cannot be effectively cleaned—water damages the filtration media and reduces efficiency. Carbon filters cannot be cleaned once saturated because the pores become full of absorbed molecules. Always check your filter type before attempting to clean it. When in doubt, consult your owner’s manual or replace rather than risk damaging the filter.
How do I reset the filter light on my Honeywell air purifier?
Reset procedures vary by model. For HPA series units, press and hold the filter reset button for 3-5 seconds with the unit powered on. For Air Genius models, press and hold the Check Filter button for 3-5 seconds. Some models require the unit to be powered off during reset. If the light won’t reset, ensure the filter is properly seated, completely dry, and that all access panels are securely closed. Wipe filter contacts with isopropyl alcohol if needed.
What happens if I don’t clean my air purifier filter?
Dirty filters force your air purifier to work harder while moving less air. Energy consumption can increase by 30% while airflow decreases by up to 40%. The motor strains and may fail prematurely. Worst of all, saturated filters can’t capture new particles, allowing dust, allergens, and pollutants to recirculate in your air. For allergy and asthma sufferers, this significantly worsens symptoms. Eventually, the filter can become so clogged that no air passes through at all, rendering the unit useless.
Conclusion
Proper filter maintenance is the key to getting clean air from your Honeywell air purifier. Whether you’re cleaning washable pre-filters, maintaining permanent ifD filters, or knowing when to replace HEPA and carbon filters, following the right procedures makes all the difference.
Remember: identify your filter type first, never wash HEPA filters, always let washed filters dry completely, and reset the indicator light after maintenance. Stick to a regular maintenance schedule and your air purifier will deliver cleaner air for years to come.
For more information on choosing the right air purifier for your needs, check out our other air purifier guides. Breathe easier knowing your Honeywell air purifier is running at peak efficiency.
Leave a Reply