
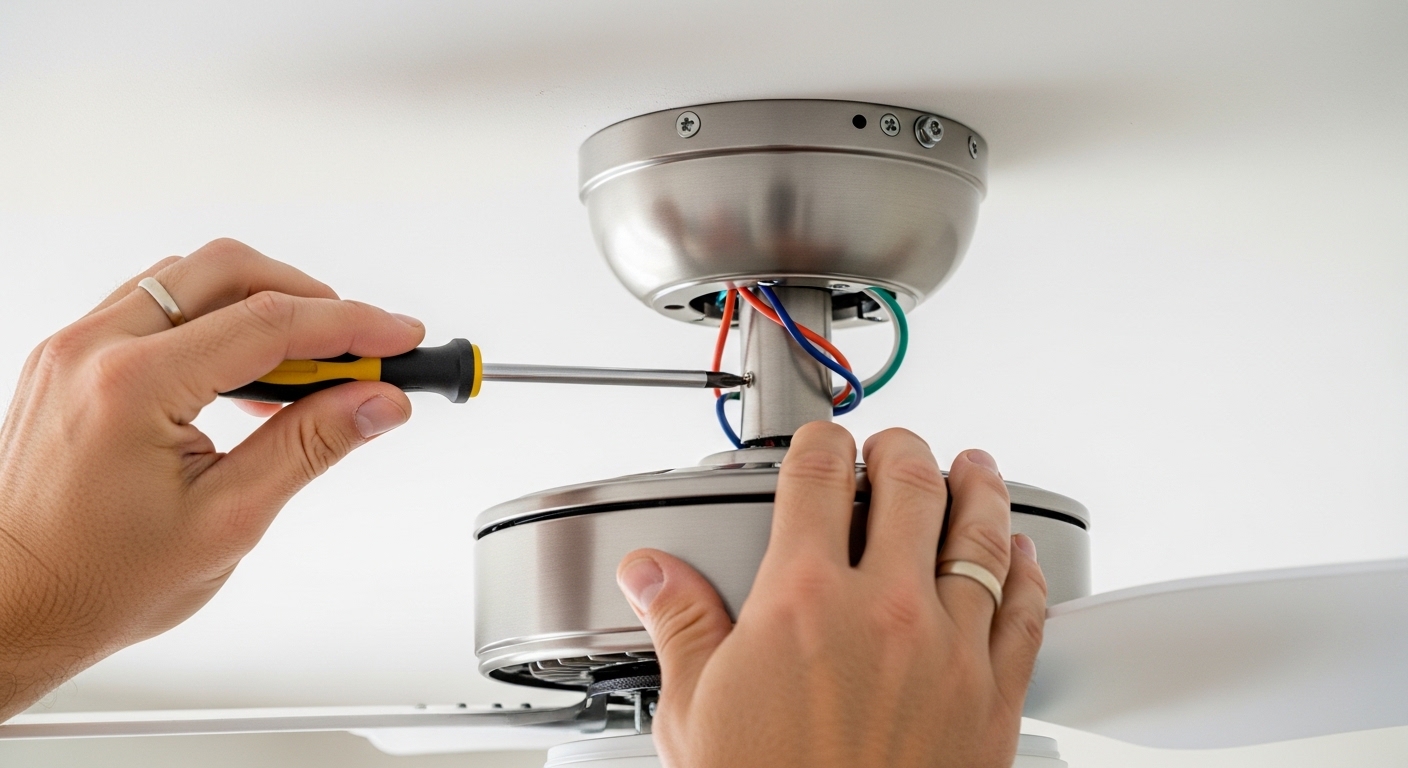
There comes a time when every homeowner needs to know how to remove a ceiling fan. Whether you are upgrading to a newer model, replacing the fan with a simple light fixture, or taking one out during a room renovation, the process is straightforward if you approach it methodically. I have walked dozens of readers through this task, and the key is always the same: take your time with the electrical connections and never skip the safety steps at the beginning.
This guide covers the complete removal process for both downrod-style ceiling fans and flush mount models updated for 2026. I include everything from the tools you need to the final cleanup, so you can work confidently without calling an electrician for what is essentially a DIY project.
Tools You Need Before Starting
Having the right tools ready before you begin makes this job go much smoother. Our team has found that gathering everything first saves at least 30 minutes of stopping and starting.
You will need a voltage tester or non-contact voltage tester to confirm power is off at the fan location. This is the single most important tool for your safety. Screwdrivers in both Phillips and flathead varieties cover most screw types you will encounter. A step ladder strong enough to hold your weight while you work overhead is essential, and a helper is genuinely recommended for any fan over 20 pounds.
Have a small container ready to hold the screws and hardware you remove. I like to use an empty egg carton or a magnetic parts tray because it keeps everything in one place and prevents screws from rolling off the ladder. A camera or phone is useful for taking a photo of the wiring configuration before you disconnect anything. Wire nuts, electrical tape, and a wire stripper are helpful for capping off exposed wires at the end.
Step 1: Shut Off the Power at the Circuit Breaker
Before you touch any wire or removal screw, you must turn off the power to the ceiling fan circuit. Go to your electrical panel and locate the breaker that controls the room where the fan is installed. Flip that breaker to the OFF position.
Do not just assume the breaker is off because the fan has stopped spinning. I always recommend using a non-contact voltage tester at the fan location to verify no electricity is present. Hold the tester near the fan wiring and wait for it to indicate no voltage. If the tester still shows power, you have the wrong breaker and need to keep looking.
Some electricians and experienced DIYers recommend testing at the switch as well, flipping the wall switch to OFF after turning off the breaker. This provides a second layer of safety and prevents someone else from accidentally turning the fan back on while you are working.
Step 2: Remove Light Bulbs and Globes
Once the power is confirmed off, start by removing anything attached to the fan that could fall or break. Light bulbs should be unscrewed and set aside safely. If the fan has been running recently, let the bulbs cool for a few minutes before handling them.
Globes or light shades come in several types. Some simply screw into place and twist off. Others have small set screws that need to be loosened before the globe can be removed. A few models use clip-on shades that pull straight down with gentle pressure. Examine your specific fixture and work carefully to avoid cracking any glass components.
Set all removed bulbs and globes in a safe location away from the work area. A cardboard box on a bed or table works well to keep these items protected until you are ready to pack them for disposal or donation.
Step 3: Remove the Light Kit
With the bulbs and globes gone, you can access the light kit wiring. Most ceiling fans have a light kit that connects to a central hub with two or three wires: typically a black or colored hot wire, a white neutral wire, and sometimes a green or bare copper ground wire.
Before disconnecting anything, take a photo of how the wires are connected. This single step prevents enormous frustration later when you cannot remember which wire went where. Once you have documented the configuration, twist off the wire nuts holding the connections together.
Some light kits are hardwired directly into the fan housing, while others plug into a quick-connect port. If you see a quick-connect adapter, simply squeeze the release tab and pull the plug apart. For direct wire connections, you may need to strip a small amount of insulation if the wire ends are damaged when you remove the wire nuts.
After disconnecting, fold the wires neatly against the ceiling or tuck them into the canopy area so they are out of your way for the remaining steps.
Step 4: Remove the Fan Blades
Fan blades attach in one of two ways. The most common is through a blade iron, which is a metal bracket that screws to the blade and then attaches to the fan motor hub. The other method is direct-mount blades where the blade screws straight into the motor housing without an intermediate bracket.
For blade iron systems, look for screws on the top side or bottom side of the blade attachment point, depending on your fan model. Most blades have three to five screws total holding them to the blade iron. Remove all screws from each blade and set the blades aside.
Forum discussions from experienced DIYers reveal a common frustration: some blade screws are located at the top where they are hidden by the blade itself. If you do not see screws on the visible face of the blade, flip the blade up gently and check the hidden surface.
Stack the removed blades flat and keep them organized if you plan to donate the fan. Damaged or bent blades should be wrapped separately to prevent injury during disposal.
Step 5: Remove the Canopy and Disconnect Wiring
This is the step where many people get stuck, particularly with flush mount ceiling fans that appear to have no screws holding the canopy in place. The trick is that most flush mount canopies have a release mechanism: you squeeze the sides of the canopy together gently to make it bow outward, which releases the clip that holds it to the mounting bracket.
For downrod fans, the canopy slides down the downrod pole once you loosen the set screw where the downrod connects to the motor housing. The canopy then becomes loose and can be lifted off the downrod after you lower it sufficiently.
With the canopy removed or lowered, you can now see the wiring connecting the fan to the house electrical system. You should see three wires: a black or colored hot wire, a white neutral wire, and a green or bare copper ground wire. The ground wire typically attaches to the mounting bracket or the green screw on the electrical box.
Disconnect the wire nuts by twisting them counterclockwise. If the wire nuts are old or fused to the wires, you may need to cut the wires. In that case, leave enough wire extending from the ceiling box to install new wire nuts when you are ready for the next step. Take another photo here of the disconnected state for reference.
After disconnecting the fan wires, use wire nuts or electrical tape to cap the house wires separately. This prevents accidental contact and keeps the wires organized until you are ready to install something new.
Step 6: Remove the Mounting Bracket
The mounting bracket is the metal plate attached to the electrical box in your ceiling. Once all other components are removed, you can unscrew the bracket from the box.
Look for two to four screws holding the bracket to the electrical box. These screws may be visible around the perimeter of the bracket or hidden under a decorative cover that snaps or screws into place. Remove any covers first to access the mounting screws.
If the bracket is rusted or the screws are corroded and will not turn, apply a penetrating lubricant like WD-40 and let it sit for 15 minutes before attempting again. For severely rusted brackets, you may need to use a Dremel tool or hacksaw to cut the bracket free, but this is rare and should be a last resort.
With the bracket removed, you have an empty electrical box in the ceiling. If you plan to install a light fixture or a new ceiling fan, leave the box in place. For a permanent ceiling repair, you can hire an electrician to remove the box and patch the ceiling.
Removing Flush Mount vs Downrod Ceiling Fans
The removal process differs slightly depending on which type of ceiling fan you have. Downrod fans are the most common in homes with standard eight-foot ceilings. They use a long metal pole to suspend the fan motor away from the ceiling, and the canopy covers the wiring and mounting hardware where the downrod connects to the ceiling box.
Flush mount ceiling fans, also called Hugger fans, sit directly against the ceiling with no gap between the motor housing and the ceiling surface. These are common in rooms with low ceilings or where headroom is limited. The canopy on a flush mount fan is typically held in place by clips or a twist-and-lock mechanism rather than visible screws.
Vaulted and sloped ceilings may require an angled mounting bracket that allows the downrod fan to hang straight despite the ceiling angle. The removal process is the same, but you may need an extra pair of hands to support the fan while you disconnect the wiring on an angled ceiling.
What to Do With Your Old Ceiling Fan?
Once the fan is down, you have several options for disposal or repurposing. Habitat for Humanity ReStore locations accept working ceiling fans in good condition for donation. These organizations resell building materials at discount prices and use the proceeds to fund home building projects for families in need.
If the fan is not working, many recycling centers accept metal components for scrap. The motor housing and blade irons are typically aluminum or steel and have recyclable value. Remove any plastic components like light kit covers and dispose of those separately according to your local recycling guidelines.
Some homeowners prefer to keep the blade irons and mounting bracket for DIY projects. These metal pieces can become plant hangers, pot racks, or decorative wall art with a bit of creativity. The motor itself can sometimes be salvaged for parts or repurposed into a belt drive motor for a shop project.
Tips, Warnings, and Troubleshooting
Removing a ceiling fan heavier than 20 pounds genuinely requires two people. One person should support the fan while the other disconnects components and eventually removes the mounting hardware. Attempting to hold a heavy fan with one hand while working with the other is dangerous and increases the risk of the fan falling and damaging your ceiling.
For rusted screws, do not force them. Apply penetrating oil and wait. Rusted screws that are forced may strip or break off flush with the surface, creating a much more difficult removal situation. Sometimes heating a rusted screw with a small torch will expand the metal enough to break the corrosion bond.
Brittle or crumbling wire insulation is a sign of age and potential electrical hazard. If the wires in your ceiling look cracked, chalky, or are crumbling when touched, stop the project and call a licensed electrician. Old wiring that has degraded should be inspected and potentially replaced before you install any new fixture.
If at any point you feel uncomfortable with the electrical portion of this project, hire a professional. Electricians typically charge between $100 and $200 for a ceiling fan removal, which is money well spent for peace of mind and guaranteed safe work.
How to remove a ceiling fan with no visible screws?
For flush mount fans, squeeze the sides of the canopy together gently to make it bow outward, which releases the clip mechanism holding it to the mounting bracket. If this does not work, check for a decorative cover that may be hiding the mounting screws.
Do I need an electrician to take down a ceiling fan?
Not necessarily. If you are comfortable turning off a circuit breaker and using basic hand tools, you can remove a ceiling fan yourself. However, if the wiring looks old and brittle, or if you encounter any issues during removal, calling a licensed electrician is the safest choice.
How to remove an old ceiling fan from the mounting bracket?
First remove all blades and light kit. Then loosen the canopy by either squeezing the sides for flush mounts or loosening the downrod set screw for downrod fans. Once the canopy is lowered, you can access the wiring. After disconnecting the wire nuts, unscrew the mounting bracket from the electrical box.
How do you take a ceiling fan cover off?
The canopy cover typically either twists off, slides down after loosening a set screw, or releases by squeezing the sides to disengage clips. Examine your specific model to identify which mechanism holds the cover in place before attempting removal.
Final Thoughts on Ceiling Fan Removal
Learning how to remove a ceiling fan is a valuable skill that saves you money and gives you flexibility in your home improvement plans. The process follows a logical sequence: cut power, remove light components, disconnect blades, lower the canopy, separate the wiring, and finally remove the mounting bracket.
Take photos at every stage, keep your screws organized, and do not rush the electrical disconnection step. If you encounter complications like rusted hardware or deteriorating wires, stop and assess whether you need professional help rather than forcing through a potentially dangerous situation.
Once the ceiling is clear, you have options for what comes next. Installing a new ceiling fan, a simple light fixture, or leaving the space ready for future updates are all valid choices. Your electrical box is now ready for whatever improvement project you tackle next.
Leave a Reply