
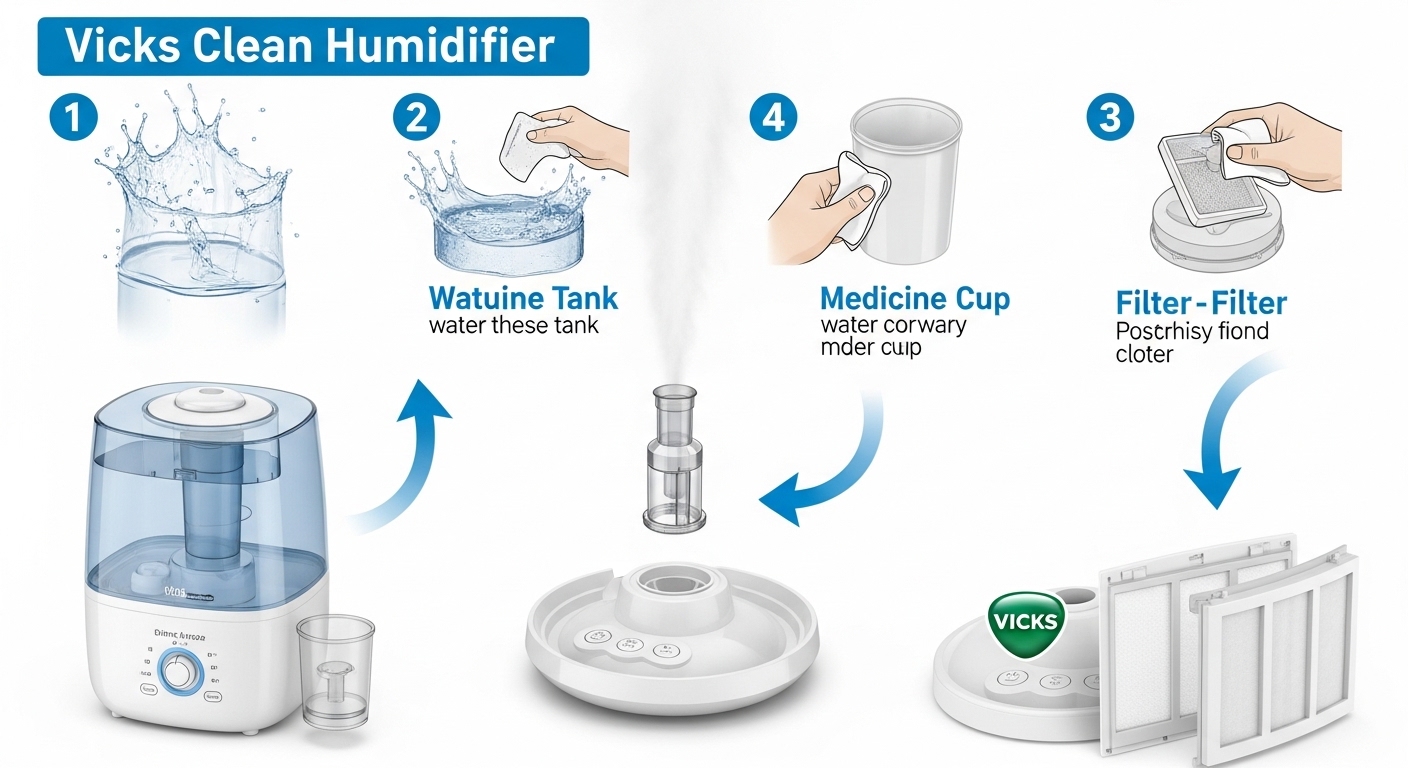
Regular cleaning of your Vicks humidifier is essential for maintaining healthy air quality in your home. A dirty humidifier can become a breeding ground for mold, bacteria, and mineral deposits that get released into the air you breathe. I’ve cleaned dozens of Vicks humidifiers over the years, and I’ll show you exactly how to keep yours running safely and efficiently.
In this guide, you’ll learn how to clean a Vicks humidifier properly, whether you have a warm mist or cool mist model. I’ll cover everything from basic weekly maintenance to dealing with stubborn mineral buildup and mold removal. These methods work for all popular Vicks models including the V150, VUL500, V750, VWM845, and others.
The entire cleaning process takes about 20-30 minutes per week. This small investment of time prevents costly repairs, extends your humidifier’s lifespan, and most importantly, protects your family’s health. Let’s get started with what you’ll need.
Supplies You’ll Need for Effective Cleaning
Gathering the right supplies before you start makes the entire process smoother. Most of these items are probably already in your home. Having everything ready means you won’t be scrambling mid-clean with a wet humidifier on your counter.
For basic weekly cleaning, you’ll need white distilled vinegar, warm water, a soft clean cloth, and a soft-bristled toothbrush. The vinegar is crucial for dissolving mineral deposits that naturally build up from tap water. I recommend using a toothbrush designated only for cleaning your humidifier to avoid cross-contamination.
For monthly deep cleaning and disinfection, you’ll also need bleach and protective gloves. The bleach solution is essential for killing bacteria and mold that regular cleaning might miss. Some users prefer citric acid as an alternative to vinegar, which works especially well in hard water areas.
Optional but helpful tools include cotton swabs for reaching small crevices, a toothpick for dislodging stubborn scale in tight spots, and a bottle brush for cleaning inside the water tank. If you have sensitive skin or respiratory issues, consider wearing a mask when working with bleach solutions.
Critical Safety Precautions Before You Start
Safety should always come first when cleaning any electrical appliance. I’ve seen people make mistakes that damaged their humidifiers or created safety hazards. Follow these precautions every time you clean.
Always unplug the humidifier from the electrical outlet before beginning any cleaning. Never attempt to clean while the unit is plugged in, even if it’s turned off. For warm mist models, wait at least 30 minutes after use before cleaning to allow all components to cool completely. Touching a hot heating element can cause serious burns.
Work on a water-resistant surface like a kitchen counter, sink, or waterproof table. Place towels underneath to catch any spills or drips. Never submerge the base of your humidifier in water, even if it seems like a faster way to clean it. The electrical components must stay completely dry.
When using bleach solutions, ensure the area is well-ventilated. Open windows or turn on exhaust fans to avoid breathing in fumes. Wear protective gloves to prevent skin irritation, and avoid mixing bleach with any other cleaning products, especially vinegar, which creates dangerous fumes.
How to Clean a Vicks Warm Mist Humidifier
Warm mist humidifiers work by boiling water to create steam, which means they have a heating element that requires special attention. The heating element is where most mineral buildup occurs, and if not cleaned properly, it can stop working entirely.
Start by removing the water tank and emptying any remaining water. Fill the tank with 1-2 cups of undiluted white distilled vinegar, replace the cap, and swirl it around to coat the entire interior. Let it sit for 15-20 minutes while you work on the base. This soaking time allows the vinegar to break down mineral deposits throughout the tank.
For the base unit, carefully remove the heating element cover according to your model’s instructions. Some models have a locking latch that needs to be released. You’ll likely see white or brownish scale buildup on the heating element and surrounding areas. Pour enough vinegar into the water tray to cover the heating element completely and let it soak for at least 20 minutes.
After soaking, use a soft toothbrush to gently scrub away loosened scale from the heating element. Be thorough but gentle, as you don’t want to damage the delicate heating coil. For stubborn deposits, you can use a toothpick to carefully chip away the scale, but never use metal tools or abrasive scrubbers that could scratch the surface.
Once all visible scale is removed, rinse everything thoroughly with clean water. I recommend rinsing at least three times to ensure all vinegar residue is gone. Vinegar left in the humidifier can create unpleasant smells when you use it next. Wipe all surfaces with a clean, damp cloth and allow everything to air dry completely before reassembling.
How to Clean a Vicks Cool Mist Humidifier
Cool mist humidifiers use different technology than warm mist models, so the cleaning process varies slightly. These units typically have a nebulizer, mist chimney, and sometimes a filter that all need attention. The good news is that cool mist models generally don’t have heating elements, which can make some aspects of cleaning easier.
Begin by disconnecting the power cord and removing the water tank. Empty any standing water and fill the tank with a mixture of equal parts white vinegar and warm water. Swish the solution around to reach all interior surfaces, then let it sit for 20 minutes. For cool mist tanks with narrow openings, adding uncooked rice with the solution can help scrub hard-to-reach areas when you shake it.
While the tank soaks, turn your attention to the base. Remove the nebulizer and mist chimney according to your model’s instructions. These parts are responsible for creating the mist and are prone to mineral buildup. Submerge them in a bowl of vinegar solution and let them soak for 20-30 minutes. If your model has a water tray or cooling chamber, clean these with vinegar as well.
After soaking, scrub the nebulizer and mist chimney with a soft toothbrush, paying special attention to any small holes or openings where mineral deposits might be blocking the mist output. Use cotton swabs to clean inside narrow openings and crevices. For cool mist models with filters, remove the filter and rinse it under cool running water, but never use vinegar or bleach on filters unless your specific model’s instructions say it’s safe.
Rinse all components thoroughly with clean water. I can’t stress enough how important complete rinsing is, especially for cool mist units. Any remaining cleaning solution will be aerosolized and released into your room air when you use the humidifier. Allow all parts to air dry completely before putting everything back together.
Removing Stubborn Mineral Scale and Buildup
Mineral scale is the white, chalky deposit that forms when hard water evaporates. It’s made primarily of calcium and magnesium, and it can significantly reduce your humidifier’s performance. If you live in a hard water area, you’ll deal with this more frequently.
For light scale buildup, the regular vinegar cleaning method described above works well. But when you have encrusted mineral deposits that have built up over time, you need to take more aggressive action. I’ve seen humidifiers where the scale was so thick the heating element was barely visible.
For stubborn cases, extend the vinegar soaking time to several hours or even overnight. Heating the vinegar slightly can help it work faster, but never boil it. Some users recommend running the humidifier with vinegar inside to let the warm vinegar work more effectively, but this method has risks. If you try this, run it for only 5-10 minutes in a well-ventilated area, then unplug and let it soak as usual.
Citric acid is another powerful option for tough scale. Mix 1-2 tablespoons of citric acid powder with warm water and use it exactly like vinegar. Many users find citric acid works faster than vinegar and leaves less odor. You can find citric acid in the canning section of most grocery stores or online.
For extreme cases where nothing else seems to work, you can carefully use a plastic scraper or an old credit card to gently chip away thick deposits. Be extremely careful not to damage the underlying surface, especially on heating elements. If scale buildup is so severe that it affects performance even after cleaning, it might be time to consider replacing the unit.
Mold Removal and Prevention Strategies
Mold in a humidifier is a serious health concern. When mold grows inside your humidifier, it gets released into the air along with the mist, potentially causing respiratory issues, allergic reactions, and other health problems. I always recommend addressing mold immediately and aggressively.
If you see black, green, or pinkish fuzzy growth in your humidifier, that’s mold. Sometimes you’ll smell it before you see it. Mold thrives in damp, dark environments, which is exactly what the inside of a humidifier provides. The key is not just killing the mold, but removing it completely and preventing its return.
For minor mold growth, start with a thorough vinegar cleaning as described above. Vinegar has antifungal properties that can kill many types of mold. After the initial cleaning, prepare a bleach solution using 1 teaspoon of bleach per gallon of water, or use the stronger ratio of 1/2 teaspoon bleach per 1/2 gallon water recommended by Vicks for disinfection. Fill the tank with this solution, let it sit for 20 minutes, then rinse thoroughly.
For extensive mold contamination, you may need a more concentrated bleach solution. Mix 1 tablespoon of bleach per gallon of water and use it to clean all affected surfaces. Wear gloves and ensure good ventilation when working with bleach. After cleaning, rinse everything at least three times with clean water to remove all bleach residue.
Prevention is easier than treatment. Always empty your humidifier when not in use, and never let water sit for more than 24 hours. Clean weekly, even if you don’t see visible buildup. Use distilled water instead of tap water to reduce mineral deposits that create surfaces where mold can attach. If you’ll be away for more than a few days, clean and dry the humidifier thoroughly before storing it.
Recommended Maintenance Schedule
Consistent maintenance is far easier than dealing with problems after they develop. I recommend following a regular schedule to keep your Vicks humidifier in optimal condition. This schedule applies to both warm mist and cool mist models.
Daily maintenance takes just a couple of minutes. Empty any remaining water from the tank and base, then refill with fresh water. This simple step prevents stagnant water from becoming a breeding ground for bacteria and mold. If you notice any film or residue in the water, rinse the tank before refilling.
Weekly cleaning should take 15-20 minutes and involves the vinegar cleaning process I’ve outlined. This removes mineral scale before it becomes severe and prevents most problems. Make it part of your regular routine, perhaps doing it every Saturday morning while you’re doing other household tasks. Weekly cleaning is the single most important maintenance task for extending your humidifier’s life.
Monthly deep cleaning includes disinfection with a bleach solution to kill any bacteria or mold that might have developed despite regular cleaning. This is especially important if anyone in your household has been sick, as the humidifier can harbor germs. The monthly cleaning is also a good time to inspect all parts for wear and tear.
Seasonal preparation is needed if you use your humidifier only during certain times of year. At the end of cold season, clean and disinfect thoroughly, then allow all parts to dry completely before storage. Store in a cool, dry place with the tank cap removed to prevent moisture from being trapped inside. Before using again after storage, perform a complete cleaning cycle even if it was clean when stored.
Alternative Cleaning Methods for Sensitive Users
Not everyone wants to use strong chemicals like bleach, and some people are sensitive to vinegar odors. Fortunately, there are alternative cleaning methods that can be effective. I’ve tested several of these options and can share what works best.
Citric acid is my favorite vinegar alternative. It’s odorless, food-safe, and often more effective at removing mineral deposits than vinegar alone. You can use it exactly as you would vinegar, either mixed with water or in stronger concentrations for tough jobs. Citric acid is especially popular in hard water areas where mineral buildup is a constant problem.
Hydrogen peroxide is another option with antimicrobial properties. Use 3% hydrogen peroxide (the standard concentration sold in stores) directly or diluted with equal parts water. It’s less harsh than bleach and breaks down into water and oxygen, leaving no harmful residues. However, hydrogen peroxide is less effective against tough mineral scale.
Some users swear by baking soda for cleaning and deodorizing. While baking soda can help with odors and light cleaning, it’s not as effective as vinegar for mineral removal. If you want to use baking soda, try mixing it with vinegar for a fizzing cleaning action, but be aware this will create foam quickly.
Enzyme-based cleaners designed for humidifiers are available commercially. These use natural enzymes to break down organic matter and some minerals. They’re typically fragrance-free and safe for all humidifier parts. However, they can be expensive and may not be necessary if you’re doing regular weekly maintenance with vinegar.
Troubleshooting Common Post-Cleaning Issues
Sometimes problems arise even after proper cleaning. I’ve encountered several issues over the years and learned how to resolve them. Here are the most common problems and their solutions.
If your humidifier smells like vinegar after cleaning, you didn’t rinse thoroughly enough. This is the most common complaint I hear. The solution is simple: rinse again. Fill the tank with clean water, swirl it around, empty it, and repeat. You may need to do this 4-5 times to completely eliminate the smell. Running the humidifier with clean water for 30 minutes can also help flush out any remaining vinegar.
Reduced mist output after cleaning usually indicates a clog that wasn’t fully cleared. For warm mist units, check that the heating element is clean and the heating chamber is free of debris. For cool mist models, ensure the nebulizer and mist chimney are completely clear. Use a toothpick or cotton swab to clean small openings. Sometimes running the unit with a vinegar-water mixture for 10 minutes helps clear stubborn clogs.
Leaks after cleaning often result from improper reassembly. Check that all components are seated correctly and that seals or gaskets are in good condition. Make sure the water tank is properly seated on the base. If leaks persist, inspect for cracks or damage that might have occurred during cleaning. Never force parts together, as this can damage the unit.
If your humidifier still doesn’t work properly after thorough cleaning, the issue might be mechanical rather than cleanliness-related. Heating elements can fail, nebulizers can wear out, and electrical components can malfunction. In these cases, consult your owner’s manual or contact Vicks customer support. Sometimes replacement parts are available, but depending on the issue and the age of your unit, replacement might be more cost-effective than repair.
Frequently Asked Questions
What is the best way to clean my Vicks humidifier?
The best way to clean a Vicks humidifier is weekly with white distilled vinegar for scale removal and monthly with a bleach solution for disinfection. For warm mist models, soak the heating element in undiluted vinegar for 20 minutes, then scrub gently with a soft toothbrush. For cool mist models, clean the nebulizer and mist chimney with a vinegar solution. Always rinse thoroughly at least three times after cleaning to remove all residue.
Can I run vinegar through my Vicks humidifier?
Yes, you can run vinegar through your Vicks humidifier, but only for 5-10 minutes maximum and in a well-ventilated area. This method can help clean internal components that are hard to reach. However, never leave vinegar in the humidifier or run it for extended periods, as the acidic fumes can damage some internal parts. After running vinegar, always rinse thoroughly and run with clean water for 30 minutes to flush out any remaining vinegar.
How do I get mold out of my Vicks humidifier?
To remove mold from your Vicks humidifier, start by cleaning with white vinegar, which has antifungal properties. For stubborn mold, use a bleach solution of 1 teaspoon bleach per gallon of water, filling the tank and letting it sit for 20 minutes. Scrub all visible mold with a soft brush, paying special attention to crevices. Rinse thoroughly at least three times to remove all bleach residue. If mold persists after cleaning, the unit may need to be replaced.
Can you run vinegar and water through a humidifier to clean it?
While you can run vinegar and water through a humidifier, this method is not recommended by most manufacturers because it can potentially damage internal components over time. A better approach is to disassemble the humidifier and soak parts in vinegar solution. This ensures thorough cleaning without risk to electrical components. If you do choose to run vinegar through the unit, use equal parts vinegar and water, run for only 5-10 minutes, and follow with extensive rinsing.
How often should you clean a Vicks humidifier?
You should clean your Vicks humidifier weekly with vinegar to remove mineral buildup and prevent bacteria growth. Monthly, perform a deeper cleaning with a bleach solution for disinfection. Daily maintenance should include emptying old water and refilling with fresh water. If you have hard water or notice mineral deposits forming more quickly, you may need to clean more frequently. Never let water sit in the humidifier for more than 24 hours without changing it.
How to properly clean a Vicks Cool Mist humidifier?
To properly clean a Vicks Cool Mist humidifier, start by unplugging and removing the water tank. Fill the tank with equal parts vinegar and warm water, let sit for 20 minutes. Remove the nebulizer and mist chimney from the base and soak them in vinegar solution. Scrub all parts with a soft toothbrush, paying special attention to small openings. Rinse everything thoroughly at least three times with clean water. Allow all components to air dry completely before reassembling and using.
How do you remove buildup from a humidifier?
To remove mineral buildup from a humidifier, soak affected parts in undiluted white distilled vinegar for at least 20 minutes, or overnight for stubborn deposits. The acid in vinegar dissolves calcium and mineral scale. After soaking, scrub with a soft toothbrush to remove loosened deposits. For extreme cases, use citric acid instead of vinegar, mixing 1-2 tablespoons with warm water. Never use metal tools or abrasive scrubbers that could damage the surface. Rinse thoroughly after cleaning.
Final Thoughts
Learning how to clean a Vicks humidifier properly is one of the most important things you can do for your home air quality and your family’s health. The process might seem detailed, but once you’ve done it a few times, it becomes second nature. Your humidifier will work better, last longer, and most importantly, won’t be spreading mold or bacteria into your air.
Remember that consistency is key. Weekly vinegar cleaning and monthly disinfection will prevent most problems before they start. If you live in a hard water area, consider using distilled water to reduce mineral buildup. Never let water sit stagnant in your humidifier, and always dry parts thoroughly before storage.
By following this guide for how to clean a Vicks humidifier, you’ll ensure your unit provides safe, effective moisture for years to come. A well-maintained humidifier is a valuable tool for managing cold symptoms, allergies, and dry air discomfort. Take the time to clean it regularly, and it will take care of you in return.
Leave a Reply