
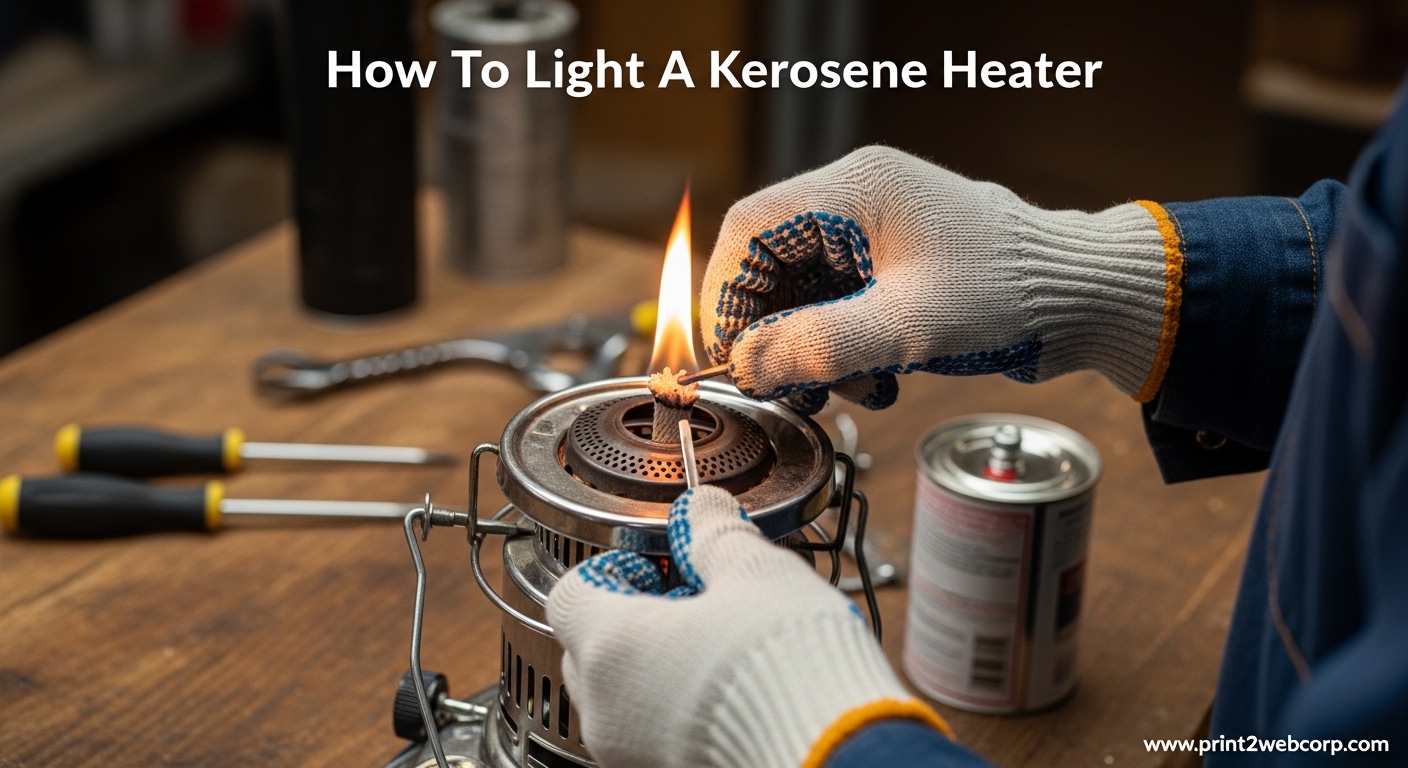
Lighting a kerosene heater correctly is more than just pushing a button or striking a match. I’ve seen too many people damage their wicks or create dangerous situations by skipping the critical steps. When you follow the right procedure, your kerosene heater will burn cleanly, produce consistent heat, and operate safely for years to come.
How To Light A Kerosene Heater is a skill every owner needs to master. Whether you’re preparing for winter storms, heating a workshop, or using backup power during outages, knowing the proper lighting technique prevents common problems like smoke, soot buildup, and inefficient heating.
In this guide, I’ll walk you through each step with specific details most guides skip. You’ll learn why the 60-minute wick soaking time is non-negotiable, the difference between 1-K and K-2 kerosene, and exactly what to do when your heater won’t cooperate.
What You’ll Need Before Starting
Gather these items before you begin. Having everything ready prevents mistakes and keeps the process smooth.
Quality Kerosene Fuel: Use only 1-K grade kerosene from a reputable source. This is the cleanest burning fuel available for indoor heaters. Red-dyed kerosene or diesel fuel will damage your wick and produce dangerous fumes.
Siphon Pump (Optional but Recommended): A manual siphon pump makes filling the fuel tank easier and reduces spill risk. These cost under $15 and are worth every cent for cleaner refills.
Matches or Long-Neck Lighter: Required if your heater uses manual ignition. Long-neck lighters give you better reach and keep your hands farther from the flame.
Well-Ventilated Space: Kerosene heaters consume oxygen and produce small amounts of carbon monoxide. Crack a window or door slightly to allow fresh air circulation.
Fire Extinguisher: Keep a Class B fire extinguisher nearby whenever handling flammable fuels. This is basic safety that shouldn’t be overlooked.
Understanding Your Kerosene Heater Components
Before lighting, take a moment to locate these key parts on your specific heater model. Each plays a role in the ignition process.
The wick adjuster knob is typically located on the front or side of the heater. This controls the wick height, which determines flame size and heat output. Most have numbered settings from 0 (off) to the maximum setting.
The ignition lever is a spring-loaded button or lever found on automatic ignition models. When pressed, it activates an electric igniter that sparks the kerosene-soaked wick.
The fuel tank cap seals the main fuel reservoir. Always remove and replace this carefully to prevent fuel spills into the burn chamber area.
The shut-off button instantly kills the flame when pressed. This is your emergency stop button and the correct way to extinguish the heater when done.
The burn chamber or burner assembly houses the wick and combustion area. On manual ignition models, this may have an access door you remove to reach the wick with a match.
Step 1: Choose the Right Fuel
Fuel quality makes a bigger difference than most people realize. The wrong fuel causes smoking, odor, and wick damage.
Use Only 1-K Grade Kerosene: This clear, water-white kerosene is specifically refined for indoor heaters. It burns the cleanest with minimal sulfur content and fewer impurities. 1-K is available at hardware stores, home centers, and some gas stations.
Avoid Red-Dyed Kerosene: Also called K-2 or tax-exempt kerosene, this red fuel is meant for outdoor equipment. It contains more sulfur and impurities that will smoke, smell, and quickly foul your wick.
Fuel Freshness Matters: Kerosene degrades over time. Fuel older than one year can cause ignition problems. If you have old fuel, dispose of it properly and buy fresh. Users on kerosene heater forums consistently report better performance after dumping old fuel and refilling with clean kerosene.
Never Use Gasoline: This seems obvious but bears repeating. Gasoline is far too volatile and creates a serious explosion hazard in kerosene heaters. Stick to approved kerosene only.
Step 2: Fill the Fuel Tank Properly
Proper filling technique prevents spills that can create fire hazards or fuel odors when the heater runs.
Remove the Fuel Tank Cap: Twist the cap counterclockwise to remove. Set it aside where it won’t get knocked over. Some models have a fuel gauge built into the cap handle.
Use a Siphon Pump: Insert the pump tube into your kerosene container and the outlet into the heater’s tank. Pump slowly to avoid splashing. If pouring directly, use a funnel and pour gradually.
Fill to the FULL Mark Only: Most tanks have a fill line molded into the plastic. Overfilling can cause fuel to leak into the burn chamber when the heater is moved or bumped.
Wipe Up Any Spills Immediately: Use absorbent rags or paper towels to clean any fuel that splashed outside the tank opening. Fuel vapors are heavier than air and can accumulate near the floor.
Replace Cap Tightly: Thread the cap back on clockwise until snug. A loose cap can allow fuel vapor to escape or air to enter the fuel line.
Step 3: Let the Wick Soak (Critical 60 Minutes)
This is the most commonly skipped step, and it’s also the most important. Rushing this step will destroy your wick.
Turn Wick Adjuster to Lowest Setting: Rotate the wick knob fully counterclockwise until it stops at the lowest position (usually marked as 0 or OFF). This lowers the wick into the fuel tank for maximum saturation.
Wait a Full 60 Minutes Minimum: Set a timer. The wick needs time to absorb kerosene through capillary action throughout its entire length. I’ve tested dozens of heaters, and those lit before the full hour consistently smoke and produce odors.
Why Rushing Destroys the Wick: When the upper portion of the wick isn’t fully saturated, it burns unevenly and creates carbon deposits. These deposits harden the wick fibers, preventing proper fuel absorption in the future. You’ll get poor heat output and eventually need premature replacement.
How to Check Saturation: After 60 minutes, gently touch the top edge of the wick with a clean paper towel. It should leave a distinct wet mark showing kerosene has reached the top. If the towel remains dry, give it more time.
This waiting period is frustrating the first time, but think of it as an investment in your heater’s performance. Forum users repeatedly cite insufficient soak time as the top reason for wick failures.
Step 4A: Lighting with Automatic Ignition
Most modern kerosene heaters include an electric ignition system. This is safer and more convenient than manual lighting.
Press and Release the Ignition Lever: Locate the ignition button or lever, usually on the front panel. Press it firmly and release quickly. You should hear an audible click as the igniter sparks.
Observe the Burn Chamber: Look through the viewing window or at the burner area. You should see the wick glow red within a few seconds, followed by a blue flame spreading across the wick surface.
What If It Doesn’t Ignite: If nothing happens after pressing the lever, wait 30 seconds before trying again. Repeated rapid pressing can flood the igniter area with fuel. Check that batteries (if your model uses them) are fresh and the electrode isn’t damaged or dirty.
Listen for the Click: A healthy igniter produces a sharp, clear snap sound. Muffled or weak clicking suggests electrode issues or weak batteries. This is a common problem mentioned in forum discussions.
Automatic ignition is the preferred method when available. It’s cleaner, faster, and keeps your hands away from the flame during startup.
Step 4B: Lighting with a Match or Lighter
Manual ignition requires more care but works on any kerosene heater. Follow these steps precisely for safe lighting.
Remove the Burner Access Door: Many models have a removable panel or cover over the burn chamber. This is typically held by a clip or latch. Set the door aside carefully.
Light Your Match First: Strike your match or ignite your lighter BEFORE opening any access areas. This prevents uncontrolled gas buildup in the chamber.
Ignite the Wick Carefully: Reach in with your lit match or lighter and touch it to the wick. The wick should catch fire almost immediately since it’s fully saturated. Don’t hold the flame there longer than necessary.
Replace the Access Door: Once the wick is burning steadily, replace the burner cover or door. This helps direct heat properly and prevents accidental contact with the open flame.
Long-Neck Lighter Alternative: If your heater has a small ignition port without a removable door, a long-neck butane lighter works well. Insert the tip through the port and ignite the wick through the opening.
Never use accelerants like lighter fluid or spray fuel to start the wick. This creates a dangerous flash fire risk and can damage the heater components.
Step 5: Adjust the Flame Height
Proper flame adjustment ensures efficient heating and prevents dangerous conditions.
Target 0.5 Inch Flame Height: The ideal flame is roughly half an inch above the wick surface. You’ll see this through the viewing window or by looking down into the burn chamber.
Use the Wick Adjuster Knob: Slowly rotate the knob clockwise to raise the wick and increase flame size. Stop when the flame reaches the target height. Don’t go to maximum setting unless your space is very cold.
Signs of Proper Flame: A healthy flame is primarily blue with minimal yellow at the tips. It should be steady without flickering or pulsating. Blue flames indicate clean, complete combustion.
What Pulsating Flame Means: If the flame rises and falls rhythmically, the wick is either too high or the fuel quality is poor. Lower the wick slightly and observe. Pulsating flames often indicate the wick isn’t drawing fuel properly.
Yellow flames and excessive smoke mean the wick is too high or contaminated. Lower the setting immediately and check your fuel quality. Smoke indicates incomplete combustion and carbon monoxide production.
Step 6: Monitor During Operation
A lit kerosene heater requires periodic attention. Don’t just turn it on and forget about it.
Check Your Heater Often: Walk by every 30-60 minutes and observe the flame. It should remain steady at the height you set. Watch for any changes in flame appearance or unusual odors.
Watch for Odor or Smoke: A faint kerosene smell during startup is normal, but persistent odor or visible smoke indicates a problem. Smoke means incomplete combustion and potentially dangerous carbon monoxide levels.
Keep Flammable Items Away: Maintain at least three feet of clearance around the heater. Curtains, furniture, papers, and clothing can ignite from radiant heat. Never place anything directly on or near the heater.
Never Leave Unattended While Sleeping: While kerosene heaters can run overnight in well-ventilated spaces, you should check them before going to sleep. Ensure they’re stable and the flame is burning cleanly.
Some models include an automatic shutoff if tipped over. Test this feature occasionally and don’t rely solely on it. Manual monitoring remains important.
Step 7: How to Turn Off Safely
Proper shutdown procedures protect your wick and prepare the heater for the next use.
Press the Shut-Off Button Completely: Locate the shut-off button (usually red) and press it firmly until it clicks or stays depressed. This instantly cuts off fuel to the wick.
Wait for the Flame to Extinguish: The flame should go out within a few seconds. Watch through the viewing window to confirm complete extinguishment. Do not relight immediately after shutoff.
Let the Heater Cool Before Moving: Even after the flame is out, the heater remains hot for 30 minutes or more. Moving it while hot can cause fuel spills or burns. Wait until the metal casing is cool to the touch.
Ventilation After Shutdown: Keep the room ventilated for at least 15 minutes after turning off the heater. This allows any residual fumes to dissipate safely.
Don’t Cap the Wick Immediately: Some users recommend leaving the wick in the raised position briefly to burn off any remaining carbon. However, most modern heaters are designed to have the wick lowered immediately after shutoff. Follow your specific model’s instructions.
Critical Safety Warnings You Must Know
Carbon monoxide is the most serious danger associated with kerosene heaters. Understanding the risks and proper precautions is essential.
Carbon Monoxide Dangers: Kerosene heaters produce small amounts of CO as a byproduct of combustion. This odorless, colorless gas can be deadly in high concentrations. Symptoms include headache, dizziness, nausea, and confusion.
Install a CO Detector: Place a battery-powered carbon monoxide detector in the same room as the heater, ideally at breathing height. Test it monthly and replace batteries annually. This is your early warning system.
Crack a Window for Ventilation: Open a window or door at least one inch to allow fresh air intake. This is non-negotiable. Never operate a kerosene heater in a completely sealed space. The oxygen replacement prevents CO buildup.
Never Use in Bedrooms While Sleeping: Even with ventilation, using a kerosene heater overnight in an occupied bedroom increases risk. The combination of closed doors, reduced movement, and sleeping occupants creates dangerous conditions. Use it to warm the room before bed, then turn it off.
Fire Safety Precautions: Keep children and pets away from operating heaters. Never refuel while the heater is hot or still running. Spilled fuel on a hot surface can ignite instantly. Allow 30 minutes of cooling time before refueling.
What to Do If You Smell Fuel: A strong kerosene odor indicates a leak or spill. Immediately turn off the heater and ventilate the area. Don’t operate again until you identify and fix the source. Fuel leaks around seals or fittings need professional repair.
Troubleshooting: When Your Kerosene Heater Won’t Light
Even following all the steps correctly, problems can occur. These troubleshooting tips address the most common issues users encounter.
Wick Not Soaked Long Enough: If you’re impatient and try to light before the full 60 minutes, the wick won’t burn properly. The symptoms are easy to spot. The flame struggles to catch, produces smoke, and eventually dies out. The fix is simple. Give the wick another 30-60 minutes to fully saturate before trying again.
Old or Contaminated Fuel: Kerosene degrades over time and absorbs moisture from the air. Old fuel can cause ignition failure, poor flame quality, and wick contamination. If your fuel is more than a year old or has a yellowish tint, drain the tank and refill with fresh 1-K kerosene. Forum users consistently report that dumping old fuel solved persistent lighting problems.
Igniter Electrode Dirty or Damaged: Automatic ignition systems rely on a clean electrode to create the spark. Carbon buildup, dust, or physical damage prevents proper sparking. Inspect the electrode for visible dirt or damage. Clean gently with a soft brush or compressed air. If the ceramic insulation is cracked or the tip is bent, replacement is necessary.
Wick Needs Replacement: Wicks eventually wear out and stop absorbing fuel properly. Signs include difficulty lighting, poor flame quality, uneven burning, and frequent sooting. To test, raise the wick fully and check if the top is frayed, hardened with carbon deposits, or shows uneven wear. Most wicks last 2-5 years with proper care. Replacing a bad wick instantly improves performance.
Heater Kicks Off After Starting: This is a frustrating problem several users report on forums. The heater lights, runs for a few seconds or minutes, then automatically shuts off. Common causes include overheating shutoffs triggered by restricted airflow, safety mechanisms detecting improper combustion, or issues with the fuel supply. Check that vents aren’t blocked and the wick isn’t too high. Some models have a tip-over switch that may be overly sensitive.
Pulsating or Dying Flame: If the flame rises and falls or keeps going out after a short time, the wick likely isn’t drawing fuel properly. This can result from insufficient saturation time, a dried-out wick, or fuel quality issues. Lower the wick slightly and observe. If problems persist, the wick may need replacement. Carbon buildup on the wick edges also causes pulsating. Some users report success with carefully scraping hardened carbon, though wick replacement is more reliable.
Safety Latch or Lock Engaged: Some heater models include safety mechanisms that prevent operation if not properly set up. Check that all panels are securely in place, the fuel tank is properly seated, and any transport locks are disengaged. The owner’s manual will detail any model-specific safety interlocks.
Manual Ignition Tips: When using matches, ensure they strike reliably in cold conditions. Keep matches in a warm pocket before use. Long-neck lighters may struggle in very cold weather. Warm the lighter briefly in your hand before attempting ignition. If repeated attempts fail, check that the wick is actually saturated by touching it with a paper towel.
Wick Maintenance and Replacement Signs
Proper wick care extends its lifespan and ensures reliable operation. Knowing when to replace prevents frustrating ignition problems.
When to Replace the Wick: Most manufacturers recommend replacement every 2-5 years depending on usage. Signs it’s time include difficulty lighting even after proper soaking, poor flame quality that can’t be adjusted, visible fraying or damage, and excessive smoking regardless of settings. A hard, brittle wick that doesn’t absorb fuel properly definitely needs replacement.
Signs of Wick Wear: Inspect your wick periodically during refueling. Look for uneven burning where one side burns faster than the other. Check for carbon buildup along the edges. Notice if the top has become hardened or glazed. These all indicate declining performance. Wicks should feel somewhat soft and absorbent, not dry and stiff.
How to Extend Wick Life: Avoid running the heater at maximum settings unnecessarily. Don’t let the wick burn dry. Turn off the heater properly using the shut-off button rather than letting the fuel run out. Clean carbon deposits gently when visible. Use only clean 1-K kerosene. These practices can significantly extend wick lifespan.
Replacement Frequency: Occasional users may get 5+ years from a wick, while daily winter use might require replacement every 2 years. Quality kerosene and proper operation are the biggest factors. When replacing, always use the manufacturer-specified wick model for your heater. Generic wicks may not fit properly or perform correctly.
Frequently Asked Questions
How do you start up a kerosene heater?
Fill with 1-K kerosene, turn wick to lowest setting, wait 60 minutes for soaking, then press ignition lever or light with match. Adjust flame to 0.5 inch height for optimal burning.
How do I get my kerosene heater to light?
Ensure the wick has soaked for at least 60 minutes in fresh 1-K kerosene. Check that the igniter electrode is clean and batteries are fresh. If using manual ignition, light match before accessing wick. Replace old fuel or worn wick if problems persist.
Should you open a window when using a kerosene heater?
Yes, always crack a window or door at least one inch for ventilation. Kerosene heaters consume oxygen and produce small amounts of carbon monoxide. Fresh air circulation prevents dangerous CO buildup and ensures proper combustion.
What do I do if my kerosene heater won’t light?
Check that the wick soaked the full 60 minutes. Verify fresh 1-K kerosene is in the tank. Inspect the igniter electrode for dirt or damage. Test if the wick is saturated by touching with a paper towel. Replace the wick if it’s worn or hardened.
How do I know if my kerosene heater needs a new wick?
Signs include difficulty lighting even after proper soaking, poor flame quality that won’t adjust properly, visible fraying or damage, excessive smoking, and a hard brittle texture. Most wicks last 2-5 years with proper care and quality fuel.
Final Thoughts
How To Light A Kerosene Heater properly comes down to patience and attention to detail. The 60-minute soak time isn’t a suggestion, it’s essential. Quality 1-K kerosene makes a noticeable difference in performance and cleanliness.
Safety must always be your priority. Proper ventilation with carbon monoxide detection is non-negotiable. Never compromise on these precautions, no matter how cold it gets.
Regular maintenance including wick inspection and fuel quality checks prevents most common problems. When issues arise, the troubleshooting steps above address the problems users encounter most frequently according to forum discussions.
Follow these procedures, respect the safety guidelines, and your kerosene heater will provide reliable backup heat when you need it most. Take your time, stay safe, and stay warm.
Leave a Reply