
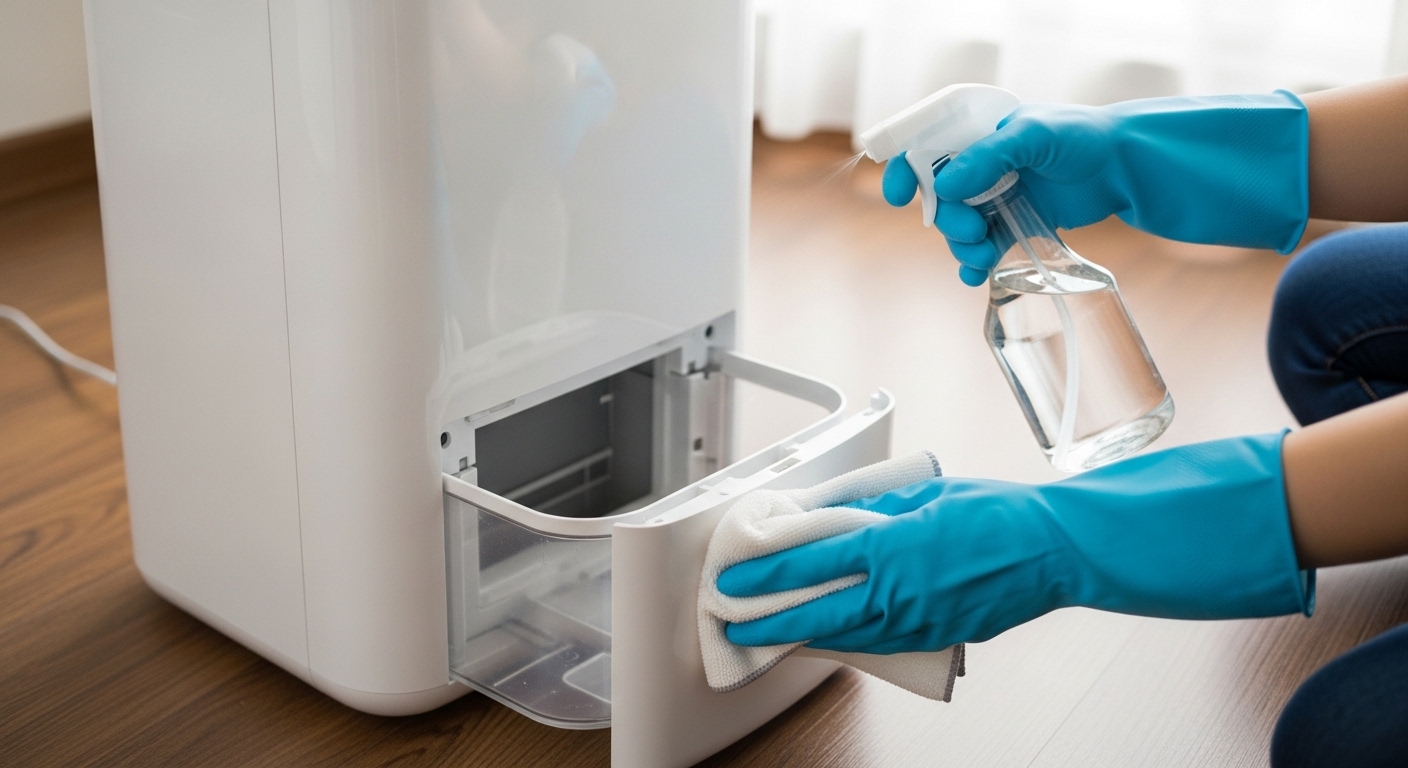
A dirty dehumidifier does more than work less efficiently. It can spread mold spores, bacteria, and unpleasant odors throughout your home. Learning how to clean a dehumidifier properly protects both your health and your investment.
This guide shows you exactly how to clean every component safely and effectively. Dehumidifiers work by pulling moist air over cold coils, which creates the perfect environment for mold and bacteria growth in the water tank and on internal components. Regular cleaning prevents these problems and keeps your unit running efficiently for years.
If you’re shopping for a new unit, check out our guide to the best dehumidifier models tested and compared.
What You’ll Need?
Gather these supplies before starting. Having everything ready makes the process faster and more thorough. Most of these items are already in your home.
Cleaning Supplies:
• Mild dish soap
• White vinegar
• Soft cloths or microfiber towels
• Soft-bristle brush or old toothbrush
• Spray bottle
• Clean water
• Bleach (optional, for deep cleaning)
Tools:
• Vacuum cleaner with hose attachment
• Small paintbrush or wide brush with trimmed bristles
• Shop vac (optional, for tough spots)
• Towels or drop cloth
Safety Equipment:
• Rubber gloves
• Safety goggles (for coil cleaning)
How to Clean a Dehumidifier: Step-by-Step Guide
Follow these steps in order for a complete, safe cleaning. This process works for all major brands including Frigidaire, GE, LG, and Whirlpool.
Step 1: Safety First
Turn off your dehumidifier and unplug it from the electrical outlet. Never clean a unit while it’s connected to power. Move the unit to a well-ventilated area or place towels underneath to catch any water spills.
If your unit has been running, wait 15-20 minutes for it to cool down before cleaning. This prevents accidental burns and allows internal components to settle. Check your owner’s manual before attempting any deep cleaning that involves removing panels or accessing internal components, as this may void your warranty.
Step 2: Remove and Clean the Water Tank
Remove the water collection tank or bucket from the unit. Empty any remaining water down the sink or drain. Inspect the tank for visible mold, slime, mineral deposits, or that characteristic brown sludge that builds up over time.
For regular cleaning, wash the tank with warm water and mild dish soap. Use a soft cloth or sponge to wipe all interior surfaces. Pay special attention to corners and crevices where mold likes to hide.
An old toothbrush works perfectly for reaching tight spots and scrubbing away stubborn residue. Rinse thoroughly with clean water and allow to air dry completely before reinstalling.
For deeper cleaning with stubborn mold or heavy sludge buildup, mix a solution of 90% water and 10% bleach. Fill the tank halfway, swirl vigorously to coat all surfaces, and let sit for 15-20 minutes. Scrub with a soft brush, then rinse multiple times to remove all bleach residue. The bleach solution kills mold spores and prevents regrowth better than soap alone.
Step 3: Clean or Replace the Air Filter
Locate the air filter, usually behind a grille on the back or side of the unit. Remove the filter carefully to avoid damaging it. Check your owner’s manual if you’re unsure about filter location or removal.
Most dehumidifier filters are washable and reusable. Rinse the filter under lukewarm running water until the water runs clear. Gently scrub with a soft brush if there’s visible debris buildup. Don’t use soap or cleaning chemicals on the filter unless your manual specifically recommends it.
Shake excess water from the filter and allow it to air dry completely. Never reinstall a damp filter, as this can promote mold growth and reduce efficiency. If your filter is damaged, torn, or excessively dirty despite cleaning, replace it with a new one compatible with your model.
Step 4: Clean the Coils and Grille
The coils behind the front grille are critical for your dehumidifier’s performance. Dust and debris buildup here reduces efficiency and can cause the unit to work harder, increasing energy costs and potentially leading to compressor failure.
Use a vacuum cleaner with a hose attachment to gently remove loose dust and debris from the coils. Work slowly to avoid bending or damaging the delicate coil fins. Vacuum in the direction of the fins, not across them, for the best results.
For stubborn dirt or dust that the vacuum can’t reach, use a soft brush to gently sweep away debris. A wide paintbrush with trimmed bristles works exceptionally well for this task—the trimmed bristles are stiff enough to dislodge dirt but gentle enough to avoid damaging the fins. Avoid using water or cleaning solutions directly on the coils unless your owner’s manual specifically approves this method.
Wipe down the exterior grille with a damp cloth and mild soap solution. Remove any dust or dirt from the air intake vents to ensure proper airflow. A clean grille improves air circulation and helps prevent dust from reaching the coils in the future.
Step 5: Wipe Down the Exterior
Use a soft, slightly damp cloth to wipe the exterior surfaces of your dehumidifier. Add a small amount of mild dish soap to the water for stubborn spots or fingerprints. Avoid using abrasive cleaners, scouring pads, or harsh chemicals that could damage the finish.
Pay special attention to air vents and intake areas where dust tends to accumulate. A vacuum with a brush attachment can help remove dust from vents and crevices. Don’t spray water or cleaning solution directly onto the unit—always apply it to your cloth first to prevent liquid from entering internal components.
Wipe the control panel carefully with a barely damp cloth. Avoid getting moisture around buttons or digital displays, which can cause electrical issues. A dry cloth works best for control panels to prevent any water damage.
Step 6: Reassemble and Test
Once all components are completely dry, reassemble your dehumidifier. Insert the clean, dry filter back into its slot. Make sure it’s seated properly and securely. Replace the water tank, ensuring it clicks into place if your model has this feature.
Plug the unit back in and turn it on. Listen for unusual sounds that might indicate improper reassembly. Set your desired humidity level and verify that the unit begins collecting water as expected. The unit should run quietly and efficiently after proper cleaning.
If something doesn’t seem right, turn off the unit and double-check that all components are properly installed and fully dry. A properly cleaned dehumidifier should perform noticeably better than before, with improved airflow and moisture removal.
Best Cleaning Solutions for Your Dehumidifier
Different cleaning challenges require different solutions. Here’s what works best for various cleaning scenarios, based on real user testing and forum insights.
Vinegar Solution: Mix equal parts white vinegar and warm water for a natural, effective cleaner. Vinegar kills most mold species and removes mineral deposits without harsh chemicals. Use this solution for weekly cleaning of the water tank and exterior surfaces. For stubborn mold, try adding salt and a few drops of lemon juice to the mixture—let it soak for 2 hours before scrubbing. Rinse thoroughly after use to remove any vinegar smell.
Bleach Solution: For serious mold problems or heavy sludge buildup, mix 90% water with 10% bleach. This powerful solution kills mold spores and disinfects surfaces. Use only for deep cleaning the water tank—never on coils or internal components. Rinse multiple times to ensure no bleach residue remains, as this can damage the unit and release harmful fumes during operation.
Dish Soap and Water: Mild dish soap and warm water work well for regular cleaning. This gentle solution removes dirt and light buildup without damaging components. Use this for weekly maintenance of the tank and exterior wiping. It’s safe for all parts and requires no special rinsing.
Commercial Coil Cleaners: Aerosol coil cleaners from hardware stores can effectively clean heavily soiled coils. These foaming cleaners lift dirt from coil fins without requiring water. Use only if your owner’s manual approves, and follow the product instructions carefully. These cleaners work well for annual deep cleaning but aren’t necessary for regular maintenance. A fin comb can also help straighten bent coil fins for improved airflow.
Maintenance Schedule and Prevention Tips
Regular maintenance prevents most cleaning problems before they start. Follow this schedule to keep your dehumidifier running efficiently and avoid the frustration of dealing with heavy mold or sludge buildup.
Daily: Empty the water tank and give it a quick rinse if you notice any film or residue. This takes less than a minute and prevents mold growth. Check the humidity level setting to ensure it’s appropriate for current conditions. A properly set dehumidifier works more efficiently and experiences less wear.
Weekly: Inspect the water tank for any buildup or slime. Wipe down the exterior with a dry or slightly damp cloth to remove dust. Check that air vents aren’t blocked by furniture, curtains, or other objects. Proper airflow is essential for efficient operation.
Every 2-3 Weeks: Perform a complete cleaning following the steps above. This frequency works well for units in constant use or humid climates. Regular cleaning prevents problems before they become severe and takes much less time than dealing with neglected buildup.
Monthly: Deep clean the coils with a vacuum and soft brush. Check the filter for wear or damage and replace if necessary. Inspect the drain hose (if applicable) for clogs or kinks. A monthly deep cleaning extends the unit’s lifespan and maintains peak efficiency.
Seasonally: Before storing your dehumidifier for the season, perform a complete cleaning and ensure all parts are completely dry. Store in a cool, dry place away from direct sunlight. Before first use each season, clean the unit again to remove any dust that accumulated during storage. This prevents that musty smell that often occurs when taking a stored unit out of hibernation.
Prevention Tips: Place your dehumidifier on a raised surface to improve air circulation and reduce dust intake. Keep it away from walls and furniture that could block airflow. Use a hygrometer to monitor humidity levels and adjust your dehumidifier settings accordingly. Maintaining relative humidity between 30-50% reduces workload and extends the unit’s lifespan.
Frequently Asked Questions
How do you clean the inside of a dehumidifier?
Clean the inside by first unplugging the unit, then removing and washing the water tank with warm soapy water. Use a soft brush or cloth to wipe down the interior surfaces, paying special attention to corners where mold can grow. For stubborn buildup, use a mixture of white vinegar and water, then rinse thoroughly and dry completely before reassembling.
Can I run vinegar through my dehumidifier?
No, you should never run vinegar or any liquid through your dehumidifier’s internal systems. The unit is designed to extract water from air, not process cleaning solutions. Instead, use vinegar to clean removable parts like the water tank and exterior surfaces. Always rinse thoroughly with water after using vinegar and allow parts to dry completely before reassembling.
How to clean sludge from a dehumidifier?
To remove stubborn sludge, empty the tank and mix a solution of warm water, dish soap, and white vinegar. Let it soak for 30 minutes to loosen buildup. Scrub with a soft brush or old toothbrush, paying special attention to corners and crevices. For heavy sludge, add 1 cup of white vinegar to the tank, swish vigorously, and let sit overnight before scrubbing and rinsing thoroughly.
How often should I clean my dehumidifier?
Clean your dehumidifier every 2-3 weeks during heavy use periods or whenever you notice reduced performance, musty odors, or visible mold growth. The water tank should be emptied and rinsed daily. Perform a deep cleaning monthly if you live in a humid climate or use the unit continuously. Regular maintenance prevents mold buildup and extends your unit’s lifespan.
Conclusion
Learning how to clean a dehumidifier properly is essential for maintaining healthy indoor air quality and protecting your investment. Regular cleaning prevents mold growth, maintains efficiency, and extends the lifespan of your unit. By following this step-by-step guide and establishing a regular maintenance schedule, you can ensure your dehumidifier continues to perform at its best.
A clean dehumidifier works more efficiently, uses less energy, and provides healthier air for your home. The small time investment required for regular cleaning pays off in improved performance and fewer problems down the road. If your current unit is old or frequently develops issues despite proper maintenance, it might be time to consider an upgrade.
Check out our dehumidifier reviews and guides for more information on choosing the right unit for your needs and keeping it running smoothly for years to come.
Leave a Reply