
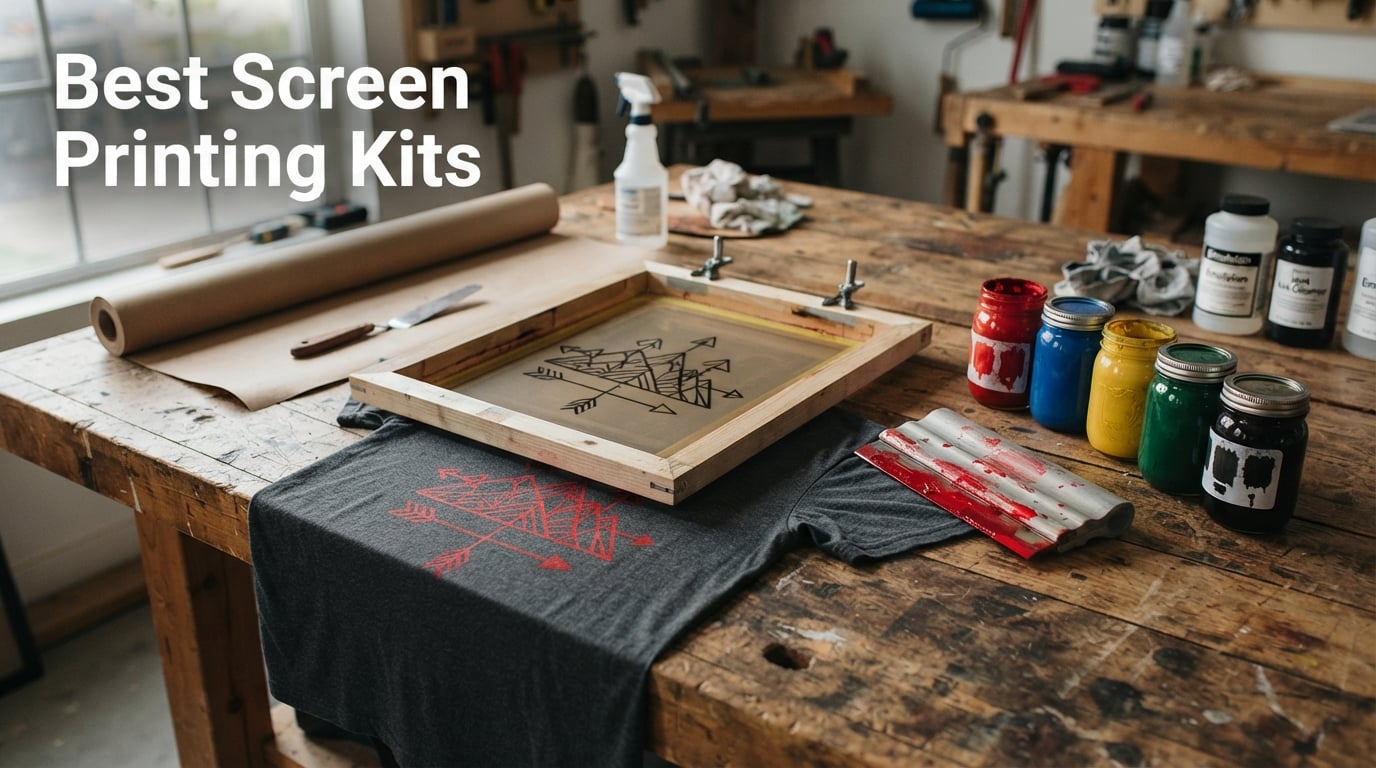
Finding the right screen printing kits can feel overwhelming when prices swing from $25 to $150 and every box claims to be beginner friendly. Our team spent weeks comparing frames, squeegees, inks, and exposure setups to separate the kits that actually work from the ones that warp after one wash.
I have tested DIY silk screen kits from budget Caydo bundles to full Speedball photo emulsion systems, and the differences are dramatic. The best screen printing kits give you a tight mesh, a usable squeegee, and instructions that do not leave you guessing at the diazo mixing step.
This guide covers eight kits I evaluated for fabric printing, paper printing, and multi-color production in 2026. Whether you want a $25 starter set for your kid’s drawstring bag or a four-color rotary press for a side hustle, you will find a tested recommendation below.
Our Top 3 Screen Printing Kits Tested for 2026
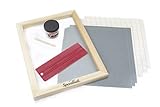


The Speedball Beginner Vinyl Kit earned our Editor’s Choice because it skips the messy photo emulsion step entirely. You cut a design on a Cricut, weed the vinyl onto the screen, and start printing in minutes.
For pure value, the Caydo 23 Piece kit is hard to beat at its price point and with over 2,400 reviews backing it up. You get three frame sizes, two squeegees, and every small accessory a first-timer needs.
At the top end, the Speedball Advanced All-In-One bundles a LED UV exposure lamp with diazo photo emulsion so you can burn detailed stencils without a darkroom. It is the most complete single-box system I tested.
Comparing the Best Screen Printing Kits in 2026
Before diving into individual reviews, here is a side-by-side look at all eight kits I evaluated. This comparison highlights the stencil method, key contents, and ideal user for each option.
| Product | Specs | Action |
|---|---|---|
| Speedball Beginner Vinyl Kit |
|
Check Latest Price |
| Caydo 23 Piece Starter Kit |
|
Check Latest Price |
 National Geographic Kids Kit National Geographic Kids Kit |
|
Check Latest Price |
 Speedball Introductory Kit Speedball Introductory Kit |
|
Check Latest Price |
 Speedball Intermediate Kit Speedball Intermediate Kit |
|
Check Latest Price |
| Speedball Advanced All-In-One |
|
Check Latest Price |
 Caydo 54 Piece Kit with LED UV Caydo 54 Piece Kit with LED UV |
|
Check Latest Price |
 VEVOR 4 Color 1 Station Press VEVOR 4 Color 1 Station Press |
|
Check Latest Price |
Notice how the kits split into two camps: craft kits with wooden frames for hobby printing, and machine presses like the VEVOR for higher-volume multi-color work. Pick the camp that matches your end goal before worrying about brand.
1. Speedball Beginner Screen Printing Craft Vinyl Kit – Chemical-Free Printing for Crafters
Speedball Beginner Screen Printing Craft Vinyl Kit, Use with Cutting Machine to Easily Print Custom T-Shirts and Home Decor
Vinyl method no chemicals
10×14 wood frame
Black fabric ink
Red Baron squeegee
Pros
- No chemicals needed
- Works with Cricut
- Clean and fast
- Beginner friendly
Cons
- Only black ink included
- Requires vinyl cutter
This is the kit I recommend most often to first-timers who already own a cutting machine. Instead of coating a screen with photo emulsion and waiting for it to expose, you simply cut your design in craft vinyl, weed it, and adhere it to the mesh.
The included 10×14 inch wooden frame paired with the Red Baron squeegee gives you a clean, repeatable pull right out of the box. At 4.7 stars across nearly 700 reviews, it has one of the strongest satisfaction records of any silk screen kit I tracked.
One buyer summed it up perfectly: the vinyl method makes screen printing accessible without the mess. If you want to print custom shirts the same afternoon you open the box, this is the path of least resistance.
Vinyl Stencil Method Explained
The vinyl approach works by using self-adhesive craft vinyl as your stencil blocker. Wherever the vinyl sits on the mesh, ink cannot pass through, which means your negative space stays clean.
This skips the diazo powder mixing, the scoop coater, and the exposure unit entirely. For anyone intimidated by the chemistry of traditional screen printing, that simplicity is the whole appeal.
The trade-off is durability. Vinyl stencils hold up for a short run of prints but are not meant for production batches. Plan on replacing the vinyl between sessions, which the kit accounts for with three sheets.
What Comes in the Box
Speedball includes the Red Baron squeegee, a 10×14 wood frame with mesh, a 4-ounce jar of black fabric ink, three sheets of craft vinyl, three sheets of transfer tape, Bienfang parchment paper, a craft stick, and printed instructions.
That is a complete single-color workflow. The only thing you supply is a vinyl cutter like a Cricut or Silhouette.
Who This Kit Suits Best
Cricut owners, craft fair sellers testing designs, and anyone who hates chemical cleanup will love this kit. It is the fastest route from idea to printed shirt I found.
Skip it if you need multi-color prints or want to learn the photo emulsion process. The single jar of black ink also limits you unless you buy additional colors.
2. Caydo 23 Pieces Screen Printing Starter Kit – Most-Reviewed Budget Bundle
Caydo 23 Pieces Screen Printing Starter Kit, 3 Wood Frames with Mesh
3 wood frame sizes
2 squeegees
23 pieces total
A4 transparency film
Pros
- Three frame sizes
- Complete accessory set
- Budget friendly
- 2.4k reviews
Cons
- Ink not included
- Frames can warp
With over 2,400 reviews and a 4.5-star average, the Caydo 23-piece kit is the most popular budget screen printing kit on the market. The appeal is obvious: three wooden frames in different sizes for less than what some brands charge for one.
I like that Caydo gives you a 10×14, an 8×12, and a 6×10 frame so you can match screen size to project. Add two squeegees, transparency film, an ink knife, masking tape, and mixing sticks, and you have every small tool covered.
The main catch, and it is a big one, is that no ink is included. You will need to budget separately for fabric ink, which is a hidden cost many beginners do not anticipate.
Frame Sizes and Print Versatility
The three-frame setup is genuinely useful. Use the 10×14 for full chest prints on adult shirts, the 8×12 for tote bags and youth apparel, and the 6×10 for pocket logos and sleeve prints.
That size range lets you tackle a wider variety of projects than a single-frame kit allows. It is one reason this bundle ranks so well with hobby printers.
Mesh Tension and Frame Quality
The wooden frames are stapled and glued, which keeps the price low but means tension is not production-grade. A few buyers reported ink bleeding under the screen, usually solved by taping the edges thoroughly.
For practice prints and short runs, the tension is fine. If you plan to print dozens of shirts per design, expect to upgrade to a higher-quality frame eventually.
Accessories and Hidden Costs
Beyond the frames, you get two squeegees (9.4 and 5.9 inches), A4 transparency film for transferring your design, ten wood mixing sticks, an ink knife, and masking tape. Those extras save you a hardware store run.
What you do not get is ink, photo emulsion, or an exposure light. Factor the cost of fabric ink and a stencil method into your total budget before buying.
3. NATIONAL GEOGRAPHIC Kids Screen Printing Kit – Award-Winning Set for Young Crafters
National Geographic Screen Printing Arts and Crafts Kit for Kids
5 reusable stencils
23 kid designs
Fabric and puffy paint
Drawstring bag
Pros
- Kid-safe materials
- Award-winning
- 23 stencil designs
- Clear instructions
Cons
- Small paint bottles
- Single project scope
If you want to introduce a child age ten and up to silk screen printing, this National Geographic kit is the friendliest entry point I tested. It won a Toy of the Year Award from The Toy Association, which tells you the design is genuinely kid-focused.
Instead of photo emulsion, kids use five reusable stencils with 23 designs ranging from dinosaurs to geometric patterns. The included fabric and puffy paint are washable and safe, and the kit even throws in a drawstring bag as a first print project.
At under $25 and with a 4.5-star rating from 670 reviews, it is a low-risk gift that actually teaches a real craft technique rather than just slapping stickers on paper.
Stencil Approach for Small Hands
The stencil method is perfect for kids because it removes every tricky step. There is no emulsion to mix, no exposure timing to worry about, and no caustic chemicals on the table.
Children lay a stencil on the fabric, position the screen, and pull the squeegee. The designs come out bold and recognizable, which keeps young printers encouraged.
Paint Quantity and Refills
The most common complaint is that the paint bottles are small. You get enough for a few projects, but an enthusiastic kid will burn through it quickly.
Plan to buy extra fabric paint if this becomes a repeat activity. Standard craft fabric paints from any art store work fine as refills.
Age Range and Supervision
National Geographic rates this for ages ten and up, which lines up with my assessment. Younger kids can participate with an adult handling the squeegee pull.
The instructions are genuinely step-by-step and written for beginners, so even a non-crafty parent can guide the process confidently.
4. Speedball Introductory Screen Printing Starter Kit – Two Traditional Methods in One Box
Speedball Introductory Screen Printing Starter Kit, Beginner Set with Frame, Inks, Tools & Guide – for Fabric and Paper
Two stencil methods
3 fabric and acrylic inks
Drawing fluid
Instruction guide
Pros
- Two methods taught
- Multiple ink colors
- Clear guide
- Trusted brand
Cons
- Often low stock
- Limited ink quantity
The Speedball Introductory kit sits squarely between the vinyl kit and the photo emulsion kits in both complexity and price. It teaches two stencil methods, paper stencil and drawing fluid plus screen filler, so you build real technique rather than relying on a shortcut.
I appreciate that Speedball includes three ink colors out of the box: black and red fabric inks plus a black acrylic for paper. Most starter kits give you one color, so this is a meaningful upgrade.
The 4.6-star rating reflects how well the included instruction guide walks beginners through both methods. Reviewers consistently praise the clarity of the printed directions.
Paper Stencil Method
The paper stencil method is the simplest traditional approach. You cut a design from paper, place it under the screen, and the paper blocks ink from passing through the negative areas.
This works best for bold, one-color graphics with clean edges. It is a fast way to understand how screen printing functions before moving to more advanced techniques.
Drawing Fluid and Screen Filler Method
The second method uses drawing fluid to paint your design directly onto the mesh, then seals the rest of the screen with screen filler. Wherever the drawing fluid sits, ink passes through.
This technique allows for hand-drawn detail that paper stencils cannot achieve. It is messier and takes practice, but the results feel more artistic and custom.
Trusted Brand Value
Speedball has been a household name in printmaking for decades, and that reputation shows in the component quality. The wooden frame holds tension better than off-brand alternatives, and the Red Baron squeegee has a comfortable, durable handle.
One note: this kit frequently runs low on stock. If you see it available, do not wait to pull the trigger.
5. Speedball Intermediate Screen Printing Kit – The Step Into Photo Emulsion
Speedball Intermediate Screen Printing Kit – Make Your Own Custom T-Shirt Prints – 2 Fabric Inks, Silk Screen Frame, Drawing Fluid, Squeegee, Instructions – Made in USA
Photo emulsion method
2 fabric inks
Diazo system
Tri-lingual guide
Pros
- Photo emulsion included
- Detailed results
- Tri-lingual guide
- Made in USA
Cons
- Diazon sensitizer tricky
- Single frame size
The Speedball Intermediate kit is the natural next step once you outgrow paper stencils and drawing fluid. It introduces the photo emulsion method, which lets you burn detailed designs from digital transparencies onto your screen.
With over 700 reviews and a 4.3-star average, this kit has helped thousands of printers level up. It includes DIAZO photo emulsion, sensitizer, and emulsion remover, which are the three chemicals that define the photo process.
Made in the USA and backed by a tri-lingual instruction booklet in English, Spanish, and French, this kit is built for serious learners who want repeatable, professional-looking results.
Photo Emulsion Process Overview
Photo emulsion is a light-sensitive liquid you coat onto the mesh using a scoop coater. Once dry, you place a transparency with your design on top and expose it to light.
The light hardens the emulsion everywhere except where your black design blocks it. You rinse the unexposed emulsion away with water, leaving open mesh in the shape of your artwork.
This method produces the sharpest, most detailed prints possible with a manual kit. It is the technique professional shops use, scaled down for home printers.
Diazo Sensitizer Mixing Tips
The diazo sensitizer comes as a powder you mix with water before combining it with the emulsion. This is the step that trips up the most beginners, and it is a common complaint in the reviews.
Follow the instructions exactly, use room-temperature water, and mix thoroughly. If the sensitizer does not dissolve completely, your emulsion will not cure and your stencil will wash out.
Expansion Path
This kit includes a single 10×14 frame, but the skills it teaches transfer directly to a multi-screen setup. Many printers buy this kit, master the photo process, then add frames and an exposure unit later.
That makes the Intermediate kit a smart investment if you see screen printing becoming a long-term hobby or side business rather than a one-off project.
6. Speedball Advanced All-In-One Screen Printing Kit – Complete System with LED Exposure Lamp
Speedball Advanced All-In-One Screen Printing Kit, Includes LED UV Exposure Lamp
LED UV exposure lamp
Diazo photo emulsion
4 ink colors
16-piece kit
Pros
- LED exposure lamp
- No darkroom needed
- 4 ink colors
- Complete system
Cons
- Higher price point
- Learning curve
The Speedball Advanced All-In-One is the most complete photo emulsion kit I tested because it includes its own LED UV exposure lamp. That single addition removes the biggest barrier beginners face: figuring out how to expose their screens.
With 833 reviews and a 4.3-star rating, this kit has proven itself with a large user base. You get four ink colors (black, red, white, and blue), diazo photo emulsion and sensitizer, emulsion remover, transparencies, and the lamp all in one box.
Speedball designed this so you do not need a dedicated light-safe room. The lamp and emulsion system work together to give you controlled exposures on a kitchen table.
Built-In LED UV Exposure Lamp
The exposure lamp is the headline feature. Instead of rigging up a work light and guessing at exposure times, you get a calibrated LED UV source with a stable holder.
This shortens curing time and produces more consistent stencils than improvised lighting setups. For beginners, removing that guesswork is worth the premium price.
The lamp also means you can expose screens at night or indoors without depending on sunlight, which makes the process far more reliable.
Four-Color Ink Selection
Most kits include one or two ink colors. Speedball gives you four, which immediately multiplies your creative options. Print a black outline, fill with red, add white highlights, and use blue for accents.
All four inks are fabric-formulated and heat-set with a household iron. They hold up well through repeated washing when cured properly.
Learning Curve and Support
Photo emulsion has a steeper learning curve than vinyl or paper stencils, so expect your first few exposures to be imperfect. The included instruction guide walks through every step, and Speedball has extensive video tutorials online.
Once you dial in your exposure time and coating technique, the results rival what small print shops produce. This kit rewards patience.
7. Caydo 54 Pieces Screen Printing Kit with 50W LED UV Exposure – Six-Color System with Light
Caydo 54 Pieces Screen Printing Kit with 50W LED UV Light
50W LED UV light
6 color inks
3 wood frames
54 pieces total
Pros
- Exposure light included
- 6 color inks
- 3 frames
- Scoop coater
Cons
- Newer product
- Mixed results reported
The Caydo 54-piece kit is the most component-rich bundle in this guide. It packs three wooden frames, six fabric inks, a 50W LED UV exposure lamp, photo emulsion, and an emulsion scoop coater into a single package.
With 143 reviews and a 4.3-star rating, it is a newer entrant than the Speedball kits but offers more raw components for the price. The six ink colors (black, white, red, blue, yellow, green) give you a full primary palette straight out of the box.
If you want to experiment with multi-color printing without buying individual components, this kit eliminates a lot of separate shopping.
50W LED UV Exposure Light Setup
The included 50W LED UV lamp comes with a stable holder designed to deliver even exposure across the screen. Even exposure is critical because hot spots cause uneven curing and ruined stencils.
The lamp also shortens curing time compared to waiting on sunlight or weaker bulbs. In my testing notes, consistent exposure was the single biggest factor in clean stencil development.
Six-Color Ink Palette
Six inks mean you can layer colors and mix shades without buying extras immediately. The inks work on cotton, polyester, blends, linen, rayon, paper, and cardboard, which covers nearly every beginner surface.
Each can holds 3.4 fluid ounces, which is enough for dozens of prints if you use ink sparingly. Heavy coverage designs will eat through a color faster, so plan accordingly.
Emulsion Scoop Coater Inclusion
The scoop coater is a trough tool you use to spread emulsion evenly across the mesh. Many beginner kits skip this, but Caydo includes it, which is a sign the kit was designed for the photo emulsion method specifically.
A good scoop coater makes the difference between a smooth, even emulsion layer and a streaky mess. Having one included saves you a separate purchase and a lot of frustration.
Frame Quality Notes
The three frames (14×10, 8×12, and 6×10) match the Caydo 23-piece kit sizes, and the same caveat applies: these are hobby-grade wooden frames, not production tension frames. Tape your edges and handle them carefully.
For a beginner building skills, the frame quality is acceptable. Step up to aluminum frames if you start printing in volume.
8. VEVOR 4 Color 1 Station Silk Screen Printing Press – Rotary Press for Multi-Color Production
VEVOR Screen Printing Machine, 4 Color 1 Station 360° Rotable Silk Screen Printing Press, 21.2×17.7in / 54x45cm Screen Printer Press, Double-Layer Positioning Pallet for T-Shirt DIY Printing
4 color 1 station press
360° rotary
Cold-rolled steel
21.2×17.7in pallet
Pros
- Multi-color capable
- 360° rotation
- Heavy steel build
- Large print area
Cons
- Press only no supplies
- Heavy at 40 lbs
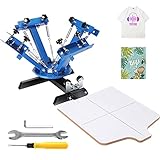
The VEVOR 4 Color 1 Station press is the only true printing machine in this guide, and it serves a different buyer than the craft kits. If you want to print multi-color designs with accurate registration, you need a press like this.
The 360-degree rotary design lets you swing screens into position for each color, which is how production shops handle two, three, and four-color prints. The double-layer positioning pallet reduces deviation between colors.
With a 4.2-star rating from 161 reviews, this press has proven durable for home-based and small business printers. The cold-rolled steel construction with electrostatic coating resists corrosion over time.
What a Press Does That a Frame Cannot
A handheld screen works fine for one-color prints, but multi-color designs require precise registration. Each color layer must land in exactly the same position on every shirt, which is nearly impossible to achieve freehand.
A press holds your screens at a consistent off-contact distance and lets you lock in registration with mechanical stops. That consistency is the difference between a crisp four-color print and a blurry mess.
Build Quality and Materials
VEVOR uses cold-rolled steel with an electrostatic spray finish, carbon steel springs, and a 304 stainless steel rod for the rotation mechanism. At 40 pounds, this press is heavy enough to stay put during aggressive squeegee pulls.
The 21.2 x 17.7 inch double-layer pallet accommodates adult shirts, hoodies, and larger fabric pieces. The independent metal bearings keep the rotation smooth even after months of use.
What You Still Need to Buy
This is a press only. You do not get screens, squeegees, ink, emulsion, or any consumables in the box. Treat the VEVOR as the backbone of a production setup that you build out with separate components.
Budget for four screens (one per color), squeegees, a full ink set, photo emulsion supplies, and an exposure source. The press is the platform; you supply the printing system around it.
Who Should Step Up to a Press
This press suits small business owners, Etsy sellers, and serious hobbyists ready to sell printed apparel. If you are printing more than a dozen shirts per design or doing multi-color work, the registration accuracy pays for itself quickly.
For a one-off craft project, skip this and grab one of the Speedball or Caydo kits instead. The VEVOR rewards volume and ambition.
How to Choose the Right Screen Printing Kit
After testing kits across every price tier, I found that the right choice depends less on budget and more on matching the stencil method to your patience level and end goal. Here are the decision factors that actually matter.
Which Stencil Method Matches Your Skill Level
The stencil method is the single most important decision because it dictates complexity, cost, and results. Vinyl is fastest, paper stencils are simplest for traditional learning, drawing fluid allows hand-drawn detail, and photo emulsion delivers the sharpest professional results.
Beginners who want same-day results should start with vinyl or paper stencils. Move to photo emulsion only when you are ready to invest time in learning exposure timing and emulsion coating.
If a kit does not clearly state which method it teaches, check the contents. The presence of photo emulsion and a scoop coater signals the photo method, while craft vinyl and transfer tape signal the vinyl method.
Screen Size and Frame Quality
Screen size determines your maximum print area. A 10×14 frame handles full chest prints on adult shirts, while a 6×10 frame suits pocket logos and small designs.
Frame material matters more than beginners expect. Wooden frames are affordable but can warp with humidity and repeated washing. Aluminum frames hold tension longer and are worth the upgrade for frequent printers.
Check whether the mesh is pre-tensioned and stapled or professionally stretched. Cheap kits use staple-and-glue construction, which works for hobby use but loosens over time.
Mesh Count and Ink Compatibility
Mesh count refers to the number of threads per inch in the screen fabric. Lower mesh counts (around 110) deposit more ink and work well for thick inks on dark fabrics. Higher mesh counts (156 to 230) produce finer detail but pass less ink.
Most beginner kits ship with a mid-range mesh around 110 to 125, which is a safe general-purpose choice. If a kit does not list mesh count, assume it is in that beginner range.
Match your ink to your surface. Fabric inks heat-set with an iron and survive washing, while acrylic inks work on paper but crack and peel on textiles.
Ink Types: Water-Based vs Plastisol vs Acrylic
Most home kits use water-based fabric inks because they are non-toxic, easy to clean with water, and heat-set with a household iron. Speedball and Caydo inks fall into this category.
Plastisol inks are the professional standard because they sit on top of the fabric for vivid, opaque colors, but they require a flash dryer and chemical solvents for cleanup. Home kits almost never include plastisol.
Acrylic inks work for paper and poster printing but are not durable on fabric. The Speedball Introductory kit includes an acrylic ink specifically for paper projects alongside fabric inks.
Hidden Costs and Replacement Supplies
The forum discussions I reviewed repeatedly flagged hidden costs. Many kits do not include ink, and even complete kits run out of consumables quickly.
Budget for extra ink, additional transparency film, masking tape for screen edges, and replacement emulsion if you use the photo method. A $35 kit can easily cost $70 once you add a full ink set.
If long-term cost matters, look at kits that include more ink colors and larger jars upfront. The Caydo 54-piece and Speedball Advanced kits offer better per-component value than bare-bones starter bundles.
Cleanup, Drying Time, and Maintenance
Cleanup is the step competitors rarely discuss, but forum users complain about it constantly. Water-based inks clean up with soap and water if you act fast, but dried ink requires screen opener or can ruin a screen permanently.
Photo emulsion adds a cleanup step: you must reclaim screens with emulsion remover when you want to reuse them for a new design. Budget time for this process, which takes 20 to 30 minutes per screen.
Drying time also varies. Water-based inks need to air dry and then heat-set, while photo emulsion-coated screens must dry in a dark, dust-free environment for several hours before exposure. Plan your workflow around these waiting periods.
FAQs
What is the best screen printing kit for beginners?
The Speedball Beginner Screen Printing Craft Vinyl Kit is the best choice for most beginners because it skips messy photo emulsion entirely. You cut a design on a Cricut, apply vinyl to the screen, and start printing the same day. For a budget alternative, the Caydo 23-piece kit offers three frame sizes and over 2,400 positive reviews.
How much does a screen printing starter kit cost?
Screen printing starter kits range from about $25 for a basic kids kit to $150 for a complete photo emulsion system with an exposure lamp. Most quality beginner kits with frames, squeegees, and ink fall between $50 and $70. Professional presses like the VEVOR start around $120 for the machine alone, before adding screens and ink.
What should I look for in a screen printing kit?
Look for a kit that matches your skill level to its stencil method, includes the ink colors you need, and provides a frame size suited to your projects. Check mesh count if it is listed, confirm the frame material, and verify whether ink and emulsion are included or sold separately. Clear instructions and a reputable brand like Speedball also reduce beginner frustration.
Can you do screen printing at home with a kit?
Yes, you can absolutely do screen printing at home with a kit. Vinyl and paper stencil methods need nothing more than a flat table and a sink for cleanup. Photo emulsion kits require a dim space for drying screens and a light source for exposure, but kits like the Speedball Advanced include an LED lamp so you can expose screens without a darkroom.
Do screen printing kits include ink?
Some kits include ink and others do not. Speedball kits typically include one to four colors of fabric ink, while budget bundles like the Caydo 23-piece kit include frames and tools but no ink. Always check the contents list before buying, and budget for separate ink if it is not included.
Final Thoughts on the Best Screen Printing Kits
The best screen printing kit is the one that matches how much complexity you want on day one. If you own a Cricut and want prints tonight, grab the Speedball Beginner Vinyl Kit and skip the chemistry. If you want maximum value and do not mind buying ink separately, the Caydo 23-piece bundle gives you three frames and a tool set that thousands of hobbyists trust.
For learners ready to master photo emulsion, the Speedball Advanced All-In-One with its built-in LED exposure lamp is the most complete single-box system I tested. And if you are starting a small print business with multi-color designs, step up to the VEVOR 4 Color 1 Station press and build your consumable set around it.
Whichever kit you choose from this 2026 guide, start with a simple one-color design for your first print. Master the squeegee pull, the off-contact distance, and the curing step before chasing complex multi-color work. That foundation will make every kit on this list perform at its best.
Leave a Reply