
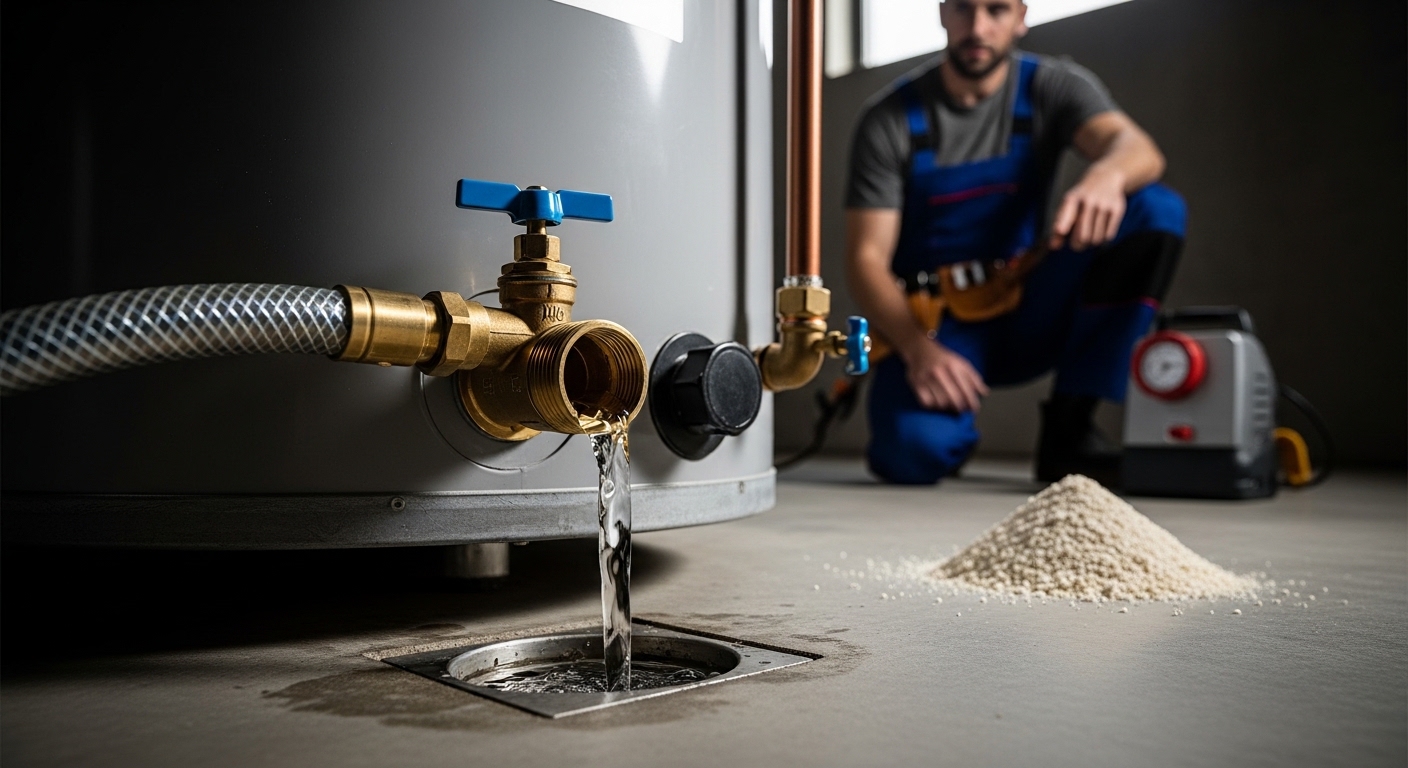
Learning how to drain a water heater is one of the most important maintenance tasks any homeowner can master. I’ve helped dozens of neighbors through this process, and I’m always surprised by how many people have never touched their water heater in 10+ years of ownership. The truth is, this simple 30-minute task can add years to your appliance’s life and save you hundreds in energy costs.
Your water heater works hard every single day, heating 40-80 gallons of water repeatedly. Over time, minerals and sediment from your water supply settle at the bottom of the tank. This buildup creates a barrier between the heating element and your water, forcing the unit to work harder and use more energy. In hard water areas, I’ve seen tanks completely filled with sediment after just 3-5 years.
In this guide, I’ll walk you through exactly how to drain a water heater safely, whether you have an electric or gas model. I’ve included troubleshooting tips for common problems like clogged drain valves and slow draining, based on real issues I’ve encountered over the years. Let’s get started with understanding why this maintenance matters so much.
Why Draining Your Water Heater Matters?
Sediment buildup is the silent killer of water heaters. When minerals like calcium and magnesium settle at the bottom of your tank, they create a thick layer that acts as insulation. This means your heating element has to work overtime to heat the water through this sediment barrier. I’ve cut open neglected tanks that were literally half-filled with hardened mineral deposits.
The consequences go beyond just efficiency. That sediment layer causes hot spots on the tank bottom that can lead to premature failure. The constant heating and cooling of these mineral deposits creates popping and rumbling noises—sounds many homeowners mistakenly think are normal. When you hear your water heater making noise, that’s actually sediment banging around inside.
Regular draining also extends the lifespan of your anode rod, the sacrificial metal component that prevents your tank from rusting. When sediment covers the bottom of the tank, it accelerates corrosion where the rod can’t protect. A properly maintained water heater can easily last 15-20 years, while neglected units often fail within 8-12 years.
How Often Should You Drain Your Water Heater?
The standard recommendation is to drain and flush your water heater at least once per year. This annual maintenance removes sediment before it becomes a serious problem. However, the right frequency depends on your water quality and usage patterns. I’ve tested water from heaters in different neighborhoods and seen dramatic differences in sediment accumulation rates.
If you live in an area with hard water (water high in mineral content), you may need to flush every 6 months. Hard water leaves behind white or grayish scale that builds up quickly. You can tell if you have hard water by looking for mineral deposits on your faucets and showerheads. Soft water areas can often go 12-18 months between flushes, though annual maintenance is still ideal.
Watch for these signs that your water heater needs immediate attention: rumbling or popping sounds during heating, longer recovery times (hot water runs out faster), higher energy bills, or rusty/discolored water. These symptoms indicate significant sediment accumulation that should be addressed right away to prevent damage.
Tools and Materials You’ll Need
Before starting the how to drain a water heater process, gather these essential tools. Having everything ready beforehand will make the job much smoother and prevent frustration mid-process. I’ve learned from experience that nothing’s worse than realizing you’re missing a crucial tool with water already flowing.
Essential tools:
- Garden hose (50-100 feet depending on drain location)
- Adjustable wrench or channel locks
- Flathead screwdriver (for some drain valve types)
- Bucket or container for initial water testing
- Rags or towels for cleanup
Safety equipment:
- Heat-resistant gloves
- Safety glasses
- Protective footwear
Optional but helpful items:
- Hose washer or rubber gasket (if your hose leaks)
- Wire coat hanger (for clearing clogged drain valves)
- Shop vacuum (wet/dry vac) for final water removal
- Flashlight (to inspect inside the tank)
The garden hose is the most critical tool. Make sure it’s in good condition with no cracks or leaks. I’ve seen cheap hoses burst under pressure, creating a messy situation. Also verify that your hose reaches from the water heater to your drain location—whether that’s a floor drain, utility sink, or outdoor area.
Safety Precautions Before You Begin
Safety should always come first when working with water heaters. These appliances involve scalding water, electrical connections, or gas lines—all of which demand respect and caution. I’ve been doing this for years and still treat every drain as if it’s my first time. A few moments of preparation can prevent serious injuries.
Critical safety steps:
For electric water heaters: Turn off the power at the circuit breaker panel. Never rely on just turning off the unit itself—the breaker must be flipped to completely cut power. I always double-check with a voltage tester before touching any electrical components. Water and electricity are a deadly combination, so don’t skip this step.
For gas water heaters: Turn the gas control valve to the “pilot” setting. This keeps the pilot light lit while stopping the main burner. If you need to completely shut off gas (rarely necessary for draining), turn the valve to “off.” Never attempt to drain a water heater while the burner is actively heating.
Allow the water to cool for at least 2-3 hours before draining. The water inside can be 120-140°F or hotter, which can cause severe burns instantly. I prefer to drain in the evening after the family has showered so the water has time to cool naturally. Rushing this step is how most people get hurt during water heater maintenance.
How to Drain a Water Heater: Step-by-Step Guide
Now let’s get into the actual process of how to drain a water heater. Follow these steps carefully, and don’t rush. I’ve broken this down into the exact sequence I use after years of practice. Each step serves an important purpose in ensuring thorough sediment removal and preventing problems.
Step 1: Turn off the cold water supply
Locate the cold water shut-off valve, which is typically located on the pipe leading into the top of the water heater. Turn this valve clockwise until it’s fully closed. This stops new water from entering the tank during draining. If you’re unsure which valve is which, the cold inlet is usually on the right side (facing the unit) and may have a blue handle or标记.
Step 2: Turn off the power or gas supply
For electric models, flip the circuit breaker off. For gas units, turn the gas control valve to “pilot” as described in the safety section. Never attempt to drain a water heater while it’s actively heating water. This can damage the heating elements or cause the tank to warp from uneven cooling.
Step 3: Open a hot water faucet
Go to the nearest hot water faucet (usually a sink or tub) and turn it to the hot side. This breaks the vacuum seal inside the tank and allows air to enter as water drains out. Without this step, the tank can create a vacuum lock that stops draining completely. Leave this faucet open throughout the entire process.
Step 4: Connect the garden hose
Attach your garden hose to the drain valve at the bottom of the water heater. The drain valve is usually a spigot-style valve near the bottom front or side of the tank. Hand-tighten the connection first, then use pliers for a quarter-turn if needed—don’t overtighten as plastic valves can crack. Route the hose to a floor drain, utility sink, or outside. Make sure the hose end is lower than the drain valve to allow gravity to do the work.
Step 5: Open the pressure relief valve (T&P valve)
Locate the temperature and pressure relief valve on the side or top of the tank. Flip the small metal lever upward to open it. You’ll hear some air hiss out—that’s normal. This valve releases pressure buildup and allows faster draining. Leave it open during the entire drain process. If no water comes out when you open this valve, the tank may be depressurized already, which is fine.
Step 6: Open the drain valve
Slowly turn the drain valve handle counter-clockwise to open it. If you have a plastic valve, be gentle—these can be fragile. Water should start flowing out through the hose immediately. At first, the water may be discolored or have sediment in it. This is normal and exactly what we’re trying to remove. Let the tank drain completely until water stops flowing.
Step 7: Flush out the sediment
Once the initial flow stops, turn on the cold water supply for 30-60 seconds to flush remaining sediment from the bottom of the tank. Watch the water coming through the hose—it will likely be dirty at first. Repeat this flush cycle 2-3 times until the water runs relatively clear. This is the most important step for removing sediment buildup.
Step 8: Close the drain valve
When the water runs clear, close the drain valve by turning it clockwise. Make sure it’s fully closed but don’t force it—plastic valves can strip or crack if over-tightened. If your valve leaks slightly after closing, this often indicates sediment stuck in the valve seat. Opening and closing it a few times usually clears this.
Step 9: Close the pressure relief valve
Flip the T&P valve lever back down to close it. If it continues to drip, try lifting it briefly and releasing it a few times to clear any sediment. Persistent leaking may indicate a faulty valve that needs replacement, but minor dripping for a few minutes after draining is normal.
Step 10: Refill the tank
Turn the cold water supply back on. Leave the hot water faucet open—you’ll hear air sputtering out as the tank fills. Once a steady stream of water flows from the faucet, close it. Check for leaks around all connections and valves before proceeding.
Step 11: Restore power and test
For electric heaters, flip the circuit breaker back on. For gas models, return the gas control valve to its normal setting. Wait 30-60 minutes for the water to heat, then test your hot water at various fixtures. Check the drain valve and T&P valve one more time for any leaks.
How to Properly Flush Sediment from Your Tank?
The initial drain removes most of the loose sediment, but proper flushing requires a bit more technique. After years of maintaining water heaters, I’ve found that most people stop too early and leave significant sediment behind. The key is patience and multiple flush cycles to break up stubborn mineral deposits.
After the tank drains initially, don’t just refill it. Instead, perform a short flush cycle: open the cold water supply for 30 seconds while the drain remains open, then close it and let the water drain out. This swirling action helps dislodge sediment stuck to the tank bottom. I typically do 3-4 flush cycles, checking the water clarity each time.
For tanks with heavy sediment buildup, try this technique: after the initial drain, close the drain valve and fill the tank about one-third full. Then open the drain valve again—this smaller volume of water creates more turbulence and can break up hardened deposits. Repeat this partial fill and drain cycle 2-3 times before doing a final full flush.
When checking water clarity, collect some in a clear container or bucket. You’re looking for the water to run clear with no visible particles or cloudiness. In hard water areas, the water may never run perfectly clear—aim for significant improvement rather than perfection. If you’re still seeing heavy sediment after 5-6 flush cycles, the tank may have serious buildup that requires professional attention.
Troubleshooting: What to Do When Your Water Heater Won’t Drain?
After guiding many homeowners through water heater maintenance, I’ve encountered nearly every draining problem imaginable. The most common issue is a drain valve that won’t open or water that trickles out painfully slowly. These problems are frustrating but usually solvable with the right approach.
Problem: Drain valve won’t open
If the valve handle won’t turn, don’t force it—plastic valves snap easily. First, try tapping the valve body gently with a hammer to loosen mineral deposits. Apply penetrating oil around the valve stem and let it sit for 15-20 minutes. If it still won’t budge, carefully use channel locks on the valve handle (not the valve body) for additional leverage. If the valve breaks or strips, you’ll need to replace it—a job that requires draining the tank first anyway.
Problem: Water drains very slowly or stops
This almost always means sediment is clogging the drain valve opening. Try opening and closing the valve rapidly several times to dislodge the blockage. If that doesn’t work, carefully insert a wire coat hanger or stiff wire up through the valve opening to break up the clog. Be very gentle with plastic valves—they crack easily. Another option is to remove the drain valve completely (after draining as much as possible) and clear the opening directly.
Problem: No water comes out at all
First verify that a hot water faucet is open somewhere in the house. If no faucet is open, vacuum lock prevents draining. Also check that the T&P valve is open to relieve pressure. If these steps don’t solve the problem, the drain valve opening may be completely sealed with sediment. In this case, you may need to remove and replace the drain valve—a more advanced repair.
Problem: Drain valve leaks after closing
Minor dripping for a few minutes is normal as sediment clears from the valve seat. If leaking persists, try opening and closing the valve several times to clear debris. For persistent leaks, you can install a hose cap over the valve as a temporary fix. Long-term, replace the faulty valve—upgrade to a brass ball valve which is more durable than the original plastic valve.
Electric vs Gas Water Heaters: Key Differences
The draining process is similar for both electric and gas water heaters, but there are important differences in how you shut them down. Understanding these differences prevents damage to your unit and ensures safety. I’ve worked with both types extensively, and the distinctions matter more than you might think.
Electric water heaters require complete power shutoff at the circuit breaker. Never rely on the unit’s power switch alone, as this may not completely disconnect electricity. The heating elements inside an empty tank can burn out in seconds if powered on, causing expensive damage. I always double-check with a voltage tester before proceeding. Electric models also tend to have more sediment accumulation because the lower heating element creates hot spots where minerals settle.
Gas water heaters need the gas control valve turned to “pilot” setting rather than completely off. This keeps the pilot light burning while preventing the main burner from firing. If you completely extinguish the pilot, you’ll need to relight it—which can be tricky for some models. Gas models typically have less sediment buildup than electric units because the burner heats from below, creating natural convection that reduces settling. However, the burner chamber itself can accumulate debris that affects efficiency.
The biggest difference I’ve noticed is that gas water heaters often drain faster because the internal design creates less turbulence during operation, keeping sediment more suspended. Electric heaters tend to have harder-packed sediment at the bottom because the heating elements create a static heating zone. This means electric units often require more flush cycles to get the water running clear.
When to Call a Professional?
Learning how to drain a water heater is valuable DIY knowledge, but some situations require professional expertise. After years of maintaining water heaters, I’ve learned to recognize when a job is beyond my skill level. There’s no shame in calling a plumber—it’s often cheaper than causing expensive damage through inexperience.
Call a professional if: your water heater is leaking from the tank itself (not just from valves or connections), you smell gas near your gas water heater, the unit is over 12 years old and showing signs of failure, you’re uncomfortable working with gas lines or electrical components, or the drain valve is completely seized and you don’t have plumbing experience.
Professional service typically costs $150-300 for a thorough flush and inspection, including valve replacement if needed. This might seem expensive compared to DIY, but consider that a new water heater costs $800-1500 installed. Professional maintenance every few years is cheap insurance against premature replacement. I recommend professional service if you’ve never maintained an older water heater—technicians can spot problems before they become emergencies.
Water Heater Maintenance Schedule for 2026
Consistent maintenance is key to water heater longevity. I’ve created this simple schedule based on manufacturer recommendations and my own experience maintaining dozens of units over the years. Following this calendar will prevent most common problems and ensure your water heater runs efficiently for years to come.
Monthly: Check for leaks or unusual sounds, visually inspect the area around the unit, test the T&P valve by lifting the lever briefly (water should flow out and stop when released). These 5-minute checks catch problems early.
Every 6 months (hard water areas): Quick flush by draining 2-3 gallons from the drain valve until water runs clear. This prevents heavy sediment accumulation between annual maintenance.
Annually: Complete drain and flush as described in this guide, inspect the anode rod and replace if more than 50% depleted, check all pipe connections for corrosion, test the pressure relief valve thoroughly, verify proper temperature setting (120°F recommended).
Every 3-5 years: Consider professional inspection, especially for gas models where the burner chamber can accumulate debris. Technicians can also check venting and gas pressure that homeowners cannot safely assess.
Keep a maintenance log with dates and observations. This documentation is valuable for warranty claims and helps you track sediment accumulation patterns in your specific water conditions.
Frequently Asked Questions About Draining Water Heaters
What is the easiest way to drain a water heater?
Can you drain your own water heater?
Yes, draining a water heater is a safe DIY task for most homeowners. The process requires basic tools and no special skills beyond following safety precautions. However, if you’re uncomfortable working with gas lines, electrical connections, or the unit shows signs of serious problems, calling a professional is the smarter choice.
How do you flush sediment out of a water heater?
After draining the tank, turn on the cold water supply for 30-60 seconds while the drain valve remains open. This flushes remaining sediment from the bottom. Repeat this flush cycle 2-3 times until the water runs clear. For stubborn sediment, try partial tank fills—fill one-third full then drain to create more turbulence.
How long does a 40 gallon tank take to drain?
A 40-gallon water heater typically takes 20-30 minutes to drain completely, depending on hose length and drain location. Larger tanks (50-80 gallons) may take 30-45 minutes. Draining slows significantly as sediment accumulates in the drain valve opening—if water stops flowing, you may need to clear the valve opening.
What happens if you never drain your water heater?
Without regular draining, sediment accumulates until it fills 30-50% of tank capacity in hard water areas. This causes loud popping noises, reduced efficiency, higher energy bills, and shortened lifespan. Eventually, the sediment creates hot spots that cause tank failure. I’ve seen 8-year-old water heaters completely ruined by sediment buildup.
Do plumbers recommend draining water heaters?
Most professional plumbers recommend annual draining for tank water heaters, especially in hard water areas. However, they also note that many homeowners never perform this maintenance. Plumbers see more water heater failures caused by sediment buildup than any other preventable issue. The $150-300 professional service cost is far less than the $800-1500 replacement cost.
Final Thoughts on Water Heater Maintenance
Learning how to drain a water heater is one of the most valuable skills a homeowner can develop. This simple maintenance task extends your appliance’s lifespan by years, improves energy efficiency, and prevents costly emergency replacements. I’ve seen well-maintained water heaters still going strong after 20 years, while neglected units fail within a decade.
Set a reminder on your calendar to perform this maintenance annually—pick a date you’ll remember, like when you change smoke detector batteries. The 30-45 minutes invested once per year pays dividends in lower energy bills, fewer repairs, and peace of mind knowing your water heater is operating safely and efficiently.
If this is your first time draining a water heater, don’t be intimidated. Take your time, follow the safety precautions, and expect the process to take closer to an hour. With each annual maintenance, you’ll become more efficient and learn your specific water heater’s quirks. The sediment you flush out is tangible proof that you’re protecting your investment and ensuring reliable hot water for your family.
Leave a Reply