
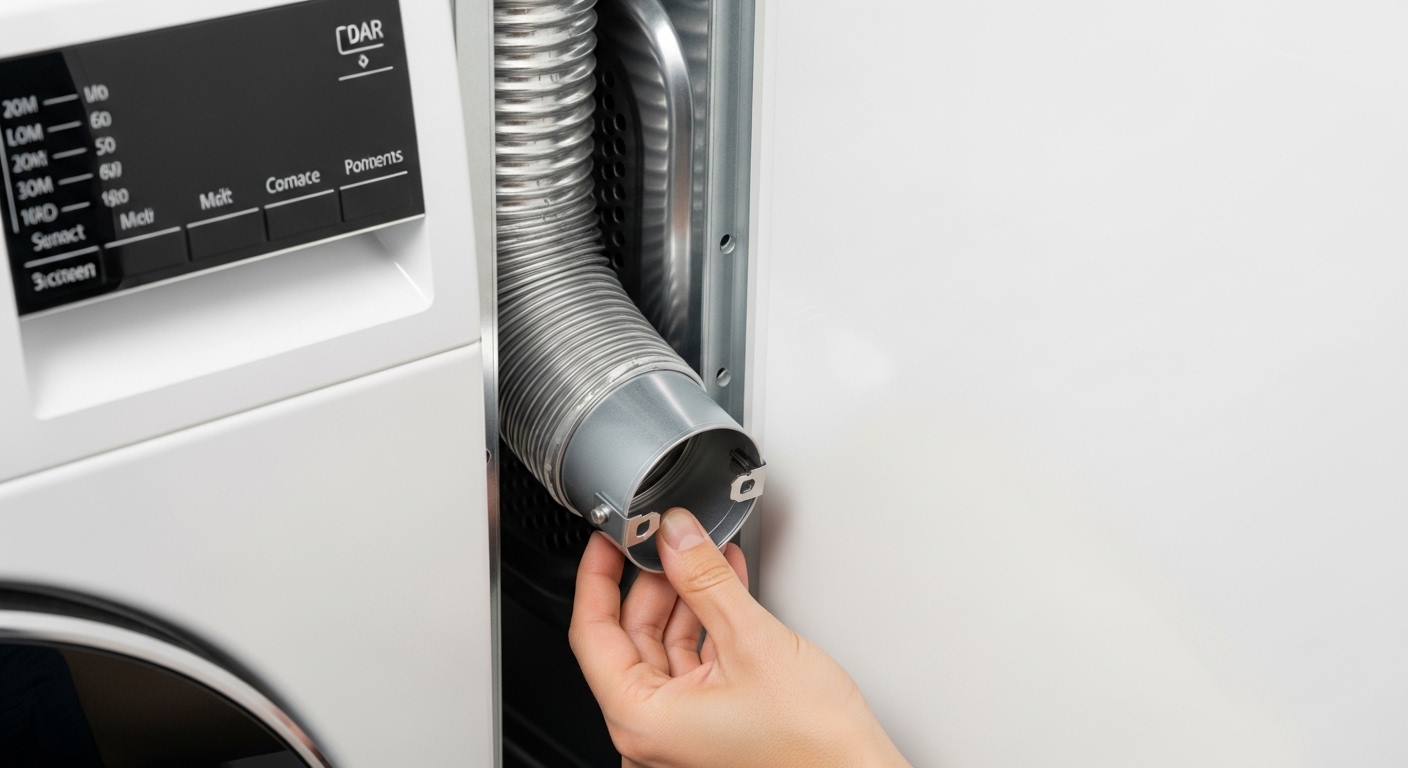
Hooking up a dryer vent in a tight space is one of those projects that looks simple until you realize your dryer sits six inches away from the wall while the vent opening is offset by the same distance. I have faced this exact problem in my own home, and I know how frustrating it can be to find a solution that actually works without requiring you to leave a dangerous gap or kink the exhaust hose.
This guide walks you through how to hook up a dryer vent in a tight space using the best techniques and products available. You will learn about offset vents, magnetic connectors, and the proper sealing methods that keep your home safe from lint buildup and carbon monoxide risks. By the end, you will have a clear plan for getting your dryer flush against the wall while maintaining proper airflow.
Understanding the Tight Space Problem
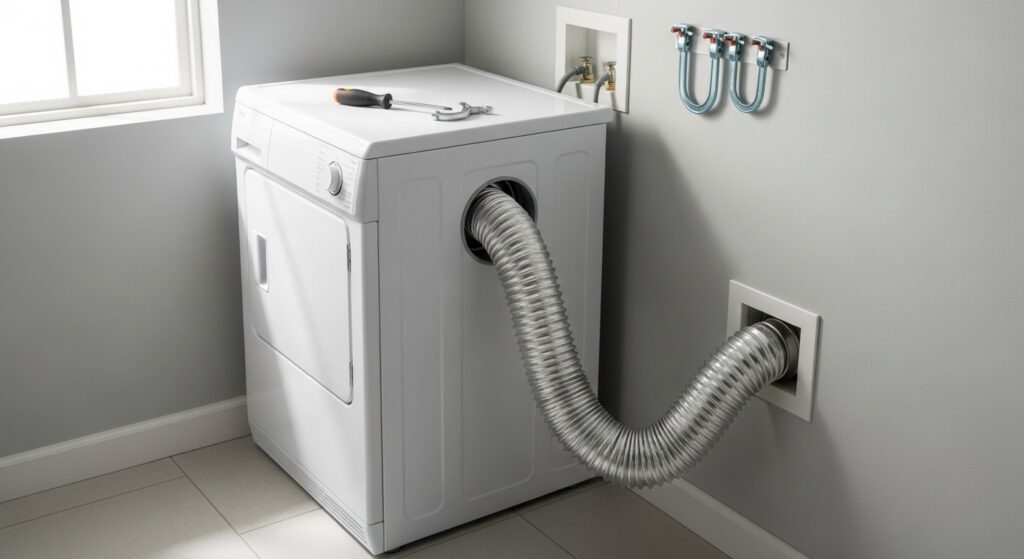
Standard dryer vent installations assume you have enough room to connect a straight or slightly curved duct from the dryer discharge to the wall vent. In most new construction, this works fine. But if you are working with a small laundry closet, a basement installation, or an older home where the dryer and vent were not aligned properly, you face a common challenge: the dryer discharge sits at a different height or depth than the wall vent.
When the distance between the dryer outlet and wall vent exceeds what a simple connector can handle, you end up with excess flexible ducting that loops, kinks, or crushes when you push the dryer back. This restricts airflow, reduces drying efficiency, and creates a serious fire hazard from lint accumulation. The solution is not to leave a gap but to use specialized components designed specifically for offset connections in tight spaces.
Tools and Materials Needed
Essential Tools
Before you start, gather the basic tools that make this job much easier. You will need a drill with driver bits, a level to ensure your vent connections are properly aligned, a measuring tape for taking precise measurements, and tin snips if you need to cut any rigid ductwork. A utility knife comes in handy for trimming flexible ducting to length.
Materials Checklist
For the vent connection itself, you will need some combination of the following depending on your specific situation. An offset dryer vent kit or periscope vent is essential for bridging significant gaps between the dryer and wall. A magnetic dryer vent connector makes installation and future maintenance much easier. You will also need aluminum foil tape rated for dryer vent use, band worm-gear hose clamps in the appropriate sizes, and possibly a dryer vent adapter if your dryer uses a non-standard discharge orientation.
Solutions for Tight Spaces
Offset Periscope Vent
The periscope dryer vent is designed specifically for situations where the dryer discharge and wall vent are offset horizontally or vertically. It extends from the dryer and telescopes outward to reach the wall vent connection while maintaining a low profile. These vents typically offer anywhere from zero to six inches of offset adjustment, making them ideal for bridging small to moderate gaps.
What makes periscope vents effective is their rigid construction compared to flexible ducting. They do not crush or kink when the dryer is pushed back against the wall, and they maintain consistent airflow throughout their length. The trade-off is that installation requires careful measurement to ensure the periscope reaches both connection points without excessive strain on either end.
Magnetic Dryer Vent Connectors
Magnetic dryer vent connectors like the MagVent system use powerful magnets to create a secure connection between the dryer discharge and the vent duct. The primary advantage here is easy disconnection for cleaning and maintenance. Instead of wrestling with hose clamps every time you need to pull your dryer out, you simply lift it away from the magnetic connection.
These connectors also help with alignment issues since the magnetic connection can accommodate slight misalignments between the dryer and wall vent. They work particularly well in tight spaces where reaching traditional hose clamps would be difficult. The magnetic connection still requires proper sealing with foil tape at the seams to prevent leaks.
Recessed Dryer Vent Box
A recessed dryer vent box, sometimes called a Dryerbox, mounts flush with the wall and provides a shallow connection point for the dryer vent. This allows your dryer to sit closer to the wall than a traditional surface-mounted vent connection would allow. The box creates a dedicated cavity in the wall that houses the vent connection and provides a clean connection point.
These are more common in new construction or renovation projects where you can install the box directly into the wall framing. Retrofitting an existing wall with a recessed box is possible but requires opening the wall. The benefit is a permanently flush mount that eliminates the need for additional offset components.
Flexible Duct Options
When rigid solutions will not work, flexible ducting becomes necessary. If you must use flexible duct, opt for semi-rigid aluminum ducting rather than the thin plastic or foil flex ducts commonly found in hardware stores. Semi-rigid metal duct maintains its shape better, resists crushing, and provides a smoother interior surface that reduces lint buildup.
Whatever flexible duct you choose, keep the runs as short and straight as possible. Each bend and foot of flexible duct adds resistance to airflow and creates a potential collection point for lint. The ideal flexible duct run is no longer than necessary and uses no more than two 90-degree bends.
Step-by-Step Installation
Here is how to hook up a dryer vent in a tight space using an offset periscope vent as the primary solution. Adjust the specific steps based on which vent type you are using.
Step 1: Measure Your Space
Before purchasing any components, measure the distance from your dryer discharge to the wall vent opening. Note both the horizontal offset and any vertical difference. Check the depth of your space when the dryer is positioned as close to the wall as possible. These measurements determine which solution type and size you need.
Step 2: Prepare the Dryer Connection
Clean the dryer discharge opening and inspect it for any damage or debris. If your dryer has a定向 exhaust that needs adjustment, now is the time to reposition it. Attach any necessary adapters to the dryer discharge to accept your chosen vent connection method.
Step 3: Install the Offset Vent
Slide one end of the offset vent onto the dryer discharge. Secure it with a band worm-gear clamp, tightening just enough to create a firm seal without crushing the metal. Ensure the vent is properly oriented toward the wall vent connection point.
Step 4: Connect to Wall Vent
Extend the offset vent toward the wall vent and connect the other end. Use another worm-gear clamp to secure this connection. The vent should reach without strain, and both connections should be aligned to avoid putting stress on the ductwork.
Step 5: Seal All Joints
Apply UL-rated aluminum foil tape to all joints and connection points. This includes where the duct connects to the dryer, where it connects to the wall vent, and any seams in the duct itself. Foil tape creates an airtight seal that prevents both lint leakage and unwanted air infiltration. Do not use standard duct tape, which degrades over time with heat exposure.
Step 6: Secure the Duct
Use duct straps or brackets to support the vent run and prevent it from sagging or pulling on the connections. The duct should have no sag that could collect lint and no tension that could pull connections apart. Proper support keeps everything aligned and secure.
Step 7: Verify Clearances
Check that your installation maintains the minimum clearances required by your dryer manufacturer and local building codes. Most codes require at least one inch of clearance between the duct and any combustible materials when using rigid ducting. Push the dryer back into position and verify the connections do not flex or stress.
Step 8: Test the Installation
Run the dryer on a full heat cycle and check for any air leaks. Place your hand near the connections to feel for escaping air. The dryer should heat normally and complete a full cycle without excessive runtime, which would indicate restricted airflow.
Safety Warnings and Best Practices
Carbon Monoxide Risks
Gas dryers produce carbon monoxide as a byproduct of combustion, and improper venting can allow this deadly gas to accumulate in your home. This risk is particularly acute in tight spaces where airflow is already limited. Always ensure your gas dryer vents properly to the outside, and never use indoor venting options for gas appliances. Install carbon monoxide detectors near your laundry area if you do not already have them.
Lint Buildup Prevention
Lint accumulation is the primary fire hazard associated with dryer vents. In tight space installations, the risk increases because kinks and bends in flexible ducting create more surface area for lint to collect. Inspect your vent system at least annually and clean it whenever you notice longer drying times or a burning smell during operation. Flexible ducting should be replaced entirely every few years as it degrades and becomes more prone to tears.
Proper Sealing Techniques
Using the right sealing materials matters more than most people realize. Standard household duct tape fails quickly when exposed to the heat and airflow from a dryer. UL-rated aluminum foil tape is designed specifically for this application and maintains its seal over years of use. Apply tape to clean, dry surfaces for the best adhesion, and cover the entire circumference of each joint.
Gas vs Electric Dryer Considerations
If you have a gas dryer, your venting installation has an additional safety dimension. Gas dryers require both proper exhaust venting and careful attention to the gas connection. Any work on gas lines should be done by a licensed professional or with extreme caution. The venting for gas dryers follows the same principles as electric dryers, but the consequences of a leak or malfunction are more severe.
Electric dryers produce no combustion byproducts, but they still require proper venting for moisture removal and heat exhaustion. The good news is that electric dryers offer more flexibility in vent routing since there is no carbon monoxide risk from the appliance itself. However, improper venting still creates fire hazards from lint and reduces drying efficiency.
Maintenance Tips
Regular maintenance extends the life of your dryer and prevents safety hazards. Clean the lint trap after every load, but also schedule periodic deep cleaning of the entire vent system. For tight space installations, consider using a magnetic connector that allows you to disconnect and clean the duct more frequently without struggling with hose clamps.
Watch for warning signs that indicate venting problems. If your dryer takes more than one cycle to dry a full load, the vent is likely restricted. A burning smell during operation or excessive heat on the front of the dryer indicates a serious problem that needs immediate attention. Addressing these issues promptly prevents more costly repairs and potential fire hazards.
Common Mistakes to Avoid
One of the biggest mistakes is using flexible ducting for the entire run because it seems easier. Flexible ducting kinks, crushes, and accumulates lint much faster than rigid alternatives. Reserve flexible ducting for short connections only, and always use semi-rigid aluminum rather than thin plastic flex.
Another common error is failing to seal connections properly. A loose connection might seem fine initially, but it will leak lint into your wall cavity and restrict airflow over time. Take the extra five minutes to apply foil tape properly at every joint.
Finally, do not ignore the clearances. Pushing your dryer completely flat against the wall might seem like the goal, but if the installation does not maintain proper airflow clearance, you are creating a fire hazard. There is always a balance between saving space and maintaining safe operation.
Frequently Asked Questions
How to vent a dryer in tight spaces?
The best approach is to use an offset periscope vent, magnetic connector, or recessed dryer vent box. These components are specifically designed to bridge gaps between the dryer discharge and wall vent while allowing the dryer to sit close to the wall. Choose based on your specific offset distance and available space.
How to vent a dryer with no outside access?
Venting a dryer without outside access requires alternative solutions like a ventless dryer (condenser or heat pump), a duct through the roof, or a venting system that connects to a window adapter. However, if you have a gas dryer, outside venting is mandatory for safety reasons.
How to attach a flexible duct to a dryer vent?
Slide the flexible duct over the dryer discharge collar or adapter, secure it with a band worm-gear clamp, and then connect the other end to your wall vent or offset vent using another clamp. Apply UL-rated aluminum foil tape to all joints for an airtight seal. Keep the duct as straight as possible with minimal bends.
How to use a dryer vent extender?
A dryer vent extender, also called a periscope vent, slides onto your dryer discharge and extends outward to reach your wall vent connection. Simply attach one end to the dryer, position the other end toward the wall vent, connect it, and secure all joints with worm-gear clamps and foil tape.
Conclusion
Learning how to hook up a dryer vent in a tight space is about choosing the right components and installing them correctly. Offset periscope vents, magnetic connectors, and recessed boxes all offer viable paths to a safe, functional installation that saves space. The key is taking accurate measurements, using UL-rated materials, and prioritizing safety over aesthetics.
Do not rush the installation or settle for flexible ducting when rigid components would work better. A proper installation might take an extra hour, but it protects your home from fire hazards and ensures your dryer runs efficiently for years to come. If you encounter situations beyond your skill level, particularly gas line work, hire a professional. Your safety is worth more than any space savings.
Leave a Reply