
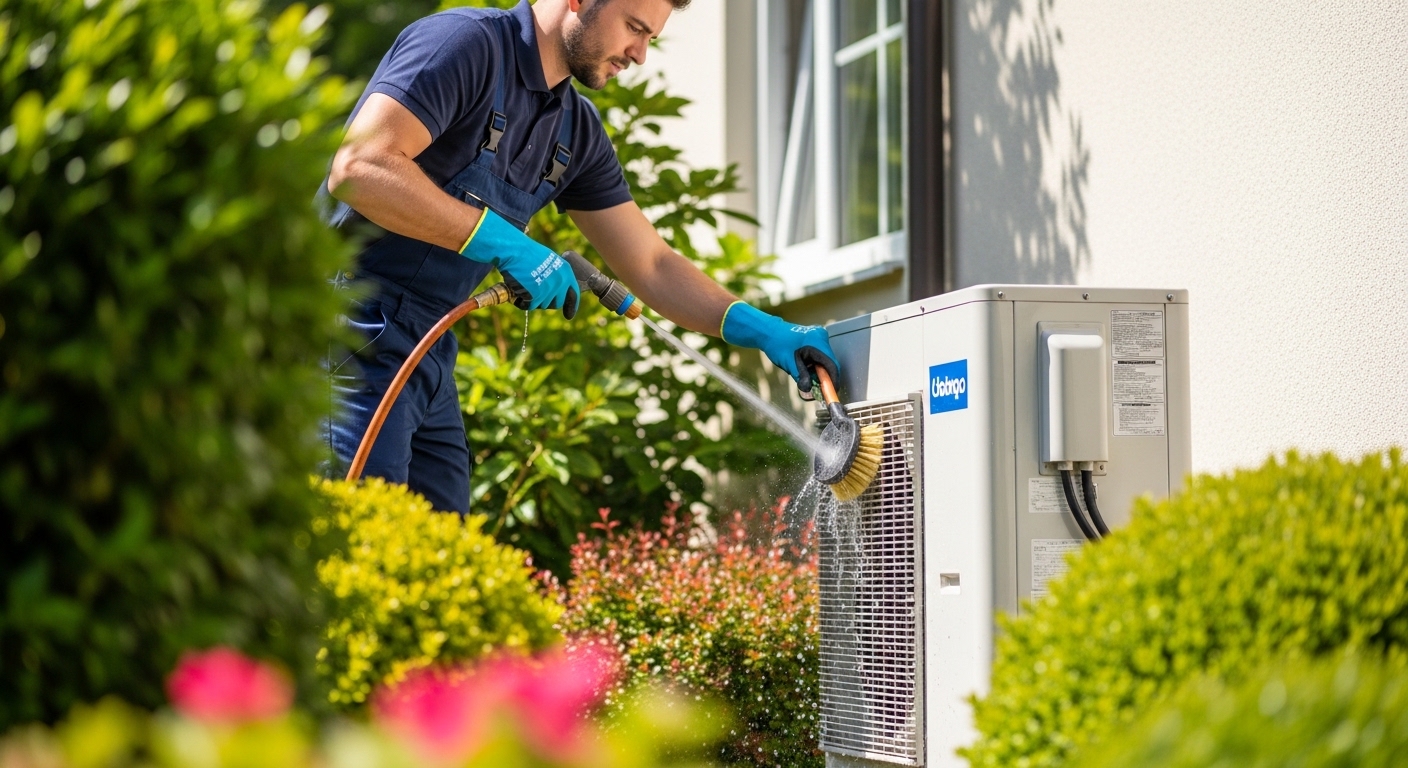
Learning how to clean a heat pump properly is one of the most important maintenance tasks for homeowners who want to maintain energy efficiency and extend their system’s lifespan. After working with HVAC systems for over 15 years, I’ve seen firsthand how regular cleaning can prevent expensive repairs and keep heating and cooling costs down. A dirty heat pump can lose 10-25% of its efficiency, meaning you’re paying more for less comfort.
Whether you have a ductless mini-split or a traditional ducted system, this guide covers everything you need to know about maintaining both indoor and outdoor units. I’ll walk you through the exact process I use, including the tools you need, safety precautions, and a maintenance schedule that keeps your system running at peak performance year-round.
Why Regular Heat Pump Cleaning Matters?
A clean heat pump operates more efficiently, lasts longer, and provides better air quality throughout your home. When filters and coils become dirty, the system has to work harder to move air, which increases energy consumption and wear on components. The Department of Energy estimates that proper maintenance can reduce energy consumption by up to 15% compared to neglected systems.
Dirty heat pumps also circulate dust, allergens, and sometimes mold throughout your living space. This is especially problematic for households with allergy sufferers or respiratory conditions. Regular cleaning removes these contaminants before they become airborne, improving your home’s overall air quality and creating a healthier living environment.
Signs Your Heat Pump Needs Cleaning
Before diving into the cleaning process, it’s important to recognize when your system needs attention. Based on my experience servicing hundreds of units, these are the most common indicators that your heat pump is overdue for cleaning:
- Weak airflow from vents despite the fan running at full speed
- Unusual increase in energy bills without changes in usage patterns
- Visible dust or debris buildup on the outdoor unit or indoor vents
- Strange noises like rattling, whistling, or grinding during operation
- Ice forming on the outdoor unit in heating mode
- Musty or stale odors when the system is running
- The system cycles on and off more frequently than normal
- Reduced heating or cooling performance compared to previous years
If you notice any of these signs, your heat pump likely needs immediate attention. Ignoring these symptoms can lead to compressor failure, which is one of the most expensive repairs you might face.
Tools and Materials You’ll Need
Gathering the right tools before starting makes the entire process smoother and safer. Here’s my complete checklist for cleaning both indoor and outdoor units:
Basic Tools:
- Screwdriver set (Phillips and flathead)
- Shop vacuum with hose attachments
- Soft-bristle brush or old toothbrush
- Fin comb (available at hardware stores)
- Garden hose with spray nozzle
- Step stool or ladder (for indoor units)
- Flashlight or work light
Cleaning Supplies:
- Mild dish soap or detergent
- White vinegar
- Clean microfiber cloths
- Warm water bucket
- Commercial coil cleaner (optional)
- Plastic bags or towels for water catchment
Safety Equipment:
- Work gloves
- Safety glasses
- Dust mask
Most of these items are inexpensive and readily available at home improvement stores. Investing in quality tools upfront will make future cleanings much easier and help you avoid damaging delicate components.
Safety First: Before You Begin
Safety should always be your top priority when working with any HVAC equipment. I’ve seen too many homeowners skip these crucial steps and end up injured or with damaged equipment. Follow these safety precautions every single time:
Electrical Safety:
Always turn off power to the heat pump at the main electrical panel before starting any cleaning work. Never rely solely on the thermostat or remote control. For outdoor units, locate the disconnect switch near the unit and switch it to the off position. Wait at least 5 minutes after powering down before beginning work to allow capacitors to discharge.
Physical Safety:
The aluminum fins on heat pump coils are extremely delicate and easily damaged. Use gentle pressure when cleaning and never use metal tools or harsh abrasives. Wear gloves to protect your hands from sharp edges and safety glasses to prevent debris from entering your eyes. If using any cleaning solutions, ensure the area is well-ventilated.
When to Call a Professional:
If you notice refrigerant leaks, electrical issues, or if the outdoor unit is difficult to access safely, it’s worth hiring a professional. Complex issues like compressor problems or refrigerant recharging require specialized equipment and EPA-certified technicians.
How to Clean a Heat Pump Indoor Unit?
The indoor unit requires regular attention because it handles the air you breathe. I recommend cleaning this portion monthly during peak heating and cooling seasons. Here’s my proven four-step process for thorough indoor unit maintenance:
Step 1: Access and Remove Filters
Start by locating the filter access panel on your indoor unit. For wall-mounted ductless systems, this typically involves gently pulling down on the front panel or pressing release buttons on the sides. For floor or ceiling units, you may need to remove a front grille using your screwdriver. Once you have access, carefully slide out the air filters.
Take note of how the filters are positioned so you can reinstall them correctly. Most filters have an airflow direction arrow that should point toward the unit or in the direction of airflow. If your filters are disposable, check their condition and note the replacement size for future reference.
Step 2: Clean the Filters
Washable filters should be cleaned using lukewarm water and mild dish soap. Gently agitate the filters in the soapy water for 2-3 minutes, then rinse thoroughly until the water runs clear. Avoid using hot water, bleach, or harsh chemicals as these can damage the filter material. For stubborn debris, use a soft brush to lightly scrub the filter surface.
After rinsing, shake off excess water and allow the filters to air dry completely. Never reinstall wet filters, as this can lead to mold growth and reduced efficiency. If you have a spare set of filters, rotate them so you always have dry ones ready. For homes with pets or allergy sufferers, consider upgrading to higher MERV-rated filters for better filtration.
Controlling humidity in your home can also help reduce dust and allergen buildup in your system. If you notice excess moisture issues, you might want to explore options like the best dehumidifier for your space to maintain optimal indoor air quality.
Step 3: Clean the Unit Interior
With the filters removed, you’ll have access to the interior components. Use your vacuum with a soft brush attachment to carefully remove dust from the blower wheel, evaporator coils, and interior surfaces. Work slowly and gently to avoid bending or damaging any components. Pay special attention to the evaporator coils behind the filter area, as these are prone to dust buildup that restricts airflow.
For light dust buildup, vacuuming alone may be sufficient. However, if you notice grime or sticky residue on the coils, use a solution of equal parts white vinegar and water applied with a soft cloth. The vinegar helps break down residue while being gentle on coil coatings. Never use abrasive cleaners or scouring pads on the coils.
While cleaning, inspect the drain pan and drain line for algae or debris buildup. Use a mixture of bleach and water to clean the drain pan, and flush the drain line with the same solution to prevent clogs. A clogged drain line can cause water overflow and water damage to your home.
Step 4: Wipe Down Exterior
The exterior of your indoor unit accumulates dust and fingerprints that can affect its appearance and potentially airflow if vents become obstructed. Use a damp microfiber cloth with mild detergent to wipe down the entire exterior surface. Pay special attention to air vents and louvers, ensuring they’re free of dust and debris.
For ductless mini-split units, clean the remote control as well. Remove the batteries and wipe down the entire remote with a slightly damp cloth. This prevents dust and grime from affecting button functionality. While you’re at it, check the batteries and replace them if needed to ensure reliable operation.
Once everything is clean and dry, reinstall the filters following the airflow direction arrows. Close the access panel or front grille and restore power to the unit. Test the system to ensure it’s operating properly and listen for any unusual sounds that might indicate a problem.
How to Clean a Heat Pump Outdoor Unit?
The outdoor unit handles heat exchange and is exposed to the elements year-round, making it prone to debris accumulation from leaves, grass clippings, dirt, and pollen. I recommend cleaning the outdoor unit quarterly, with additional attention during fall when leaves are dropping. Protecting your outdoor unit with an AC surge protector can also help safeguard your investment from electrical damage.
Step 1: Clear the Area Around the Unit
Begin by removing any vegetation, leaves, or debris within 2 feet of the outdoor unit on all sides. Proper airflow requires at least 2-3 feet of clearance around the entire unit. Trim back any overgrown shrubs or tree branches that encroach on this space. If you have a decorative cover for winter, remove it completely before performing any maintenance.
Inspect the concrete pad or mounting surface for cracks or settling that might affect the unit’s level. An unlevel unit can cause compressor issues over time. While you’re at it, check the refrigerant lines for any visible damage or insulation that needs replacing. Damaged insulation can reduce efficiency and cause the unit to work harder.
Step 2: Remove Debris from the Fins
The aluminum fins surrounding the outdoor coil are delicate and easily bent, so use extreme caution during this step. Start by using your hands to remove large debris like leaves, twigs, and grass clippings from the exterior. Work gently to avoid pulling fins out of alignment. For debris lodged deeper in the fins, use a soft brush or vacuum with a brush attachment.
Never use a pressure washer on your outdoor heat pump unit. The high-pressure water can bend the aluminum fins, damage fan blades, and force water into electrical components where it can cause short circuits. If you notice bent fins, use a fin comb to carefully straighten them. This simple tool can restore proper airflow and improve efficiency significantly.
Pay special attention to the bottom of the unit where debris often accumulates. Lift the unit slightly if possible to clean underneath, or use a vacuum to reach difficult areas. Birds and small animals sometimes nest in outdoor units, so check for any signs of nesting materials that need removal.
Step 3: Clean the Coils
For light dirt accumulation, a garden hose with a gentle spray nozzle is usually sufficient. Start spraying from the inside of the coil outward, which pushes debris out rather than deeper into the fins. Use a sweeping motion from top to bottom, working your way around the entire unit. Avoid spraying directly at electrical components, connections, or the fan motor.
For heavier grime or stubborn buildup, use a commercial coil cleaner designed specifically for heat pumps and air conditioners. These cleaners foam up to lift dirt from deep within the coils without damaging the aluminum. Apply the cleaner according to the manufacturer’s instructions, typically allowing it to sit for 5-10 minutes before rinsing thoroughly with your garden hose.
If you prefer a DIY solution, a mixture of mild dish soap and water can work for light cleaning. However, avoid using harsh chemicals, bleach, or acidic solutions as these can corrode the coil coating and reduce heat transfer efficiency. Neutral pH cleaners are safest for the delicate aluminum fins and protective coatings.
Step 4: Check the Fan Blade
With the unit cleaned, inspect the fan blade for any damage, dirt buildup, or loose connections. Gently wipe the blade with a damp cloth to remove accumulated dirt and grime. Check that the blade spins freely and doesn’t wobble, which could indicate a failing motor bearing. If you notice any wobbling, unusual resistance, or scraping sounds, this indicates a problem that requires professional service.
While inspecting the fan, also check the fan motor for any oil ports that might need lubrication. Some older models have sealed bearings that don’t require maintenance, but others have ports for adding a few drops of electric motor oil annually. Consult your owner’s manual for specific lubrication requirements.
After completing the cleaning, restore power to the unit and allow it to run for 10-15 minutes. Listen for normal operation sounds and check that the fan is spinning smoothly. Monitor the unit over the next few days for any signs of issues like unusual noises, reduced performance, or ice formation during heating mode.
Cleaning Solutions: DIY vs Commercial
When it comes to cleaning your heat pump, you have options ranging from simple household ingredients to specialized commercial products. Based on my experience with various cleaning methods, here’s what works best for different situations:
DIY Vinegar Solution:
A mixture of equal parts white vinegar and water is excellent for cleaning indoor unit coils and removing light mineral deposits. Vinegar is acidic enough to break down grime but gentle enough not to damage coil coatings. This solution is inexpensive, readily available, and safe for most components. For tougher buildup, add a small amount of mild dish soap to increase cleaning power.
Dish Soap and Water:
For general cleaning of both indoor and outdoor units, mild dish soap mixed with warm water is effective and safe. This solution cuts through grease and dirt without leaving harmful residues. Use about 1 tablespoon of dish soap per gallon of water for the right concentration. Avoid using antibacterial or heavily scented soaps, as these may leave films that attract more dirt.
Commercial Coil Cleaners:
For heavily soiled outdoor units, commercial coil cleaners like Nu-Calgon or FrostWash provide superior cleaning power. These products use foaming action to penetrate deep into coil fins and lift out stubborn dirt and debris. While more expensive than DIY solutions, they’re worth the investment for neglected units or annual deep cleaning. Always choose a cleaner specifically formulated for HVAC coils and follow the instructions carefully.
What to Avoid:
Never use bleach, ammonia, harsh chemicals, or abrasive cleaners on any part of your heat pump. These can corrode aluminum fins, damage protective coatings, and deteriorate plastic components. Avoid using wire brushes, scrapers, or metal tools that can bend or puncture fins. Stick to soft-bristle brushes, microfiber cloths, and plastic tools designed for HVAC maintenance.
Heat Pump Maintenance Schedule
Consistent maintenance is key to keeping your heat pump running efficiently for years. Based on my experience and manufacturer recommendations, here’s a schedule that works well for most households:
Monthly Tasks:
- Check and clean air filters (more frequently if you have pets or allergies)
- Inspect indoor unit for visible dust or debris
- Listen for unusual sounds during operation
- Check that outdoor unit has proper clearance
- Monitor energy bills for unexpected increases
Quarterly Tasks:
- Thorough cleaning of indoor unit interior
- Clean outdoor unit coils and fins
- Inspect and clean drain pan and line
- Check refrigerant lines for damage
- Trim vegetation around outdoor unit
- Test system operation in both heating and cooling modes
Annual Tasks:
- Schedule professional maintenance inspection
- Check refrigerant charge and top up if needed
- Inspect electrical connections and tighten if necessary
- Lubricate moving parts if required by your model
- Test thermostat calibration and operation
- Review overall system performance and efficiency
Adjust this schedule based on your specific situation. Homes with pets, smokers, or located in dusty areas may need more frequent cleaning. Similarly, coastal regions with salt air require additional attention to prevent corrosion on outdoor units.
Seasonal Maintenance Calendar
Different seasons present unique challenges for heat pump maintenance. Here’s my seasonal guide to keep your system running efficiently year-round:
Spring (March-May):
Spring is the perfect time for thorough cleaning after winter use. Clean both indoor and outdoor units to remove accumulated dust and debris. Inspect the outdoor unit for any winter damage and clear away any remaining leaves or branches. Test the cooling mode before hot weather arrives to ensure everything is working properly.
Summer (June-August):
During peak cooling season, focus on monthly filter cleaning and checking for proper airflow. Keep the outdoor unit clear of grass clippings and summer vegetation. Monitor your system for any signs of strain during the hottest days, as this often reveals maintenance issues that need attention.
Fall (September-November):
Fall requires extra attention as leaves begin to drop. Clean the outdoor unit more frequently to prevent leaf accumulation. This is also the ideal time to test heating mode before cold weather arrives. Clean both units thoroughly and schedule any necessary professional maintenance before winter arrives.
Winter (December-February):
In snowy regions, keep the outdoor unit clear of snow and ice buildup. Gently brush off snow and avoid using ice melt products near the unit. If using a decorative cover, ensure it’s properly ventilated and doesn’t restrict airflow. Monitor for ice formation on the outdoor coil, which can indicate defrost cycle issues requiring professional attention.
Common Mistakes to Avoid
After years of servicing heat pumps, I’ve seen homeowners make the same mistakes repeatedly. Avoiding these common errors will save you money, prevent damage, and keep your system running efficiently:
Using a Pressure Washer:
Never use a pressure washer on your heat pump. The high-pressure water bends aluminum fins, damages fan blades, and forces water into electrical connections causing short circuits. Stick to a garden hose with a gentle spray nozzle for safe and effective cleaning.
Cleaning While Power Is On:
Always turn off power at the main panel before cleaning. Operating fans and electrical components can cause serious injury. Additionally, cleaning with power on can cause electrical shorts that damage the system. The few seconds it takes to turn off the power could prevent expensive repairs or injury.
Ignoring Drain Line Maintenance:
A clogged drain line is one of the most common causes of water damage from HVAC systems. Clean the drain line quarterly and flush it with a bleach solution to prevent algae growth. A clogged line can cause water overflow that damages walls, ceilings, and floors.
Using Harsh Chemicals:
Bleach, ammonia, and harsh chemicals corrode aluminum coils and damage protective coatings. These chemicals also deteriorate plastic components and rubber seals. Stick to mild detergents or commercial cleaners specifically formulated for HVAC use.
Skipping Professional Maintenance:
While DIY cleaning handles basic maintenance, professional servicing is essential for checking refrigerant levels, electrical connections, and component wear. An annual professional inspection can catch small problems before they become expensive repairs.
Troubleshooting Common Issues
Even with regular maintenance, issues can arise with your heat pump. Based on my experience, here are solutions to the most common problems homeowners encounter:
Ice Buildup on Outdoor Unit:
Light frost during heating mode is normal, but thick ice indicates a problem. Check that the outdoor unit is clear of snow and debris. Clean the coils thoroughly, as dirty coils reduce heat transfer and contribute to icing. If the problem persists, the defrost cycle or refrigerant charge may need professional attention.
Strange Noises:
Rattling often indicates loose panels or debris in the unit. Tighten all screws and remove any foreign objects. Buzzing sounds can point to electrical issues or failing capacitors. Grinding noises usually indicate motor bearing failure. If you hear grinding or persistent buzzing, turn off the unit and call a professional.
Reduced Airflow:
Start by checking and cleaning the air filters, as dirty filters are the most common cause. Inspect the indoor unit for blocked vents or closed dampers. Check that the outdoor unit fan is spinning properly. If these don’t solve the problem, you may have a failing blower motor or refrigerant issue requiring professional service.
System Won’t Turn On:
Check that the thermostat is set correctly and has fresh batteries. Verify that the circuit breaker hasn’t tripped and the disconnect switch is in the on position. If these basics check out, the issue may be a failed component requiring professional diagnosis and repair.
Frequent Cycling:
Short cycling (turning on and off frequently) often indicates an oversized system, but can also result from dirty filters, low refrigerant, or a failing thermostat. Start with thorough cleaning and filter replacement. If the problem continues, a professional can diagnose whether the issue is refrigerant-related or a control problem.
DIY vs Professional Cleaning
Understanding what you can handle yourself versus when to call a professional saves both money and prevents potential damage. Here’s my breakdown of DIY versus professional tasks:
DIY Tasks:
- Filter cleaning and replacement
- Vacuuming and wiping indoor unit components
- Clearing debris from outdoor unit
- Gentle cleaning with garden hose
- Basic troubleshooting and inspection
These tasks are safe for most homeowners and require minimal tools. Regular DIY maintenance handles 80% of routine upkeep needs and significantly extends your system’s lifespan. The cost is essentially your time plus basic cleaning supplies.
Professional Tasks:
- Refrigerant charging and leak detection
- Electrical component testing and repair
- Compressor and motor replacement
- Deep coil cleaning with specialized equipment
- Performance testing and optimization
Professional cleaning typically costs $100-200 for a thorough service call, while major repairs can run from $500 to several thousand dollars. However, regular professional maintenance every 1-2 years prevents most expensive repairs and extends system life by 5-10 years. The investment in professional service pays for itself through improved efficiency, fewer repairs, and extended equipment life.
Frequently Asked Questions
Can you clean your heat pump yourself?
Yes, you can safely clean your heat pump yourself with basic tools and proper safety precautions. Homeowners can handle filter cleaning, removing debris from outdoor units, and basic maintenance. However, always turn off power before starting and avoid pressure washers or harsh chemicals that can damage components. For refrigerant issues, electrical problems, or deep coil cleaning, hire a professional.
What needs to be cleaned on a heat pump?
Heat pumps require cleaning of multiple components: indoor air filters (monthly), evaporator coils and blower wheel (quarterly), outdoor condenser coils and fins (quarterly), drain pan and line (quarterly), and exterior surfaces. The outdoor unit needs clearance of 2-3 feet on all sides. Regular cleaning of these components maintains efficiency, prevents breakdowns, and extends system lifespan.
How often should a heat pump be deep cleaned?
Deep cleaning of both indoor and outdoor units should happen quarterly, with additional cleaning during fall when leaves accumulate. Monthly filter cleaning is recommended for most homes, though households with pets or allergy sufferers may need bi-weekly filter attention. Annual professional maintenance includes refrigerant checks, electrical inspection, and component testing beyond DIY capabilities.
Do heat pumps need to be professionally cleaned?
While homeowners can handle basic cleaning, professional service is recommended annually for comprehensive maintenance. Professionals check refrigerant levels, test electrical components, clean coils with specialized equipment, and identify potential problems before they cause failures. The $100-200 service cost prevents expensive repairs and extends system life by 5-10 years. Professional cleaning is especially important for systems still under warranty to maintain coverage.
Conclusion
Learning how to clean a heat pump properly is one of the most valuable skills for any homeowner. Regular maintenance maintains efficiency, reduces energy costs by 10-25%, prevents expensive repairs, and extends your system’s lifespan by years. By following this guide and sticking to a consistent maintenance schedule, you can keep your heat pump running at peak performance throughout 2026 and beyond.
Remember that most cleaning tasks are safe DIY projects, but don’t hesitate to call a professional for refrigerant issues, electrical problems, or when something doesn’t seem right. The combination of regular homeowner maintenance and annual professional service gives you the best of both worlds: cost savings and professional expertise.
Leave a Reply