
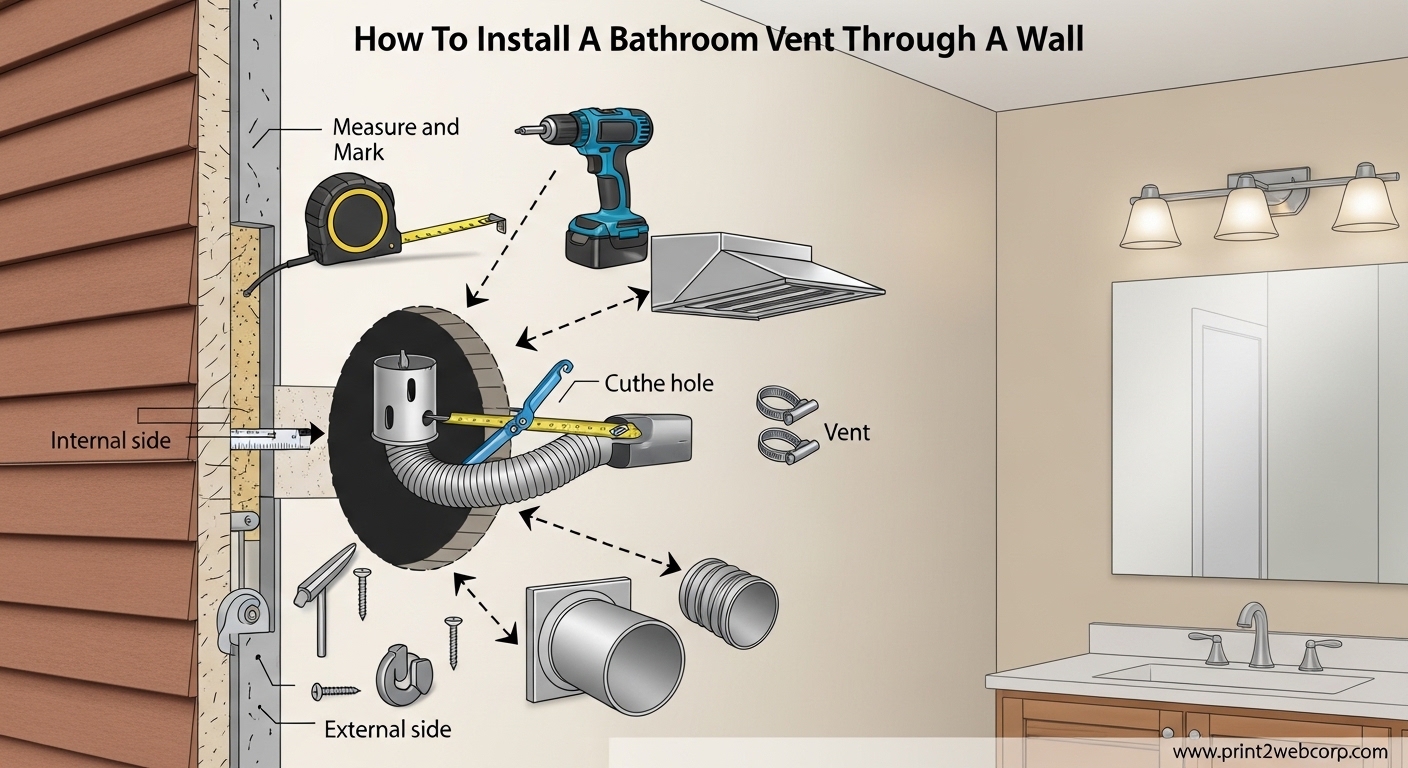
Installing a bathroom vent through an exterior wall is one of the most effective ways to remove moisture and prevent mold growth in your home. After helping homeowners tackle this project over 15 years, I’ve learned that wall venting often works better than roof venting for many bathrooms, especially those on exterior walls with no attic access above.
Proper bathroom ventilation removes excess humidity from showers and baths, protecting your walls, ceilings, and framing from moisture damage, mold, and mildew. The EPA recommends bathroom exhaust fans that vent directly outdoors, not into attics or crawl spaces where moisture can cause hidden problems.
Quick Installation Overview
Here’s the condensed process for how to install a bathroom vent through a wall in seven steps:
- Calculate your CFM needs based on bathroom size (50 CFM minimum for most bathrooms)
- Mark the vent location on an exterior wall between studs, avoiding electrical and plumbing
- Drill a pilot hole from inside to verify the exterior location and check for obstacles
- Cut the hole through the wall using a hole saw sized for your wall cap (typically 4 inches)
- Install the exterior wall cap with silicone caulk and weatherproof flashing
- Mount the fan housing inside the bathroom and connect ductwork to the wall cap
- Wire the electrical connections and test the fan operation
Is It Okay to Vent a Bathroom Fan Through a Wall?
Yes, venting a bathroom exhaust fan through an exterior wall is not only acceptable but often preferable to roof venting. Wall venting is typically easier to install, costs less, and provides simpler maintenance access compared to routing ductwork through the roof. The key requirements are that the vent must terminate outdoors with a proper wall cap that includes a backdraft damper to prevent cold air from entering and pests from nesting.
Building codes require bathroom exhaust fans to vent directly to the exterior, never into an attic, crawlspace, or soffit. Wall venting meets this requirement when properly installed with a rated wall cap and sealed ductwork.
Tools and Materials You’ll Need
Before starting this project, gather all the necessary tools and materials. Having everything ready will save you multiple trips to the hardware store mid-project.
Tools Checklist
- Power drill with various drill bits
- Hole saw sized for your vent cap (usually 4-inch)
- Stud finder to locate wall framing
- Reciprocating saw or drywall saw for interior cutout
- Wire strippers and electrical tools
- Caulking gun for exterior sealing
- Tape measure and pencil for marking
- Level for straight installations
- Ladder if working on a second-story exterior wall
- Safety glasses and work gloves
Materials List
- Bathroom exhaust fan rated for your bathroom size
- Wall cap vent with damper (4-inch standard)
- Ductwork – flexible aluminum or rigid metal duct
- Duct tape – high-quality foil or HVAC tape (not cloth tape)
- Hose clamps for securing duct connections
- Silicone caulk for exterior weatherproofing
- Electrical wire (14/2 NM cable for typical installations)
- Wire connectors (wire nuts)
- Electrical box if installing a new switch
- Drywall repair materials if patching existing openings
Cost Estimate
The total cost for a DIY bathroom vent installation through a wall typically ranges from $150 to $400, depending on whether you’re replacing an existing fan or starting from scratch. A quality exhaust fan costs $60-$150, ductwork and wall cap add $30-$80, and electrical materials run $20-$50. Hiring a professional will cost $400-$800 including labor.
Determining the Right Fan Size
Choosing the correct bathroom fan size is critical for effective moisture removal. Fans are rated in CFM (cubic feet per minute), which measures how much air the fan moves. Undersized fans won’t remove moisture effectively, while oversized fans create unnecessary noise and energy use.
CFM Calculation Guide
The Home Ventilating Institute provides these guidelines for calculating required CFM:
- Small bathrooms (under 50 sq ft): 50 CFM minimum
- Medium bathrooms (50-100 sq ft): 1 CFM per square foot
- Large bathrooms (over 100 sq ft): Add 50 CFM for toilet, tub, and shower each
Example: An 80-square-foot bathroom needs an 80 CFM fan. A 120-square-foot bathroom with a separate toilet area needs at least 100 CFM (80 + 20 for the toilet).
Duct Length Adjustments
Long duct runs reduce fan performance. For every 10 feet of duct length, subtract approximately 5% from the fan’s rated CFM. Additionally, each 90-degree elbow in the ductwork reduces airflow by about 20%. When calculating your needs, factor in these reductions and potentially choose a higher-rated fan to compensate.
Example: A 100 CFM fan with 15 feet of duct and two elbows will deliver approximately 60 CFM at the exterior vent (100 CFM – 7.5% for duct length – 40% for elbows = 52.5 CFM effective output).
Understanding Sones (Noise Level)
Fan noise is measured in sones, with lower numbers indicating quieter operation. A typical conversation rates at 4 sones. For bathrooms, look for fans rated 1.5 sones or less for quiet operation. Modern inline fans can achieve 0.3-0.5 sones while still providing adequate airflow.
How To Install A Bathroom Vent Through A Wall
Now let’s walk through the complete installation process step by step. These instructions assume you’re installing a new vent fan where none existed before, but you can adapt them for replacing an existing unit.
Planning and Location Selection
Choose a location on an exterior wall that’s centrally positioned in the bathroom for optimal air circulation. The ideal spot is near the shower or tub area but at least 3 feet away from the tub or shower enclosure to minimize water exposure. Avoid installing directly above a tub or shower enclosure unless the fan is rated for wet locations (GFCI protected).
Check the exterior wall location for potential obstacles:
- Use a stud finder to locate wall studs and plan to cut between them
- Check for electrical wiring, plumbing pipes, and HVAC ducts in the wall cavity
- Verify the exterior location has adequate clearance and won’t interfere with siding, trim, or other features
- Consider the path for running electrical wiring to the fan location
Step 1: Find Wall Studs and Mark the Location
Use a stud finder to locate the wall studs on both sides of your planned installation. Mark the center point between studs for your vent hole. Standard studs are spaced 16 inches apart, giving you a 14.5-inch opening to work with. Most bathroom fan housings require 10-12 inches of width, so you should have adequate space.
Mark a 4-inch circle at the chosen location using a template or the wall cap itself as a guide. This will be your reference point for drilling. Also mark the location for the fan housing on the interior wall – most fans require a rectangular opening approximately 10×10 inches.
Step 2: Drill Pilot Hole from Inside
From inside the bathroom, drill a small pilot hole through the wall at the center of your marked location. Use a long drill bit that will penetrate through the exterior sheathing and siding. This pilot hole serves two purposes: it confirms your exact location on the exterior and allows you to check for any hidden obstacles in the wall cavity.
Go outside and locate your pilot hole. Check that the exterior location is acceptable and won’t interfere with siding, trim, windows, or other features. If you have vinyl siding, plan your installation so the wall cap flashing can slide under the siding above for proper water management.
Step 3: Cut the Exterior Wall Hole
From the exterior, use a hole saw sized for your wall cap (typically 4 inches) to cut through the siding and sheathing. Drill slowly and steadily to prevent binding. For thicker walls or multiple layers, you may need to cut through each layer separately.
For Vinyl Siding: Cut through the siding and sheathing together. The wall cap flashing will slide under the siding above to direct water away from the opening.
For Brick Walls: Use a masonry hole saw or hammer drill with a masonry bit. Mark your hole location carefully on the brick, then drill a series of smaller holes around the perimeter before using a chisel to remove the brick material. This prevents cracking in surrounding bricks. The hole should penetrate through the brick and into the wall cavity.
For Stucco Walls: Score the stucco surface with a utility knife around your marked hole to prevent cracking beyond the cut area. Use a masonry hole saw to cut through the stucco and wire mesh, then continue through the sheathing behind it. Seal any exposed wire mesh with corrosion-resistant paint or primer.
Step 4: Install the Exterior Wall Cap
Apply a generous bead of silicone caulk around the flange of the wall cap. Insert the wall cap into the hole from the exterior, ensuring it’s level and properly positioned. The flange should rest flush against the exterior surface.
Secure the wall cap with screws appropriate for your wall type:
- Vinyl siding: Use screws into the wall studs through the sheathing
- Brick: Use masonry anchors or tapcon screws
- Stucco: Use screws into the wall studs, sealing penetrations with caulk
For vinyl siding, slide the top flashing edge under the siding course above. This ensures water runs over the flashing rather than behind it. Apply additional caulk around the entire perimeter for a watertight seal. Allow the caulk to cure according to the manufacturer’s instructions before proceeding.
Step 5: Cut the Interior Opening
Return inside and cut the rectangular opening for the fan housing. Use the fan housing template or measure the housing dimensions and mark accordingly. Cut through the drywall using a drywall saw or reciprocating saw. Be careful not to cut into any wiring or plumbing that may be in the wall cavity.
Insert the fan housing into the opening to check the fit. The housing should fit snugly but not require excessive force. Adjust the opening as needed by carefully trimming the drywall edges.
Step 6: Mount the Fan Housing
Position the fan housing in the opening and secure it according to the manufacturer’s instructions. Most fans mount directly to the ceiling joist or wall studs using screws. Ensure the housing is level and secure.
For ceiling-mounted fans venting through a wall, you’ll need to run ductwork from the fan housing to the wall vent location. This often involves running ductwork through the ceiling joists or wall cavity. Use rigid duct where possible for better airflow, with flexible duct only for making connections and navigating around obstacles.
Connect the ductwork from the fan housing to the wall cap using appropriate clamps and foil tape. Seal all connections with high-quality foil duct tape or HVAC mastic to prevent air leaks. Avoid using standard cloth duct tape, which deteriorates quickly in the humid environment of bathroom ductwork.
Step 7: Electrical Wiring
Safety First: Turn off power to the circuit at the electrical panel before beginning any electrical work. Verify power is off using a non-contact voltage tester.
Run 14/2 NM cable from your power source (typically an existing switch or electrical outlet) to the fan location. If installing a new switch, mount a standard single-gang box and run cable from the power source to the switch, then from the switch to the fan.
Connect the wiring according to the manufacturer’s diagram and local electrical codes:
- Connect the black (hot) wire to the fan’s black wire (or marked terminal)
- Connect the white (neutral) wire to the fan’s white wire
- Connect the bare copper (ground) wire to the fan’s ground wire or green screw
If installing a switched configuration, the black wire from the power source connects to one terminal on the switch, and a black wire from the switch connects to the fan. The white neutral wires splice together in the switch box, and the ground wires connect to the switch ground terminal and splice together.
Secure all connections with wire nuts and tuck wires neatly into the box. Replace the fan housing cover or grille.
Step 8: Test and Finish
Turn the power back on and test the fan operation. Verify that the fan turns on and off properly with the switch. Check that the backdraft damper on the exterior wall cap opens when the fan operates and closes when it turns off. You should feel air exiting the exterior vent when the fan is running.
Inside the bathroom, check for air leaks around the fan housing where it meets the ceiling or wall. Seal any gaps with caulk or spray foam to prevent moist air from escaping into the wall cavity or attic space.
Complete the interior finish by installing the fan grille or cover. For ceiling-mounted fans, this typically involves attaching the grille with springs or screws. For wall-mounted units, secure the cover according to the manufacturer’s instructions.
Wall-Specific Installation Considerations
Different wall types require specific techniques and materials for successful bathroom vent installation. Here’s detailed guidance for common exterior wall types.
Vinyl Siding Installation Tips
Vinyl siding is the most common exterior for modern homes and presents specific considerations for wall vent installation. The key is proper water management – the wall cap flashing must direct water over the vent rather than behind it.
When cutting through vinyl siding, use a hole saw that cuts through both the siding and the sheathing beneath. Install the wall cap so the top edge of the flashing slides under the siding course above. This creates a shingle effect where water flows over the flashing rather than behind it. If necessary, use a siding removal tool to unlock and lift the siding above to insert the flashing edge.
Seal around the wall cap perimeter with exterior-grade silicone caulk. For a clean appearance, choose a caulk color that matches your siding. After installation, test the flashing by spraying water above the vent – water should flow over and away from the vent, not behind it.
Brick Wall Installation
Installing a bathroom vent through a brick wall requires masonry tools and techniques. The process is more labor-intensive than vinyl siding but follows the same principles.
Mark your hole location carefully on the brick surface. Using a masonry bit, drill a series of closely spaced holes around the perimeter of your marked circle. This creates a weak line that prevents uncontrolled cracking. Use a hammer and masonry chisel to remove the brick material within the perimeter, working carefully to avoid damaging surrounding bricks.
Continue cutting through the brick veneer until you reach the sheathing or wood structure behind it. Then cut through the sheathing using a standard hole saw or reciprocating saw. The total wall thickness will be greater than with siding, so ensure your ductwork is long enough to span the entire distance.
Secure the wall cap using masonry anchors or tapcon screws designed for brick. Apply a generous bead of masonry-rated caulk around the perimeter. Consider using a wall cap with a larger flange for better coverage on the uneven brick surface.
Stucco Wall Installation
Stucco walls present a unique challenge because the material can crack beyond the intended cut area. Proper preparation prevents this problem.
Before cutting, score the stucco surface deeply with a utility knife around your marked hole perimeter. This score line creates a controlled break point and prevents random cracking. Use a masonry hole saw designed for stucco to cut through the material. Stucco typically contains wire mesh reinforcement – you’ll cut through this as well.
After cutting through the stucco and mesh, continue through the sheathing behind it. Seal any exposed wire mesh with rust-inhibitive paint to prevent corrosion over time. Install the wall cap using screws long enough to penetrate into the wall studs. Seal around the perimeter with stucco-rated caulk, and consider painting the caulk to match your exterior for a seamless appearance.
Venting Options: Wall vs. Roof
Both wall and roof venting are acceptable methods for exhausting bathroom air, but each has advantages depending on your home’s configuration.
Wall Venting Advantages
Wall venting is often simpler and less expensive than roof venting. Installation doesn’t require working on the roof or penetrating roofing materials, reducing the risk of leaks. Maintenance and cleaning are easier from ground level or a ladder rather than requiring roof access. Wall venting also works well for bathrooms on exterior walls where there’s no attic access above for routing ductwork.
Roof Venting Advantages
Roof venting may be preferable for bathrooms not on exterior walls or when aesthetics are a concern. Roof vents are less visible from the ground and may be required by some HOAs. In colder climates, roof venting can reduce condensation concerns because the duct runs vertically rather than horizontally, allowing moisture to drain naturally.
Making the Choice
For most DIY installations, wall venting is the better choice due to simpler installation and maintenance. Choose roof venting when the bathroom isn’t on an exterior wall, when local codes prefer it, or when aesthetics are a primary concern. In either case, proper ductwork installation and sealing are critical for long-term performance.
Condensation and Cold Climate Considerations
In colder climates, condensation in bathroom ductwork can become a significant problem. Warm, moist air from the bathroom cools as it travels through ductwork in cold wall cavities, causing moisture to condense inside the duct. Over time, this can lead to mold growth, water damage, and reduced fan performance.
To minimize condensation:
- Keep duct runs as short and straight as possible
- Use insulated ductwork for runs through unconditioned spaces
- Install the wall cap on a wall that receives sunlight to help keep the duct warm
- Ensure ductwork slopes slightly toward the exterior to allow any condensation to drain
- Consider a fan with a built-in humidity sensor that runs longer to clear moisture
In extreme cold climates, some contractors recommend installing a condensation trap or using rigid ductwork with a slight downward slope toward the exterior. This allows any moisture that does condense to drain out rather than accumulating in the duct.
Backdraft dampers are essential in cold climates to prevent cold air from entering the home when the fan is off. Quality wall caps include integrated dampers that open when air flows out and close when the fan stops, creating a thermal barrier against cold air infiltration.
Electrical Safety and Code Compliance
Bathroom exhaust fans must be installed according to local electrical codes, which are based on the National Electrical Code (NEC) in most areas. Key requirements include:
- All bathroom fans must be GFCI protected if installed in areas reachable from a shower or tub
- Fans must be controlled by a readily accessible switch
- Timer switches are recommended to ensure fans run long enough to clear moisture
- All electrical connections must be made in approved electrical boxes
- Use appropriately sized wire for the circuit (typically 14-gauge for 15-amp circuits)
If you’re uncomfortable with electrical work, consider hiring a licensed electrician for the wiring portion of the installation. The cost is reasonable for the peace of mind and ensures the installation meets all code requirements.
Maintenance and Troubleshooting
Once your bathroom vent is installed, proper maintenance ensures it operates effectively for years. Clean the fan grille and intake port annually to remove dust buildup that reduces airflow. Vacuum the fan housing and motor if accessible, being careful not to damage the fan blades.
Inspect the exterior wall cap annually to ensure the damper operates freely and the seal remains intact. Remove any debris, nests, or obstructions from the vent opening. Check that caulking remains in good condition and reapply if cracked or separating.
Common problems and solutions:
- Fan won’t turn on: Check the circuit breaker, verify the switch is working, and test for power at the fan connection
- Fan is too loud: Ensure the fan is securely mounted, check for loose ductwork connections, and verify the fan is rated for the duct length used
- Moisture remains: Check for duct leaks, verify the fan CFM rating is adequate, and ensure the damper opens fully
- Cold air coming through: Check that the backdraft damper closes properly and consider installing a more damper-equipped wall cap
Frequently Asked Questions
Is it okay to vent a bathroom fan through a wall?
Yes, venting a bathroom exhaust fan through an exterior wall is not only acceptable but often preferable to roof venting. Wall venting is typically easier to install, costs less, and provides simpler maintenance access. The vent must terminate outdoors with a proper wall cap that includes a backdraft damper to prevent cold air from entering and pests from nesting.
Do bathroom vents need to be vented outside?
Yes, building codes require bathroom exhaust fans to vent directly to the exterior. Bathroom vents should never terminate in an attic, crawlspace, garage, or soffit area. Venting moist air into enclosed spaces causes mold growth, rot, and structural damage. The vent must exit through an exterior wall, roof, or gable end with a properly installed vent cap.
Is it better to vent a bathroom through the roof or wall?
Wall venting is generally better for most DIY installations because it’s simpler, less expensive, and easier to maintain. Roof venting may be preferable when the bathroom isn’t on an exterior wall, when aesthetics are a concern, or in colder climates where vertical duct runs help manage condensation. Both methods work effectively when properly installed.
How far can you run bathroom vent ductwork?
The maximum recommended duct run for bathroom exhaust fans is 25-30 feet, but shorter runs are always better. For every 10 feet of duct length, you lose approximately 5% of the fan’s rated CFM. Each 90-degree elbow in the ductwork reduces airflow by about 20%. When calculating required CFM, factor in these reductions and choose a higher-rated fan for longer runs.
Can I install a bathroom vent without attic access?
Yes, wall venting is the ideal solution for bathrooms without attic access. By routing the ductwork horizontally through the wall studs to an exterior wall, you avoid the need to access an attic or crawlspace. This makes wall-vented bathroom fans an excellent choice for first-floor bathrooms, condos, and homes with flat roofs where attic access isn’t available.
Conclusion
Learning how to install a bathroom vent through a wall is a manageable DIY project that delivers significant benefits for your home’s health and durability. Proper ventilation protects your investment by preventing moisture damage, mold growth, and the costly repairs that follow. A well-installed bathroom vent also improves indoor air quality and comfort year-round.
The key to success is careful planning, proper sizing, and attention to sealing details. Take time to calculate your CFM needs accurately, choose quality materials for ductwork and sealing, and follow the installation steps methodically. The upfront investment in proper materials and careful installation pays dividends in years of trouble-free operation.
If you encounter any aspects of the installation that feel beyond your comfort level – particularly electrical wiring or cutting through masonry – don’t hesitate to hire a professional. The cost of professional help for specific portions of the project is reasonable compared to the potential problems from improper installation.
With the right preparation and attention to detail, your new bathroom vent will provide years of reliable service in 2026, keeping your bathroom dry, comfortable, and mold-free.
Leave a Reply