
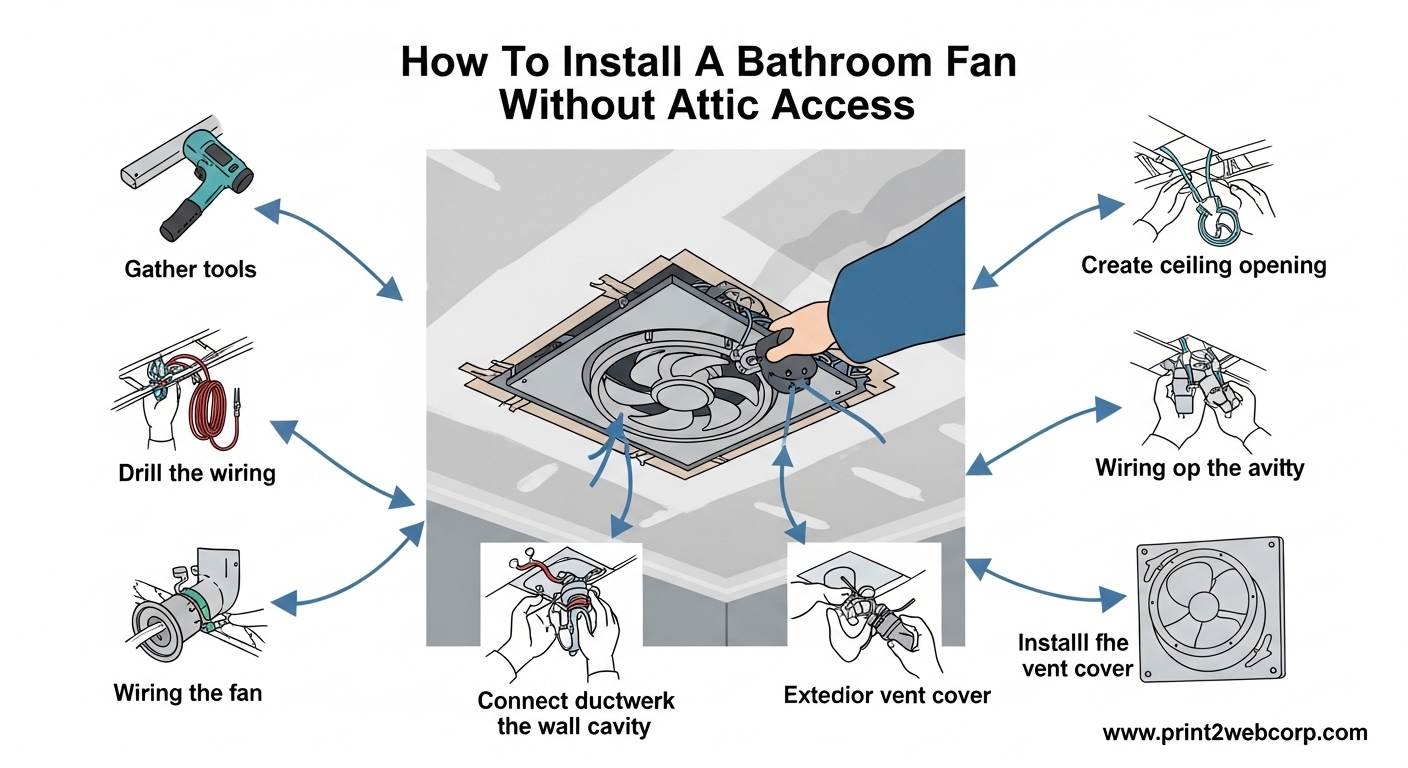
Installing a bathroom exhaust fan when you have no attic access might seem impossible, but I’ve done it dozens of times and I’m going to show you exactly how. The trick is using a “room-side” or “remodel” fan designed to mount entirely from below, combined with the right ductwork strategy. Whether you’re dealing with a vaulted ceiling, a mobile home, or just a house with limited access, this guide will walk you through every step.
Proper bathroom ventilation isn’t just about comfort—it prevents mold, protects your home from moisture damage, and in many areas, it’s required by building code. A bathroom without adequate ventilation can lead to peeling paint, warped drywall, and even structural issues over time. If your bathroom has no window or just a tiny one that doesn’t provide enough airflow, installing an exhaust fan is essential.
The challenge most homeowners face is that traditional bathroom fan installation requires crawling around in the attic space above the bathroom. You need to access the ceiling joists, run ductwork to an exterior vent, and mount the fan housing from above. But what happens when your bathroom is on the top floor, has a vaulted or cathedral ceiling, or you live in a mobile home with zero attic access? That’s exactly what I’m going to cover in this guide.
Why Bathroom Ventilation Matters
Before diving into the installation, let me explain why this project is worth your time. Every time you take a hot shower, you’re releasing significant moisture into the air—up to a half gallon of water in a single 10-minute shower. Without proper ventilation, that moisture has nowhere to go. It settles on walls, ceilings, and fixtures, creating the perfect environment for mold and mildew growth.
I’ve seen bathrooms where the drywall literally crumbled away after years of excess moisture. The paint peels in sheets, the ceiling develops dark spots, and in extreme cases, the structural integrity of the ceiling joists can be compromised. Beyond the structural damage, all that moisture creates poor indoor air quality and can aggravate respiratory issues for anyone in the household.
Building codes in most areas require bathroom ventilation for a reason. The International Residential Code mandates that bathrooms with enclosed showers or tubs must have either a window with at least 3 square feet of openable area OR an exhaust fan that moves at least 50 cubic feet per minute (CFM) of air. Many older homes were built without fans, relying solely on windows, but modern construction standards recognize that mechanical ventilation is far more reliable.
Understanding Your Installation Options
When you don’t have attic access, you have three main installation paths to consider. The right choice depends on your home’s layout, your DIY comfort level, and how much modification you’re willing to do. Let me break down each option so you can decide what works best for your situation.
Room-Side (Remodel) Fans: These are specifically designed for installations without attic access. The fan housing mounts entirely from below using collapsible mounting brackets or “ears” that expand against the ceiling joists. You attach flexible ductwork to the exhaust port before pushing the unit up into position. This is the most common solution for vaulted ceilings and top-floor bathrooms. I’ve installed dozens of these, and when done correctly, they’re just as secure as traditional attic-mounted fans.
Wall-Mounted Fans: If your bathroom has an exterior wall, you can bypass the ceiling entirely. Wall-mounted exhaust fans install directly through the exterior wall with minimal ductwork—often just a short section connecting the fan to a wall cap. This eliminates the need to work in the ceiling cavity altogether. The downside is that wall-mounted units are typically more visible and sometimes noisier than ceiling-mounted options.
Hire a Professional: If you’re uncomfortable working with electrical wiring or cutting holes in your roof, there’s no shame in calling a licensed electrician or contractor. They have specialized tools and experience that can make quick work of a challenging installation. Expect to pay between $300 and $600 for professional installation, depending on your location and the complexity of the job.
Tools and Materials You’ll Need
Gathering everything before you start will save you countless trips to the hardware store mid-project. Here’s the complete list based on my experience installing bathroom fans in various situations:
Essential Tools:
- Circuit tester or voltage detector (non-negotiable for safety)
- Drill with various drill bits (including a 12-inch or longer spade bit for roof penetration)
- Jigsaw or drywall saw for cutting the ceiling hole
- Wire strippers and wire cutters
- Screwdrivers (both Phillips and flathead)
- Pliers (needle-nose are helpful for wire connections)
- Utility knife
- Tape measure
- Ladder tall enough to reach the ceiling comfortably
- Stud finder (for locating ceiling joists)
Materials Needed:
- Bathroom exhaust fan (room-side/remodel type recommended)
- Flexible aluminum ductwork (typically 4-inch diameter)
- Duct connector or transition piece
- HVAC aluminum foil tape (NOT standard duct tape)
- Roof vent cap or wall vent cap
- Electrical wire connectors (wire nuts)
- Cable clamp for securing electrical wiring
- Mounting brackets or screws (often included with fan)
- Spackle or joint compound (for patching ceiling after cutting)
- Paint for touch-up (optional)
One item I want to emphasize is the HVAC tape. Regular cloth or plastic duct tape will degrade quickly in the hot, humid environment of an exhaust duct. Aluminum foil HVAC tape is specifically designed for this application and will last for years. Trust me, I’ve seen plenty of DIY installations fail because someone used the wrong tape.
How to Size Your Bathroom Fan (CFM Calculator)
Before buying a fan, you need to determine the right capacity for your space. Bathroom fan power is measured in cubic feet per minute (CFM), which indicates how much air the fan can exhaust in one minute. Undersizing your fan means it won’t effectively remove moisture, while oversizing can create unnecessary noise and wasted energy.
The standard calculation is simple: multiply the bathroom’s square footage by 1.1 for a standard 8-foot ceiling. For example, a 50-square-foot bathroom would need a fan rated for at least 55 CFM. If your bathroom has a taller ceiling, multiply the room’s length x width x height, then divide by 7.5 to get the minimum CFM rating.
Here’s a quick reference chart based on common bathroom sizes:
CFM Requirements by Bathroom Size:
- Up to 50 sq ft: 50 CFM minimum
- 51-100 sq ft: 80-100 CFM
- 101-150 sq ft: 110-150 CFM
- Over 150 sq ft: Consider adding a second fan or upgrading to 150+ CFM
One important adjustment: if your bathroom includes a jetted tub or a large soaking tub, you need to add 50 CFM to the base calculation. These fixtures release significantly more moisture than standard showers, and the extra capacity ensures proper ventilation.
Another spec to consider is the sones rating, which measures noise level. One sone is equivalent to the sound of a quiet refrigerator. Standard bathroom fans run at 2-3 sones, which is noticeable but not disruptive. Ultra-quiet models can operate at 0.5-1 sones—almost silent. If you’re a light sleeper or use the bathroom during night hours, investing in a quieter model is worth the extra cost.
Safety First: Turn Off Power
This is the most critical step in the entire process. Before you touch any wires or remove any fixtures, you MUST shut off power to the bathroom circuit. Go to your electrical panel and flip the breaker that controls the bathroom outlets and lighting. If you’re unsure which breaker it is, turn off the main breaker—yes, it’s inconvenient to reset all your clocks, but it’s better than risking electrical shock.
After shutting off the breaker, use your circuit tester to verify there’s no power flowing to the existing fan or light fixture. Touch the tester probes to the wire connections—if it lights up or beeps, you haven’t turned off the right breaker. Do not proceed until the tester confirms zero voltage.
I can’t stress this enough: electrical shock can be fatal. Even if you’re experienced with electrical work, always double-check that power is off. If you’re uncomfortable working with wiring at any point during this project, call a licensed electrician. Your life is worth more than the cost of professional installation.
Removing the Old Bathroom Fan
If you’re replacing an existing fan, you’ll need to remove it first. This can actually be more challenging without attic access, since you can’t simply disconnect the housing from above. Here’s how I handle old fan removal when working from below:
Start by removing the grille cover. Most covers either twist off counterclockwise or have a simple spring clip that releases with gentle prying. Once the cover is off, you’ll see the fan motor and housing assembly. Disconnect any wiring connections, taking note of which wires connect to what (black to black, white to white, ground to ground).
Next, locate the mounting brackets. Traditional fans are screwed directly into the ceiling joists from above, which you can’t access. This is where a reciprocating saw or oscillating multi-tool becomes invaluable. Carefully cut through the mounting brackets on both sides of the housing. Support the fan unit with one hand while cutting to prevent it from falling once released.
After cutting the brackets, carefully lower the fan housing through the opening. You may need to wiggle it a bit to free it from the ductwork connection. Be prepared for some dust and debris—have a vacuum or shop vac ready to clean up immediately.
If the existing ceiling hole is the wrong size for your new fan, you’ll need to modify it. For enlarging the hole, use your jigsaw to cut the drywall along your marked outline. If the hole is too large, you can install a mounting frame or patch the excess opening with drywall before installing the new fan.
How to Install a Bathroom Fan Without Attic Access
Now for the main event. I’m going to walk you through installing a room-side bathroom fan step by step. This is the exact process I use, refined through dozens of installations. Follow each step carefully, and don’t rush—this is one project where taking your time pays off in the long run.
Step 1: Mark and Cut the Ceiling Opening
If you’re doing a new installation (not replacing an existing fan), use the template included with your fan to mark the ceiling opening. Center the template between joists whenever possible—use your stud finder to locate them. For vaulted ceilings, try to position the opening near the peak for optimal duct routing.
Score along your marked line with a utility knife first—this prevents the drywall paper from tearing when you cut. Then use your jigsaw or drywall saw to cut along the line. Cut slowly and stay on your line—it’s easier to remove a little more material later than to patch a too-large opening.
Step 2: Prepare the Ductwork Connection
Before mounting the fan, attach the flexible duct to the fan housing. This is much easier to do while the unit is still accessible. Slide the duct connector over the fan’s exhaust port and secure it with HVAC tape. Then attach the flexible duct to the connector, again using generous amounts of HVAC tape to create an airtight seal.
The duct should be long enough to reach your chosen exit point (roof or wall) with some slack, but not so long that it creates unnecessary bends and restrictions. I typically cut the duct a few feet longer than I think I need—you can always trim excess later, but you can’t add length once it’s in place.
Step 3: Position the Fan Housing
This is the tricky part without attic access. Feed the connected ductwork up into the ceiling cavity first, pushing it toward your exit point. You may need to use a coat hanger or a length of stiff wire to guide the duct in the right direction.
Once the duct is positioned, lift the fan housing into the opening. Room-side fans feature collapsible mounting ears that you fold up while inserting, then release once the housing is in place. The ears expand against the ceiling joists, securing the unit from below. Some models use a separate bracket that screws to the joists first, then the fan attaches to the bracket from below.
Work slowly and carefully here. You may need to alternately push on the housing and pull on the duct to get everything positioned correctly. If you’re working alone, a support prop (like a broomhandle wedged between the fan and floor) can hold the housing in place while you make final adjustments.
Step 4: Secure the Fan Housing
Once the housing is properly positioned and the mounting ears are expanded against the joists, secure it according to the manufacturer’s instructions. This might involve tightening screws that draw the mounting ears outward, or driving screws through mounting holes in the housing flange into the joists.
Test that the housing is secure by giving it a gentle tug—it shouldn’t move or wiggle. A loose fan will vibrate excessively when running and can eventually work its way loose. Take the time to get this right now, and you’ll avoid problems down the road.
Step 5: Make Electrical Connections
With the housing secured, make the electrical connections. Route the electrical cable from the switch through the cable clamp in the fan housing. Strip about 3/4 inch of insulation from each wire end, then connect using wire nuts: black (hot) to black, white (neutral) to white, and bare or green (ground) to the grounding screw or wire.
Some fans have a separate light function—if you’re wiring a fan/light combo, you’ll have two hot wires (often black and blue) that connect to separate switched wires from your wall switch. Follow the wiring diagram included with your specific fan model.
After connecting, gently tug on each wire nut to ensure the connections are secure. Loose connections can cause arcing, overheating, and fan failure. Wrap each wire nut with electrical tape as an extra precaution—this isn’t strictly required by code, but it’s good practice that prevents accidental contact.
Venting Options: Roof vs Wall
Getting the moist air out of the bathroom is only half the battle—you also need to route it outside. Never vent your bathroom fan into the attic space. I’ve seen the damage this causes first-hand: mold-covered rafters, matted insulation, and roting roof sheathing. The air must exit completely outside the building envelope.
Roof Venting:
If your bathroom is on an upper floor or has a roof directly above, roof venting is typically the most direct route. This requires cutting a hole through your roof and installing a dedicated roof vent cap. The challenge without attic access is positioning the hole correctly from below.
Here’s the technique I use: Drill a pilot hole through the ceiling and roof using a 12-inch or longer spade bit. Start in the bathroom ceiling near where you want the vent, drilling upward at an angle toward the roof. Once the bit penetrates the roof (you’ll feel it break through), go outside and locate the pilot hole. Use this as your center point for cutting the larger vent opening.
For longer distances between ceiling and roof (common with vaulted ceilings), you may need a 72-inch drill bit or a specialized right-angle drill. These tools cost more to rent, but they’re invaluable for this specific application. Some DIYers use a wire coat hanger to probe upward from the ceiling hole, then search for it on the roof with a metal detector—but this is hit-or-miss at best.
Once you’ve located and cut the roof opening, install the roof vent cap according to the manufacturer’s instructions. This typically involves applying roofing cement around the flange, inserting the cap through the hole, and nailing or screwing the flange to the roof deck. Don’t forget to install proper flashing to prevent leaks—this is not the place to cut corners.
Wall Venting:
If your bathroom has an exterior wall, wall venting is often simpler than roof venting, especially without attic access. The duct runs horizontally through the wall cavity to a wall cap mounted on the exterior siding. This eliminates the need to work on the roof at all.
To install a wall vent, drill a pilot hole from inside the bathroom through the exterior wall. Use a long bit (at least 12 inches) to ensure you penetrate completely through. Go outside and locate the hole, then use it as a center point to cut the larger opening for your wall cap using a hole saw or reciprocating saw.
Install the wall cap with the flange flush against the exterior siding, securing with screws and caulking around the perimeter to prevent water intrusion. Inside, connect your flexible duct to the wall cap using a duct transition piece and secure with HVAC tape. The duct should slope slightly downward toward the exterior—this prevents condensation from draining back into the fan housing.
Wiring Your Bathroom Fan
Proper wiring is essential for safe and reliable operation. While I can’t cover every possible wiring scenario, I’ll outline the most common configurations. If your setup differs significantly, consult a licensed electrician—electrical work isn’t something to guess at.
Simple Switch Setup:
The most basic setup is a single switch controlling the fan. The power comes from your electrical panel to the switch, then from the switch to the fan. At the switch box, you’ll have a hot wire (usually black) bringing power in, and a switched hot wire going to the fan. The white neutral wires splice together without passing through the switch.
Fan/Light Combo:
If you’re installing a fan/light combination, you have two wiring options. The simplest uses a single switch that controls both functions simultaneously. For independent control, you’ll need a double switch or a combination switch with separate controls for fan and light. This requires running an additional wire (typically a red traveler wire) between the switch and fan.
Timer or Humidity Sensor Switch:
Upgrading to a timer switch or humidity sensor switch is a smart move that I recommend to all my clients. These ensure the fan runs long enough to thoroughly remove moisture even if you forget to turn it on. Timer switches are straightforward to wire—simply replace your existing switch with the timer unit. Humidity sensors are more complex and may require a neutral wire at the switch box, which older homes often lack.
Regardless of your switch configuration, always follow the specific wiring diagram included with your fan and switch. Different manufacturers use different color codes, and assuming standard conventions can lead to problems. When in doubt, consult the documentation or call a professional.
Testing and Finishing the Installation
With everything connected, it’s time to test your work. Turn the power back on at the breaker panel and flip the switch. The fan should start immediately without any unusual noises. A brief hum at startup is normal, but grinding, rattling, or clicking sounds indicate a problem—usually the housing isn’t secured properly or something is contacting the fan blades.
Test the airflow by holding a tissue near the grille. It should be pulled firmly against the grille, indicating strong suction. Walk outside and check that air is exiting through the roof or wall vent—you should feel a steady stream of air. If air isn’t exiting, check for duct kinks or obstructions.
Once you’ve confirmed everything is working, install the decorative grille cover. Most snap into place with spring clips, while others require screws. Test the cover removal to ensure you can access the fan for future cleaning. Bathroom fans should be cleaned annually to maintain optimal performance and prevent fire hazards from dust buildup.
Finish by patching any ceiling damage around the installation area. Use spackle or joint compound to fill gaps, then sand smooth and paint to match. A neat, professional-looking installation adds value to your home and makes all your hard work worth it.
Common Mistakes to Avoid
After installing dozens of bathroom fans over the years, I’ve seen the same mistakes repeated. Avoiding these common pitfalls will save you time, money, and frustration:
Venting into the attic: This is hands down the worst mistake I see. Bathroom exhaust air is loaded with moisture that will cause mold, rot, and insulation damage. Always vent completely outside the building envelope. If someone tells you “just vent into the attic, it’ll be fine,” they’re wrong—dead wrong.
Using the wrong duct material: Regular dryer vent hose or flexible plastic tubing isn’t rated for the high-temperature, high-moisture environment of bathroom exhaust. Use only aluminum flex duct specifically designed for HVAC applications. It costs a few dollars more but lasts years longer and won’t sag or collapse over time.
Creating tight duct bends: Every 90-degree bend in your ductwork significantly reduces airflow. Route the duct with as few bends as possible, and when bends are necessary, use wide, gradual curves rather than sharp angles. The smoother the airflow, the better your fan will perform.
Undersizing the fan: A fan that’s too small for the space will never adequately remove moisture. Use the CFM calculation I provided earlier, and when in doubt, go slightly larger. A 100 CFM fan running on low speed is quieter and more effective than a 50 CFM fan struggling to keep up.
Forgetting to insulate the duct: If your duct runs through unconditioned space (attic or exterior wall), wrap it with duct insulation. This prevents warm, moist air from condensing inside the duct, which can cause water damage and reduce airflow. Uninsulated ducts in cold climates can literally drip water back into the fan housing.
Special Considerations
Some installation scenarios present unique challenges. Here’s how I handle the most common special situations:
Vaulted or Cathedral Ceilings:
Vaulted ceilings eliminate the attic space above, making traditional installation impossible. Room-side fans are specifically designed for this situation. The key is positioning the duct run so it can exit through the roof or an adjacent wall with minimal bends. For steep vaults, I recommend installing the fan as close to the peak as possible while maintaining access to the switch location.
Mobile Homes:
Mobile home construction presents unique challenges—limited ceiling cavity space, different roofing materials, and sometimes non-standard framing. Room-side fans work well in mobile homes, but you may need to use wall venting instead of roof venting due to the thin roof deck. Also, check local codes—some jurisdictions have specific requirements for mobile home modifications.
Exterior Wall Installations:
If your bathroom has an exterior wall, consider a through-wall fan instead of a ceiling-mounted unit. These install directly through the exterior wall with minimal ductwork, eliminating the need to work in the ceiling cavity at all. Wall-mounted fans are slightly more visible but often easier to install when attic access isn’t an option.
Historic Homes:
If you’re working with a historic home, you may face additional considerations like plaster ceilings (which are more fragile than drywall) and preservation guidelines that restrict modifications. Take extra care when cutting openings in plaster—score deeply before cutting to prevent crumbling. Check with local historic preservation boards before making significant modifications.
FAQ’s
How to vent a bathroom fan without attic access?
Vent a bathroom fan without attic access by using a room-side or remodel fan that mounts from below, connecting flexible ductwork, and routing it either through the roof using a long drill bit technique or through an exterior wall. Always terminate the duct at a dedicated roof or wall vent cap—never vent into the attic space.
Do ductless bathroom fans actually work?
Ductless bathroom fans do work to some degree, but they’re not as effective as properly vented exhaust fans. They filter air and recirculate it back into the room, capturing some moisture and odors. However, they don’t remove humidity like vented fans, so mold risk remains higher. They’re best suited for situations where venting is truly impossible, not just inconvenient.
Do you need attic access to install a ceiling fan?
No, you don’t need attic access to install a bathroom ceiling fan. Room-side or remodel fans are specifically designed to install entirely from below the ceiling. These feature collapsible mounting brackets that secure the fan housing to the ceiling joists without requiring access from above. Combined with flexible ductwork, they make installation possible in vaulted ceilings, top-floor bathrooms, and homes without attic access.
Should a bathroom vent go into the attic?
No, a bathroom vent should NEVER go into the attic space. Bathroom exhaust contains significant moisture that will cause mold growth, rot structural framing, and matten insulation. Building codes explicitly require bathroom fans to vent directly outside the building. Always route ductwork to a dedicated roof vent cap or wall vent that exhausts completely outdoors.
How to install a bathroom vent fan with no attic access?
Install a bathroom vent fan without attic access by choosing a room-side fan, cutting a ceiling opening, attaching flexible ductwork to the fan housing before mounting, positioning the unit so the mounting ears expand against ceiling joists, making electrical connections, and routing the duct through the roof or wall to an exterior vent cap. Use a long drill bit (12-inch or longer) to create a pilot hole for roof venting from below.
Conclusion
Installing a bathroom fan without attic access is absolutely achievable with the right tools, materials, and techniques. I’ve completed dozens of these installations in everything from standard tract homes to custom houses with vaulted ceilings, and the satisfaction of a job well done never gets old. The key is choosing a room-side or remodel fan designed for this specific application, taking your time with each step, and never compromising on safety—especially when working with electricity.
Proper bathroom ventilation protects your home from moisture damage, prevents mold growth, and creates a more comfortable environment. Whether you’re dealing with a vaulted ceiling, a mobile home, or just a house with limited access, the techniques I’ve shared in this guide will help you get the job done right. If at any point you feel uncomfortable with the electrical work or roof modifications, there’s no shame in calling a professional—a licensed electrician or contractor can complete the installation safely and efficiently.
The next time you take a steamy shower and see your new exhaust fan quietly pulling all that moisture outside, you’ll know the effort was worth it. Your bathroom will stay drier, your home will be healthier, and you’ll have the satisfaction of knowing you tackled a challenging DIY project and succeeded.
Leave a Reply