
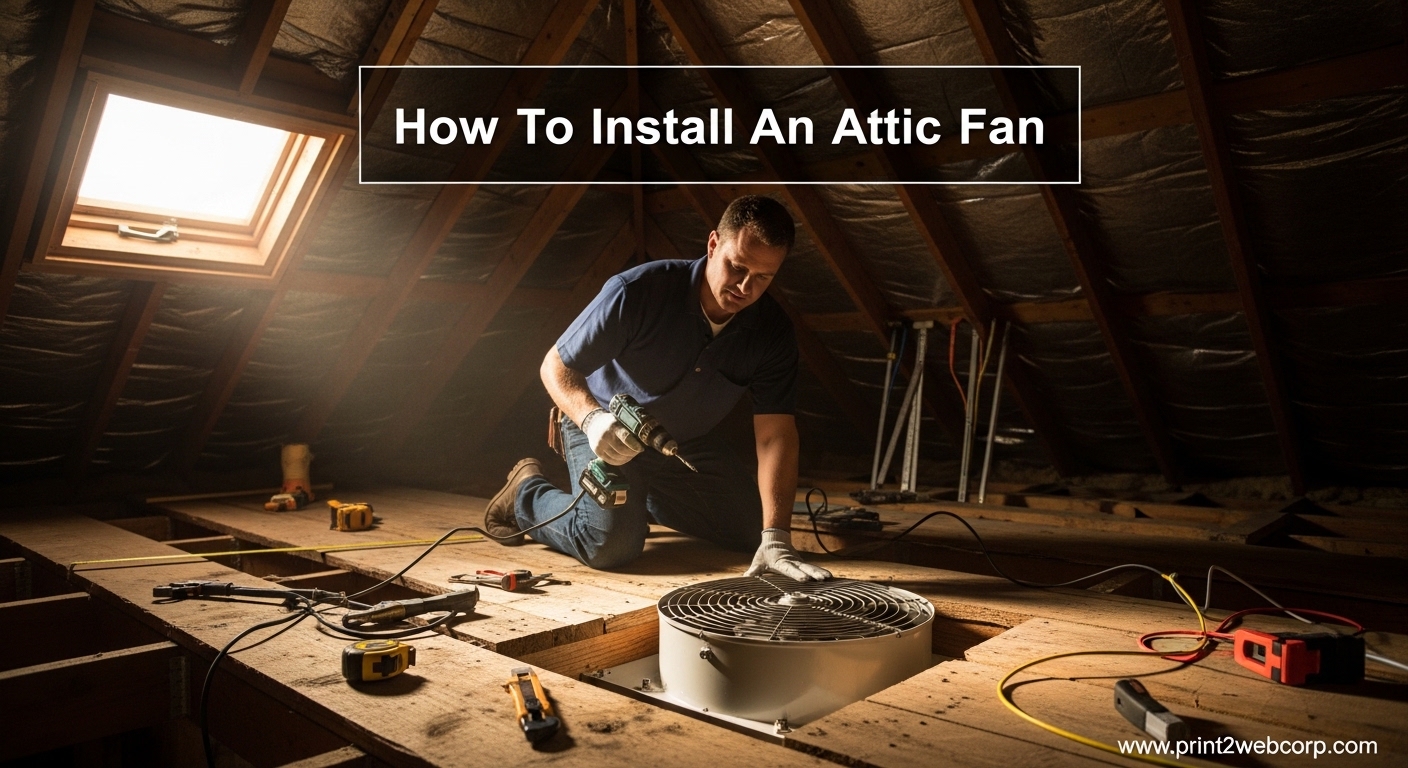
Your attic can reach 150 degrees on a hot summer day. That heat doesn’t stay put. It radiates through your ceiling into your living spaces, forcing your air conditioner to work overtime and driving up energy bills. An attic fan can reduce attic temperatures by 50 degrees or more, protecting your roof and lowering cooling costs.
I’ve helped homeowners tackle attic ventilation projects for over 15 years. Installing an attic fan is a manageable DIY project that takes about 4-6 hours and costs between $50-$500 for the fan unit. Professional installation runs $100-$300 more, but most homeowners with basic electrical knowledge can handle this job themselves.
In this guide, I’ll walk you through how to install an attic fan step-by-step, covering both roof-mounted and gable-mounted options. You’ll learn how to calculate the right fan size, wire the thermostat safely, and avoid common mistakes that can lead to roof leaks or ineffective ventilation.
Are Attic Fans Worth It in 2026?
The debate about attic fan effectiveness has been going on for decades. Critics argue that proper passive ventilation (soffit vents and ridge vents) should be sufficient. Proponents point to real-world temperature reductions and energy savings.
Here’s the reality: attic fans work well when installed correctly as part of a balanced ventilation system. They’re most effective in hot climates where summer attic temperatures routinely exceed 120 degrees. The key is ensuring adequate intake ventilation through your soffit vents. Without proper intake, the fan can’t move air effectively and may even draw conditioned air from your living space.
Modern attic fans with automatic thermostats are more efficient than older models. They only run when needed, typically when attic temperatures hit 90-95 degrees. Solar-powered options eliminate electrical wiring entirely and cost nothing to operate. For most homeowners in warm climates, an attic fan pays for itself in 3-5 years through reduced cooling costs.
Types of Attic Fans: Roof Mount vs Gable Mount
Before learning how to install an attic fan, you need to decide which type fits your home. The two main options each have advantages depending on your roof structure and existing ventilation.
Roof-mounted attic fans install directly through your roof decking, typically near the ridge line. They’re the most effective option because hot air naturally rises to the highest point. Roof-mount fans work with any roof style and don’t require an existing gable vent. However, they involve cutting a hole in your roof, which concerns some homeowners about potential leaks. When installed with proper flashing and roofing cement, leaks are rare but the installation is more complex.
Gable-mounted attic fans install inside your attic behind an existing gable vent. They’re easier to install because there’s no roof penetration required. Gable mounts are ideal if you already have functional gable vents and want a simpler installation. The downside is they’re less efficient than roof-mounted fans because gable vents are typically lower than the roof peak. They work best in attics with good vertical airflow and relatively clear space between the gables.
Solar-powered attic fans are available in both roof and gable configurations. They cost more upfront ($200-$500) but eliminate electrical wiring costs and operating expenses. Solar fans are ideal for sunny climates and locations where running electrical wire would be difficult. The main limitation is they don’t run at night or on cloudy days, though most include a small battery backup for limited operation.
Tools and Materials You’ll Need
Gather everything before you start. There’s nothing worse than being halfway through an attic fan installation and realizing you’re missing a critical connector or tool.
Essential tools: Drill/driver with hole saw bits, jigsaw for cutting roof decking, tape measure, pencil, wire strippers, wire connectors, screwdrivers (Phillips and flathead), utility knife, caulking gun, ladder tall enough to reach your roof or attic access, and a voltage tester for electrical safety.
Materials for roof mount: Attic fan unit with thermostat, roof flashing (usually included), roofing cement or silicone sealant, roofing nails, weather-resistant screws, electrical cable (14/2 NM-B wire), cable clamps, wire nuts, and possibly a junction box depending on your setup.
Materials for gable mount: Attic fan unit, mounting brackets (usually included), lumber for mounting frame if needed, screws, electrical cable, wire connectors, thermostat, and possibly sheet metal screws for attaching to the gable vent frame.
Safety equipment: Work gloves, safety glasses, dust mask (attic insulation is irritating), and non-slip footwear if working on the roof. If your roof has a steep pitch, consider using a safety harness or hiring a professional for the roof-mounted portion.
How To Install An Attic Fan: Sizing Your Fan Correctly
Installing the wrong size fan is a common mistake. Too small and it won’t effectively cool your attic. Too large and it can pressurize your attic, potentially drawing conditioned air from your home through ceiling fixtures.
The industry-standard formula for calculating attic fan capacity is simple: multiply your attic’s square footage by 0.7 to get the minimum CFM (cubic feet per minute) rating. For example, a 1,500 square foot attic needs at least 1,050 CFM of ventilation capacity. If your attic has dark shingles or is in an extremely hot climate, multiply by 0.85 instead of 0.7.
Intake ventilation is equally important. For every 300 CFM of exhaust capacity, you need at least 1 square foot of unrestricted intake ventilation through your soffit vents. Most homes have inadequate soffit ventilation because insulation blocks the vents or the vents were undersized originally. Before installing your fan, check your soffit vents and clear any blockages. If your intake ventilation is insufficient, the fan won’t work properly regardless of its CFM rating.
Don’t rely on your existing static vents (ridge vents, mushroom vents, etc.) to provide adequate intake. These vents are designed for natural convection and can’t supply the volume of air a power attic fan needs. Dedicated soffit vents are essential for balanced airflow.
Before You Start: Planning and Safety
Check your local building codes before starting. Some jurisdictions require permits for electrical work or roof modifications. Even if not required, following code ensures a safe installation. If you’re uncomfortable working with electricity or on a sloped roof, there’s no shame in hiring a professional for those portions.
Determine your power source location. The ideal scenario is an existing outlet or junction box in your attic. If not, you’ll need to run a new circuit from your electrical panel. Most attic fans draw 2-4 amps and can share a circuit with other loads, but verify your circuit capacity before tapping in. Some electricians recommend a dedicated circuit, especially for larger fans over 1,500 CFM.
Consider your roof type before choosing installation location. Asphalt shingles are the easiest to work with. Tile, metal, and flat roofs require specialized flashing and installation techniques that may be beyond typical DIY skills. For tile roofs especially, professional installation is often worth the cost to avoid breaking tiles.
Plan your thermostat location where it’s accessible but away from direct airflow. The thermostat should measure ambient attic temperature, not the air immediately exiting the fan. Mount it on a rafter or truss at least 4 feet from the fan discharge.
How To Install a Roof-Mounted Attic Fan
Roof-mounted installations are more involved but offer the best performance. Follow these steps carefully, especially the flashing and sealing portions, to prevent future leaks.
Step 1: Turn off power at the breaker. Even if you haven’t run electrical yet, verify the circuit is dead before proceeding. If you’re working during daylight, the fan’s solar panel (if equipped) could generate power even with the breaker off.
Step 2: Determine fan location. Position the fan between the roof ridge and the midpoint of your roof slope. Ideally, place it 2 feet below the ridge line for optimal hot air extraction. Ensure the location is centered between rafters and doesn’t interfere with any roof penetrations (vents, chimneys, skylights). Mark the center point with a pencil from inside the attic, then transfer this location to the roof surface.
Step 3: Cut the roof opening. Using the fan’s flashing as a template, trace the cutout onto your shingles. Use a sharp utility knife to cut through the shingles around the perimeter. Then drill a pilot hole inside each corner and use a jigsaw to cut through the roof decking. Stay within the traced lines—a tight fit between the flashing and decking prevents water intrusion.
Step 4: Apply roofing cement. Spread a generous layer of roofing cement or roofing mastic around the cut opening on the existing shingles. This creates a waterproof seal between the old and new roofing materials. Don’t skimp here—this extra step prevents leaks years down the road.
Step 5: Install the flashing. Slide the fan flashing underneath the uphill shingles first. The upper portion of the flashing should go beneath at least two courses of shingles above the opening. This ensures water flows over the flashing rather than under it. Secure the flashing with roofing nails in the designated nail holes, taking care not to puncture the lower shingle tabs.
Step 6: Seal nail heads. Apply a dab of roofing cement over each nail head in the flashing. This belt-and-suspenders approach ensures water can’t wick through the nail holes. Also seal any gaps where the flashing meets the shingles, especially at the corners.
Step 7: Mount the fan housing. From inside the attic, position the fan housing over the opening. Most units have a flange that screws directly into the roof decking or rafters. Use corrosion-resistant screws and ensure the housing is level. Some fans require sealant between the housing and flashing—follow your manufacturer’s instructions.
Step 8: Install the fan motor and blade. Most roof-mount fans have the motor assembly separate from the housing for easier installation. Secure the motor according to the instructions, then attach the fan blade. The blade should spin freely without contacting the housing. Unbalanced blades cause vibration and noise.
Step 9: Run electrical wiring. Route your 14/2 NM-B cable from your power source to the fan location. Secure the cable along rafters with cable staples, maintaining at least 1.5 inches from the face of framing members. Use cable clamps where the wire enters the fan housing junction box to prevent chafing.
Step 10: Connect the wiring. Connect the black (hot) wire to the fan’s black wire, the white (neutral) to white, and the bare or green ground wire to the green ground screw. Use wire nuts and wrap connections with electrical tape for extra security. Replace the fan junction box cover and ensure all gaskets are properly seated.
How To Install a Gable-Mounted Attic Fan
Gable-mounted installations are simpler because there’s no roof penetration required. If your home has existing gable vents, this project can be completed in about 2-3 hours.
Step 1: Turn off power. As with any electrical project, verify the circuit is dead before beginning work.
Step 2: Inspect the gable vent. Ensure your existing gable vent is in good condition and properly sized. The vent opening should be at least as large as the fan’s blade diameter. Remove the vent louvers or screen if necessary to access the installation area.
Step 3: Build a mounting frame if needed. Some gable fans mount directly to the vent frame. Others require a simple wooden frame between the attic framing and the fan. Use 2×4 lumber to create a square frame that fits your fan, then secure it to the attic wall studs with wood screws.
Step 4: Position the fan. Center the fan unit in the gable opening. The fan should be mounted so the blade operates freely without contacting the vent louvers or surrounding framing. Most gable mounts have slotted mounting holes that allow for minor adjustments.
Step 5: Secure the fan housing. Use the provided mounting brackets or lag screws to attach the fan to the framing or mounting frame. Ensure the unit is level—uneven mounting causes vibration and premature wear. Some manufacturers recommend rubber isolation mounts to reduce noise transmission.
Step 6: Install the thermostat. Mount the thermostat on a nearby rafter or wall stud, away from the direct airflow of the fan. The thermostat should be in open air where it can accurately measure attic temperature. Avoid placing it near heat sources like furnace flues or water heaters.
Step 7: Run electrical wiring. Route your electrical cable from the power source to both the fan and thermostat locations. Secure the cable along framing members with staples. Many gable-mount fans have the thermostat built into the housing, simplifying the wiring significantly.
Step 8: Connect the wiring. Follow the manufacturer’s wiring diagram carefully. Most gable fans wire the fan motor through the thermostat so the thermostat controls on/off operation. Typically, power goes to the thermostat first, then from the thermostat to the fan motor. All connections must be made in approved junction boxes with proper wire nuts and ground connections.
Step 9: Test the installation. Before buttoning everything up, turn the power back on temporarily. Set the thermostat to its lowest setting to trigger the fan. Verify the blade spins freely in the correct direction (most attic fans exhaust air upward). Check for any unusual noises or vibration.
Step 10: Restore power and set the thermostat. Set your thermostat to the recommended settings—typically 90-95 degrees for the activation temperature. Some thermostats also have a high-limit setting around 110-115 degrees as a safety override. Replace the gable vent louvers if removed, ensuring they don’t interfere with fan operation.
Wiring Your Attic Fan and Thermostat
Electrical work is where most DIYers feel uncertain. Attic fan wiring is actually straightforward, but you must follow basic safety rules and electrical code requirements.
Most attic fans run on standard 120-volt household power and use 14-gauge wire with a 15-amp circuit. Larger fans over 1,800 CFM may require 12-gauge wire and a 20-amp circuit—check your fan’s specifications. The electrical cable should be NM-B (Romex) type, rated for the temperature conditions in an attic.
When connecting the thermostat, you’re essentially inserting a temperature-controlled switch in the hot (black) wire. Power comes from your source to the thermostat’s line side, then from the thermostat’s load side to the fan motor. The white neutral wires connect together with a wire nut, bypassing the thermostat. The ground wire connects to the grounding screw in each junction box.
Thermostat settings matter for performance and longevity. The typical setting is 90-95 degrees for activation. This means the fan turns on when the attic reaches 90 degrees and off when it cools below that threshold. Some thermostats have a differential setting that prevents rapid cycling—don’t set this too narrow or the fan will short-cycle, wearing out the motor.
Does an attic fan need its own circuit? Not necessarily, but it depends on your existing electrical load. A typical attic fan draws 2-4 amps, which is relatively light. It can usually share a circuit with other attic loads like lighting. However, if you’re tapping into a circuit that’s already near capacity, you may experience tripped breakers. When in doubt, consult an electrician to evaluate your electrical panel capacity.
Always turn off power at the breaker before making any electrical connections. Use a voltage tester to verify the circuit is dead. Even experienced electricians follow this rule every time—there’s no room for shortcuts with electrical safety.
Testing Your Installation and Ongoing Maintenance
After completing your attic fan installation, test it thoroughly before declaring the project complete. Turn the power on and lower the thermostat setting manually to trigger the fan. Listen for unusual noises—clicking, grinding, or excessive vibration indicate a problem. Check that air is flowing in the correct direction (exhausting out, not sucking in).
Go into your attic and verify the fan is pulling air through your soffit vents. Hold a tissue near each soffit vent—you should feel air being drawn in. If some soffit vents aren’t flowing, they may be blocked by insulation. This is a common issue that dramatically reduces fan performance.
Annual maintenance takes about 30 minutes and extends your fan’s lifespan significantly. Clean the fan blades and housing of dust buildup. Check that the thermostat operates correctly by manually triggering it. Inspect roof-mounted units from inside the attic for any signs of water intrusion around the flashing. Tighten any loose screws and lubricate the motor if your fan’s manufacturer recommends it (some motors are sealed and require no maintenance).
Winter operation is a common question. In most climates, you can leave your attic fan running year-round. The thermostat prevents it from running in cold weather. However, some homeowners in extremely cold regions prefer to cover the fan or switch it off manually to prevent any possibility of drawing warm air from the living space. Solar-powered fans will simply stop running when there’s insufficient sunlight.
Watch for signs that your fan isn’t working properly. Increasing cooling costs, visible moisture or mold in the attic, or shingles showing premature wear can all indicate ventilation problems. If your attic still feels excessively hot in summer despite the fan running, you may have inadequate intake ventilation or an undersized fan.
Frequently Asked Questions
Why are attic fans not used anymore?
Attic fans are still widely used, but some building scientists argue that proper passive ventilation (ridge vents and soffit vents) should be sufficient. The controversy stems from poorly installed fans that pressurize attics and draw conditioned air from homes. When installed as part of a balanced ventilation system with adequate intake, attic fans remain an effective cooling solution.
What is the average cost to install an attic fan?
DIY attic fan installation costs $50-$500 for the fan unit plus $20-$50 for materials. Professional installation adds $100-$300 for labor. Solar-powered fans cost more upfront ($200-$500) but eliminate electrical wiring costs. Total project cost typically ranges from $150 for a basic DIY gable-mount to $800+ for a professional roof-mount solar installation.
Does an attic fan need its own circuit?
Not necessarily. Most attic fans draw 2-4 amps and can share a 15-amp circuit with other attic loads like lighting. However, verify your circuit isn’t already near capacity. Larger fans over 1,800 CFM may require a dedicated 20-amp circuit. When in doubt, consult an electrician to evaluate your electrical panel before tapping into an existing circuit.
Are attic fans a good idea?
Attic fans are beneficial in hot climates where summer attic temperatures exceed 120 degrees. They can reduce attic temperatures by 50+ degrees, lower cooling costs, and extend roof lifespan by reducing heat buildup. They’re most effective when paired with adequate soffit intake ventilation. In mild climates or homes with excellent passive ventilation, the benefits may not justify the cost.
Conclusion
Installing an attic fan is a rewarding project that delivers tangible comfort and energy savings. By following this guide on how to install an attic fan, you’ve learned to calculate the correct fan size, choose between roof and gable mounting, wire the thermostat safely, and avoid common installation mistakes.
Remember that proper ventilation is a system. Your attic fan needs adequate intake through soffit vents to work effectively. Before starting your installation, verify your intake vents are clear and sized correctly. After installation, test the fan annually and clean any debris from the blades and housing.
If you’re uncomfortable working on a sloped roof or handling electrical wiring, there’s no shame in hiring a professional for those portions while handling the simpler parts yourself. Many homeowners tackle the gable-mount installation and leave the roof work to a roofing contractor.
The payoff for proper attic ventilation extends beyond just comfort. Reduced heat buildup extends your shingle lifespan, lowers cooling costs, and helps prevent moisture problems that can lead to mold and structural damage. That’s a solid return on a weekend’s worth of work.
Leave a Reply