
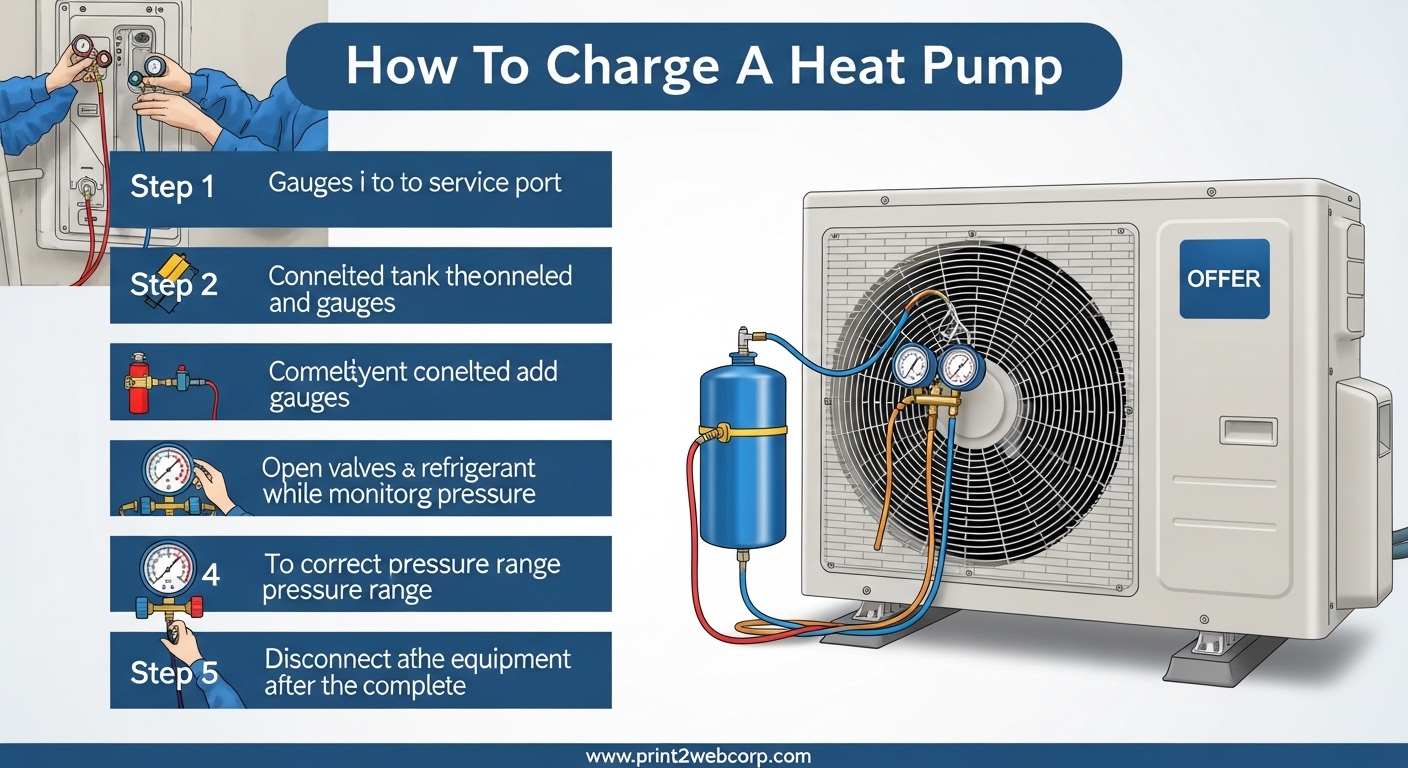
Learning how to charge a heat pump is an essential skill for HVAC technicians and knowledgeable homeowners who want to maintain their heating and cooling systems. Heat pump charging refers to adjusting the refrigerant level to match the manufacturer’s specifications, ensuring optimal efficiency and performance year-round.
Before attempting any refrigerant work, it’s important to understand that handling refrigerants requires EPA Section 608 certification in most cases. This guide covers the procedures, methods, and safety considerations for properly charging a heat pump system.
What Is Heat Pump Charging and Why It Matters
Heat pump charging is the process of adding or removing refrigerant from your system to achieve the exact amount specified by the manufacturer. The refrigerant is the lifeblood of your heat pump, absorbing heat from outside and releasing it inside (or vice versa during cooling mode).
An improperly charged heat pump operates inefficiently. Too little refrigerant reduces heating and cooling capacity, increases energy consumption, and can cause compressor failure over time. Too much refrigerant can also damage the compressor and reduce system efficiency.
Most heat pumps never need refrigerant added under normal conditions. The refrigerant circulates in a sealed system and should not leak. If your system needs frequent charging, there’s likely a leak that needs professional repair.
Understanding Superheat and Subcooling Methods
There are two primary methods for charging heat pumps: the superheat method and the subcooling method. The method you use depends on your system’s metering device.
Fixed orifice systems use the superheat method. A fixed orifice is a simple restriction that meters refrigerant flow based on pressure difference. Superheat is the temperature of the refrigerant gas above its saturation point (the temperature at which it changes from liquid to gas at a given pressure).
TXV (Thermal Expansion Valve) systems use the subcooling method. A TXV actively regulates refrigerant flow to maintain constant superheat at the evaporator outlet. Subcooling is the temperature of the liquid refrigerant below its saturation point (the temperature at which it changes from gas to liquid at a given pressure).
Superheat vs Subcooling Comparison
| Method | Metering Device | What It Measures | When Used |
|---|---|---|---|
| Superheat | Fixed Orifice | Gas temperature above saturation | Cooling mode charging |
| Subcooling | TXV/EEV | Liquid temperature below saturation | Most TXV systems |
Always consult your manufacturer’s charging chart to determine the target superheat or subcooling values for your specific model and operating conditions.
Tools Required for Charging a Heat Pump
Properly charging a heat pump requires specialized tools. Here’s what you’ll need:
Manifold Gauge Set: Connects to the service ports and allows you to measure both high and low side pressures. For modern R410A systems, you need gauges rated for the higher operating pressures.
Refrigerant Scale: A digital scale that measures the weight of refrigerant being added or removed. The weigh-in method is the most accurate charging technique.
Temperature Probes: Clamp-on digital thermometers to measure suction line temperature, liquid line temperature, and outdoor ambient temperature.
Digital Multimeter: For measuring electrical values and verifying system operation during charging.
Safety Equipment: Safety glasses, gloves, and proper ventilation when working with refrigerants. A refrigerant leak detector is also recommended.
How to Charge a Heat Pump: Step-by-Step Procedure
Follow these steps to properly charge your heat pump system. Always start with the manufacturer’s charging chart and specifications for your specific model.
Step 1: Preparation and Safety
Before beginning, verify that the system is clean and operating correctly. Replace or clean air filters, clear debris from the outdoor unit, and ensure proper airflow. Check for visible signs of leaks such as oil stains around connections.
Connect your manifold gauges to the service ports. The low side (suction) port is on the larger line, and the high side (liquid) port is on the smaller line. Always open the valves slowly to prevent pressure surges.
Step 2: Check Current System Conditions
Run the system in cooling mode for at least 15-20 minutes to stabilize. Record the following readings: suction pressure, liquid pressure, suction line temperature, liquid line temperature, and outdoor ambient temperature.
Calculate the current superheat or subcooling based on your metering device type. Compare these values to the manufacturer’s chart to determine if the system is undercharged, overcharged, or properly charged.
Step 3: Add Refrigerant if Needed
If the system is undercharged, add refrigerant slowly through the low side service port while the system is running. Use your refrigerant scale to measure exactly how much you’re adding.
Add refrigerant in small increments (typically 0.5-1 pound at a time). Allow the system to stabilize for 5-10 minutes between additions, then recheck your superheat or subcooling values.
Step 4: Monitor and Adjust
Continue adding refrigerant until your superheat or subcooling matches the manufacturer’s target range. Never exceed the total refrigerant charge specified on the unit’s nameplate.
For the most accurate charge, use the weigh-in method. Recover the existing refrigerant, weigh it, evacuate the system, then add the exact amount specified by the manufacturer plus any additional charge for line set length beyond 15 feet.
Step 5: Final Verification
Once charged, verify proper operation in both heating and cooling modes. Check that pressures, temperatures, and superheat/subcooling values are within acceptable ranges across the operating spectrum.
Disconnect your gauges carefully, ensuring no refrigerant escapes. Replace service port caps and check for leaks around all connections.
Charging in Heat Mode: What You Need to Know
Charging a heat pump in heating mode presents unique challenges. The outdoor coil becomes the evaporator and the indoor coil becomes the condenser, which reverses the normal charging relationship.
Many technicians prefer to charge heat pumps in cooling mode when possible, as it’s more straightforward. However, winter charging is sometimes necessary. When charging in heat mode, use the manufacturer’s heat mode charging chart, which typically uses dry bulb and wet bulb temperatures.
The weigh-in method is especially valuable for winter charging. When ambient temperatures are below 65°F, standard superheat and subcooling calculations become less reliable. Weighing in the exact charge eliminates guesswork.
For winter charging, you may need to block part of the outdoor coil or use a charging jacket to create artificial load. This allows the system to reach proper operating conditions even in cold weather.
Common Mistakes to Avoid When Charging
Overcharging is a frequent mistake that can reduce efficiency and damage the compressor. More refrigerant is not better. Always follow manufacturer specifications exactly.
Undercharging reduces capacity and can cause the compressor to overheat due to insufficient cooling. Both overcharging and undercharging increase energy consumption and shorten equipment life.
Ignoring ambient temperature is another common error. Superheat and subcooling targets change based on outdoor temperature. Always use the correct chart for current conditions.
Skip the temptation to charge by pressure alone. Pressures vary with temperature and don’t accurately reflect refrigerant charge. Always use superheat, subcooling, or the weigh-in method for accurate charging.
Safety Precautions and EPA Guidelines
Refrigerant handling is regulated by the EPA under Section 608 of the Clean Air Act. Only certified technicians can purchase or handle refrigerants that deplete the ozone layer. This includes most common refrigerants.
Proper refrigerant recovery is mandatory. Never vent refrigerant to the atmosphere. Use a certified recovery machine to capture refrigerant before opening the system for service.
Wear appropriate personal protective equipment including safety glasses and gloves. Refrigerant can cause frostbite upon contact with skin and eye damage if splashed.
Work in well-ventilated areas. Refrigerant displaces oxygen and can cause asphyxiation in confined spaces. Never work near open flames or sparks, as some refrigerants can decompose into harmful gases when exposed to high heat.
Frequently Asked Questions
Can I recharge my heat pump myself?
DIY heat pump charging requires EPA Section 608 certification to handle refrigerants legally. Without proper certification, you cannot purchase refrigerant or perform charging work. Additionally, improper charging can damage your system and void warranties. For most homeowners, calling a certified HVAC technician is the safest and most cost-effective approach.
How do I know if my heat pump needs charging?
Signs that your heat pump may need charging include reduced heating or cooling output, longer run times, higher energy bills, ice buildup on the outdoor unit in winter, or a hissing sound indicating a refrigerant leak. However, these symptoms can also indicate other problems. A professional technician can diagnose whether your system truly needs charging or if another issue is causing poor performance.
Can you charge a heat pump in the winter?
Yes, you can charge a heat pump in winter, but it requires special procedures. Standard charging methods become less accurate in cold weather. Use the manufacturer’s heat mode charging charts, the weigh-in method, or create artificial load with a charging jacket. Many technicians prefer charging in cooling mode when possible, but winter charging is sometimes necessary for startup or after refrigerant loss.
What happens if a heat pump is overcharged?
An overcharged heat pump operates inefficiently and can suffer serious damage. Excess refrigerant causes liquid to flood back to the compressor, potentially causing compressor failure. High head pressure increases energy consumption and reduces both heating and cooling capacity. Overcharging also causes the compressor to work harder, shortening its lifespan. Always follow manufacturer specifications for the exact refrigerant charge.
How often should a heat pump need refrigerant?
A properly installed heat pump should never need refrigerant added under normal conditions. The refrigerant circulates in a sealed system. If your system needs charging, it indicates a leak that must be repaired. Frequent recharging suggests either an ongoing leak or improper initial charging. Have a certified technician locate and repair any leaks before adding more refrigerant.
Conclusion
Understanding how to charge a heat pump properly is essential for maintaining system efficiency and longevity. Whether using the superheat method for fixed orifice systems or subcooling for TXV systems, accuracy is critical.
Always prioritize safety and EPA compliance when working with refrigerants. When in doubt, consult a certified HVAC technician who has the training, tools, and certification to charge your system correctly.
For most homeowners, the best approach is preventive maintenance rather than reactive charging. Regular professional service can catch small issues before they become major problems, keeping your heat pump running efficiently throughout 2026.
Leave a Reply