
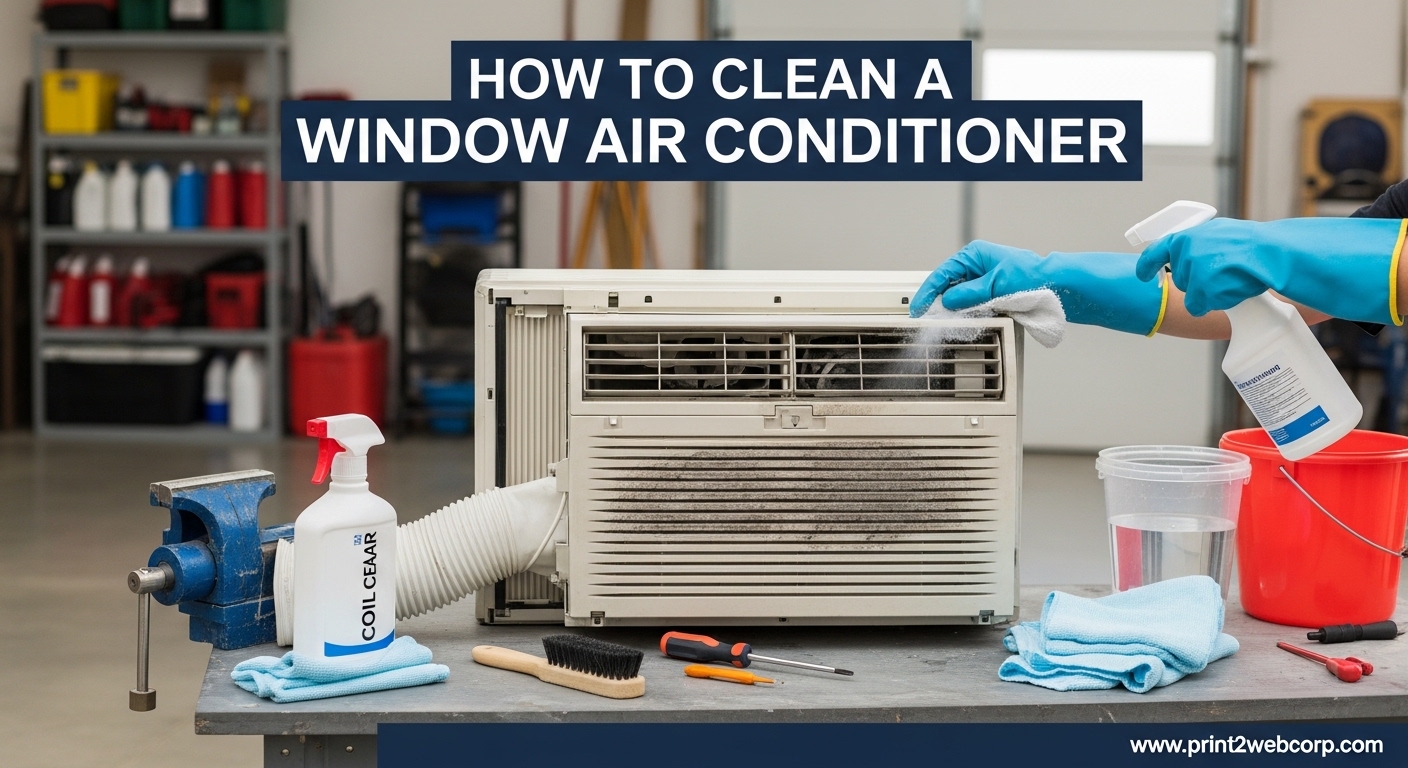
Living in a hot apartment without central AC means your window unit works overtime all summer. That constant use leads to dust buildup, mold growth, and that dreaded musty smell blowing into your room. Learning to clean window air conditioner without removing it saves you the hassle of uninstalling and reinstalling that heavy unit every few months.
A dirty AC unit runs less efficiently, costing you more money on electricity while cooling less effectively. The dust trapped in your filter and coils blocks airflow, forcing your compressor to work harder. I’ve cleaned dozens of window units over the years, and the difference in performance is noticeable immediately after a thorough cleaning.
This guide walks you through the entire process step by step. You’ll learn how to clean window AC unit from inside without removing it, using basic supplies you probably already have at home. The whole process takes about an hour from start to finish, and your AC will thank you with better airflow and fresher air.
Tools and Supplies You’ll Need
Before starting this window AC unit cleaning project, gather these supplies:
Basic Supplies:
- Screwdriver (usually Phillips head)
- Soft brush or old toothbrush
- Microfiber cloth or soft cloth
- Mild dish soap
- Warm water in a bucket or sink
- White vinegar
- Spray bottle
- Towels or drop cloth for the floor
Optional but Helpful:
- Coil cleaner spray (foaming type works best)
- Fin comb (available at hardware stores)
- Compressed air canister
- Shop vac with brush attachment
Most of these items are probably under your sink already. The commercial coil cleaner is optional but can help with stubborn grime on the condenser and evaporator coils.
Safety First Before You Start
Before touching any part of your window AC unit, you must turn off the power. This isn’t just about flipping the switch on the unit itself. Go to your circuit breaker panel and flip the breaker that powers your AC unit.
Water and electricity don’t mix. Even if the unit is turned off at the control panel, there may still be live components inside. Taking this extra step prevents shock and keeps you safe throughout the cleaning process.
Wait at least 30 minutes after turning off the power before starting. This gives any capacitors time to discharge and lets hot components cool down.
How to Clean a Window Air Conditioner Without Removing It
Step 1: Remove and Clean the Filter
The air filter is your first line of defense against dust, and it’s also the easiest part to clean. Locate the filter panel on the front of your unit. On most window AC units, this is behind a small door or tab on the front grille.
Slide the filter out carefully. Most washable filters are made of foam or mesh material. Take it to your sink or bathtub and rinse it under warm water. Use a small amount of mild dish soap to break down stubborn dust and grime.
Gently scrub the filter with your fingers or a soft brush. Avoid using harsh scrubbing that could damage the filter material. Rinse thoroughly until the water runs clear, then shake off excess water and set it aside to air dry completely.
This simple step alone can improve your AC’s performance significantly. A clogged filter restricts airflow and makes your unit work harder than necessary. For best results, clean your filter at least once a month during heavy use.
Step 2: Remove the Front Grille
The front grille covers the internal components and needs to be removed for a thorough cleaning. Look for screws along the bottom or sides of the front panel. Some units have a button or tab that releases the grille without tools.
Remove all visible screws and set them aside in a safe place. Gently pull the bottom of the grille toward you while lifting slightly to release it from the top clips. Set the grille aside on your towels.
Now you have access to the interior components. Take a moment to inspect what you can see. The amount of dust buildup might surprise you, especially if it’s been a while since the last cleaning.
Step 3: Clean the Evaporator Coils
The evaporator coils are located behind the front grille and look like a series of thin metal fins. These coils are responsible for cooling the air that passes through your unit. Over time, they collect dust, pet hair, and other debris that reduces efficiency.
Use your soft brush to gently sweep away loose dust from the coils. Work from top to bottom, letting the debris fall onto your towels. For stubborn dirt, use a vacuum with a brush attachment to carefully remove buildup.
If the coils are heavily soiled, spray them with a coil cleaner according to the product instructions. The foaming action helps lift dirt from between the tight spaces of the coil fins. Let the cleaner sit for the recommended time, usually 10-15 minutes.
Be extremely gentle when working with the coils. The aluminum fins bend easily, and bent fins block airflow. If you do bend some fins, a fin comb can straighten them out, but prevention is easier than repair.
Step 4: Clean the Condenser Coils
The condenser coils are on the back or exterior side of your window AC unit. These coils release the heat absorbed from inside your room. While they’re harder to reach, they still need attention.
Use your brush to remove visible debris from the exterior grille. If you can safely reach the condenser coils through the back vents, gently brush away dust buildup. Some window AC units allow access to the condenser from the sides after removing the cabinet.
For exterior cleaning, avoid spraying water directly into the unit from the outside. This can force water into electrical components. Instead, wipe accessible areas with a damp cloth and use your vacuum to remove loose debris.
Step 5: Clean the Fins Carefully
The thin aluminum fins surrounding the coils are delicate but crucial for heat transfer. Dust between the fins acts as insulation, reducing efficiency. A vacuum with a narrow attachment works well for removing debris from between fins.
Hold your vacuum nozzle close to the fins without actually touching them. The suction will pull out dust without damaging the soft aluminum. Work slowly and methodically across the entire fin surface.
For dirt that won’t come out with vacuuming, use compressed air. Short bursts of air can dislodge debris from tight spaces. Always blow in the direction opposite to normal airflow to push dust out rather than deeper into the unit.
Step 6: Clean the Drip Tray
The drip tray, also called the drain pan, sits at the bottom of your AC unit and collects condensation. Over time, this tray becomes a breeding ground for mold and algae. A dirty drip tray causes musty smells and can even clog the drain line.
Locate the drip tray at the bottom of the unit. You may need to look carefully as it’s sometimes tucked behind other components. Use your vacuum to remove standing water and debris from the tray.
Mix a solution of equal parts white vinegar and warm water. Pour this into the drip tray and let it sit for 10-15 minutes to kill any mold or algae. Use a brush to scrub away stubborn buildup, then wipe clean with a cloth or sponge.
Check the drain hole at the back of the tray. This small opening allows water to drain outside. Use a pipe cleaner or small brush to ensure it’s clear of obstructions. A clogged drain hole causes water to back up and potentially leak into your home.
Step 7: Clean the Fan Blades
The fan blade circulates air through your AC unit. Dust buildup on the blades throws them off balance and reduces efficiency. Locate the fan behind the front grille or near the motor housing.
Wipe the fan blades with a damp cloth, working carefully around the blade edges. A soft brush can help remove dust from hard-to-reach areas. Avoid applying pressure that could bend or damage the blades.
While cleaning the fan area, check for any debris wrapped around the fan shaft. Pet hair, string, or other materials can accumulate here and cause the fan to drag or seize. Remove any obstructions carefully with tweezers or needle-nose pliers.
Step 8: Let Everything Dry Completely
This is the most critical step for preventing mold growth. Every component you’ve cleaned must be completely dry before reassembly. Rushing this step guarantees mold problems later.
Set your cleaned filter on a towel in a well-ventilated area. Give it at least 2-3 hours to dry thoroughly. If you cleaned the front grille, let it air dry as well.
For the internal components, use towels to absorb any standing water or cleaning solution. Open windows or run a fan in the room to improve airflow and speed drying. You can also aim a fan directly at the unit to help evaporate moisture.
I recommend letting everything dry for at least 4-6 hours, or overnight if possible. This ensures even hard-to-reach areas are completely dry before you close up the unit.
Step 9: Reassemble and Test
Once everything is dry, it’s time to put your window AC unit back together. Start by reinstalling any components you removed, working in reverse order of disassembly.
Slide the clean, dry filter back into its slot. Make sure it’s seated properly and secure any clips or retainers. Position the front grille and align it with the mounting tabs. Replace and tighten all screws, but don’t overtighten them.
Restore power at the circuit breaker. Turn on your AC unit and set it to cool. Listen for any unusual sounds that might indicate something wasn’t reassembled correctly.
After a few minutes, you should feel cool air flowing from the unit. The air should smell fresh, not musty or moldy. Check that water is dripping from the outside drain as normal condensation occurs.
Stand back and enjoy your work. Your cleaned AC unit should cool more efficiently, use less energy, and provide cleaner air for your home.
How to Clean Mold from Your Window AC Unit
Mold in your window AC isn’t just unpleasant, it’s a health hazard. The dark, damp interior of an AC unit provides perfect growing conditions for mold and mildew. If you notice a musty smell or see black or white fuzzy growth, you need to address it immediately.
For light mold, the vinegar solution mentioned earlier works well. Mix equal parts white vinegar and warm water in a spray bottle. Spray the affected areas generously and let it sit for at least 30 minutes. Vinegar kills about 82% of mold species and helps prevent regrowth.
Heavier mold growth may require hydrogen peroxide. Use a 3% solution (the standard concentration sold in stores) and apply it directly to moldy areas. Let it bubble for 10 minutes, then wipe clean. Hydrogen peroxide is effective against most mold types and doesn’t leave harmful residues.
For severe mold problems, especially if you’re sensitive to mold spores, consider hiring a professional. Mold remediation specialists have the equipment and expertise to safely handle extensive contamination.
What Is the 3 Minute Rule for Air Conditioners?
The 3 minute rule is a simple guideline that can extend your AC’s lifespan and reduce energy consumption. After your AC has been running, wait at least 3 minutes before turning it back on if the power was interrupted. This includes power outages, tripped breakers, or manually turning the unit off and on.
Those 3 minutes allow the refrigerant pressures in your system to equalize. Restarting too soon can cause the compressor to struggle or fail completely. Compressor replacement often costs more than a new AC unit, making this rule worth following.
This rule applies to all types of air conditioners, not just window units. Some modern ACs have built-in time delays that enforce this rule automatically. For older models, you’ll need to track the time yourself or install a hard start kit that protects the compressor.
How Often Should You Clean Your Window AC?
Regular maintenance keeps your window AC running efficiently and prevents problems before they start. At minimum, clean your AC filter once a month during heavy use in summer. This simple task takes less than 5 minutes and makes a big difference in performance.
A complete cleaning like the one described above should happen at least once a year. The ideal time is in spring, before peak cooling season begins. This gives you a fresh start for summer and ensures maximum efficiency when you need it most.
Certain situations call for more frequent cleaning. If you live in a dusty area, have pets that shed, or notice musty smells, clean your unit more often. Allergy sufferers may benefit from monthly deep cleanings during high pollen seasons.
Watch for these signs that your AC needs cleaning:
- Reduced cooling performance
- Unusual noises
- Musty or moldy smells
- Visible dust or debris
- Higher than normal energy bills
- Water leaking inside your home
Tips to Keep Your Window AC Clean Longer
Prevention is easier than cure when it comes to AC maintenance. These simple habits reduce how often you need to deep clean your unit:
Keep the area around your window AC clear. Don’t let curtains, furniture, or other objects block airflow to the unit. Restricted intake makes your AC work harder and collect dust faster.
Use high-quality air filters and replace them according to the manufacturer’s recommendations. Better filters trap more dust before it reaches internal components. Some units accept HEPA filters that are especially effective for allergy sufferers.
Consider running your AC on “fan only” for 15-20 minutes after turning off the cooling. This helps dry out any moisture inside the unit, reducing mold growth potential. Make this part of your regular shutdown routine.
Keep windows and doors closed while your AC is running. This prevents dust and pollen from entering your home and being drawn into the unit. It also improves cooling efficiency and reduces energy costs.
Schedule your annual cleaning for early spring. This gives you time to address any issues before hot weather arrives. You’ll also avoid the rush of emergency service calls when temperatures spike.
These small habits add up to significant improvements in your AC’s performance and lifespan. A well-maintained unit can last 10-15 years, while neglected units often fail in half that time.
FAQ’s
How to clean window AC unit from inside without removing it?
To clean a window AC unit from inside without removing it, first turn off power at the breaker. Remove the front grille and filter. Clean the filter with warm soapy water and let it dry. Use a soft brush and vacuum to clean the evaporator coils, fins, and fan blades. Clean the drip tray with a vinegar and water solution. Let everything dry completely before reassembling. The entire process takes about an hour and significantly improves cooling performance.
What is the 3 minute rule for air conditioners?
The 3 minute rule means waiting at least 3 minutes before restarting your AC after the power has been interrupted. This allows refrigerant pressures to equalize throughout the system. Restarting too soon can damage or destroy the compressor, which is an expensive repair. Some modern AC units have built-in delays that enforce this rule automatically. For older units without this feature, you must wait manually or install a hard start kit for compressor protection.
Can I spray vinegar in a window AC unit?
Yes, you can safely spray vinegar in a window AC unit to clean and disinfect components. Mix equal parts white vinegar and warm water in a spray bottle. This solution effectively kills mold and mildew on coils, fins, and in the drip tray. Spray affected areas generously and let sit for 10-15 minutes before wiping clean. Avoid spraying vinegar directly into electrical components or motor housing. Vinegar is a safe, natural alternative to harsh chemical cleaners and leaves no harmful residue.
What is the best way to clean a window unit air conditioner?
The best way to clean a window unit air conditioner is to start by turning off power at the circuit breaker. Remove and wash the filter with mild soap and warm water. Take off the front grille to access internal components. Use a soft brush and vacuum to clean evaporator coils, being careful not to bend the delicate fins. Clean the drip tray with vinegar solution to prevent mold. Wipe down fan blades and accessible areas. Let everything dry completely for 4-6 hours before reassembling. Annual cleaning maintains efficiency and extends the unit’s lifespan.
Conclusion
Cleaning your window air conditioner without removing it is a manageable DIY task that pays off in better performance and lower energy bills. This simple maintenance routine extends your unit’s lifespan, improves air quality, and keeps your home comfortable all summer long.
The process requires only basic supplies and about an hour of your time. By following these steps to clean window air conditioner without removing it, you avoid the hassle of uninstalling a heavy unit while still achieving professional-level cleaning results.
Set a reminder to perform this maintenance annually, preferably in spring before peak cooling season. Your AC will run more efficiently, cost less to operate, and provide the reliable cooling you need during the hottest months of 2026.
Leave a Reply